Headlight Assembly: Removal
- DISCONNECT CABLE FROM NEGATIVE BATTERY TERMINAL (for HID Headlight)
- REMOVE COOL AIR INTAKE DUCT SEAL (See REMOVAL
)
- REMOVE FRONT BUMPER ASSEMBLY (See REMOVAL
)
- REMOVE FRONT BUMPER ENERGY ABSORBER (See DISASSEMBLY
)
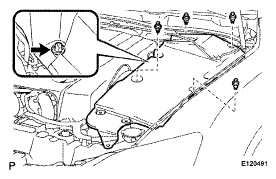
- REMOVE ENGINE ROOM SIDE COVER
- Using a clip remover, remove the 4 clips.
- Disengage the nut and remove the engine room side cover.
 Courtesy of © TOYOTA, LICENSE AGREEMENT TMS1002
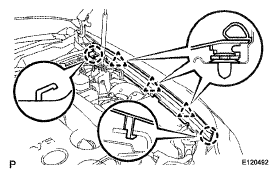
- REMOVE FRONT UPPER FENDER PROTECTOR
- Disengage the 2 claws and 3 clips and remove the front upper fender protector.
 Courtesy of © TOYOTA, LICENSE AGREEMENT TMS1002
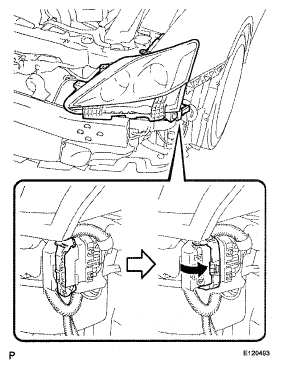
- REMOVE HEADLIGHT ASSEMBLY
- Disconnect the connector as shown in the illustration.
 Courtesy of © TOYOTA, LICENSE AGREEMENT TMS1002
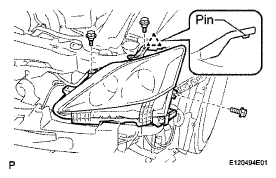
- Remove the 3 bolts.
- Disengage the headlight bracket pin and remove the headlight assembly.
 Courtesy of © TOYOTA, LICENSE AGREEMENT TMS1002