Cooling Module: Installation
- Position the cooling module in the vehicle.
- Install the 6 radiator support bolts.
- Tighten to 25 Nm (18 lb-ft).
- Connect the ambient temperature sensor electrical connector.
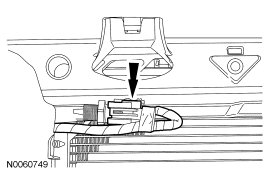 Courtesy of FORD MOTOR CO.
- Connect the horn assembly electrical connector.
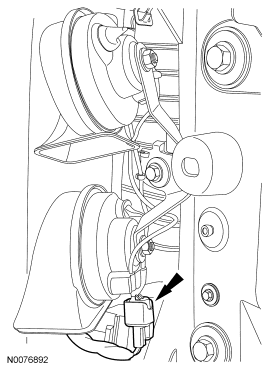 Courtesy of FORD MOTOR CO.
- Using new O-ring seals, connect the A/C fittings and install the 2 nuts.
- Tighten to 8 Nm (71 lb-in).
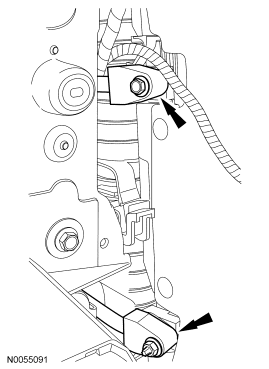 Courtesy of FORD MOTOR CO.
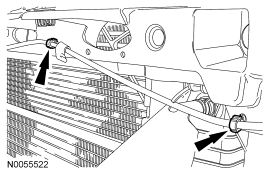
- Connect the transmission fluid cooler tubes and install the secondary latches.
- Position the air deflector and install the pushpin.
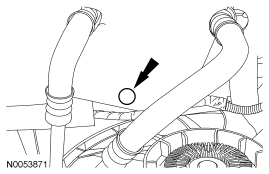 Courtesy of FORD MOTOR CO.
- Position the hood latch assembly and install the 2 hood latch assembly bolts.
- Tighten to 25 Nm (18 lb-ft).
- Connect the hood latch cable position retainers.
 Courtesy of FORD MOTOR CO.
- Install the cooling fan shroud. For additional information, refer to Cooling Fan Shroud .
- Connect the 2 power steering fluid cooler hoses to the condenser core.
- Install the front fascia. For additional information, refer to BUMPERS
article.
- Install the RH and LH headlamp assemblies. For additional information, refer to EXTERIOR LIGHTING
article.
- Connect the battery ground cable. For additional information, refer to BATTERY, MOUNTING AND CABLES
article.
- Fill and bleed the engine cooling system. For additional information, refer to Cooling System Draining, Filling and Bleeding .
- Fill and bleed the power steering system. For additional information, refer to STEERING SYSTEM - GENERAL INFORMATION
article.
- Fill the transmission with fluid and verify correct operation. For additional information, refer to AUTOMATIC TRANSAXLE/TRANSMISSION - 6HP26
article or AUTOMATIC TRANSMISSION - 6R75
article.
- Evacuate, leak test and charge the refrigerant system. For additional information, refer CLIMATE CONTROL SYSTEM - GENERAL INFORMATION AND DIAGNOSTICS
article.