Manual Transmission Shift Control Housing And Assembly
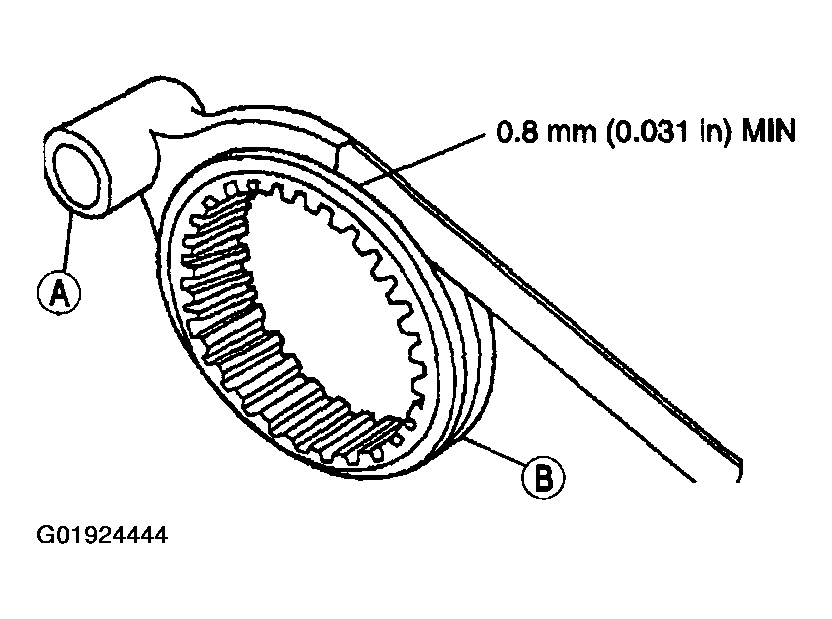
- Check the contact surface of the (A) shift fork and (B) synchronizer sleeve for wear or damage.
 Courtesy of MAZDA MOTORS CORP.
- Install the gear selector interlock sleeve.
- Position the gear selector interlock sleeve.
- Install the bolts.
- Tightening torque 8.1 Nm (72 inlbf)
- Install the interlock pins into their original shift rails.
NOTE:
- Improper installation of the interlock pins will prevent activation of the backup lamp switch.
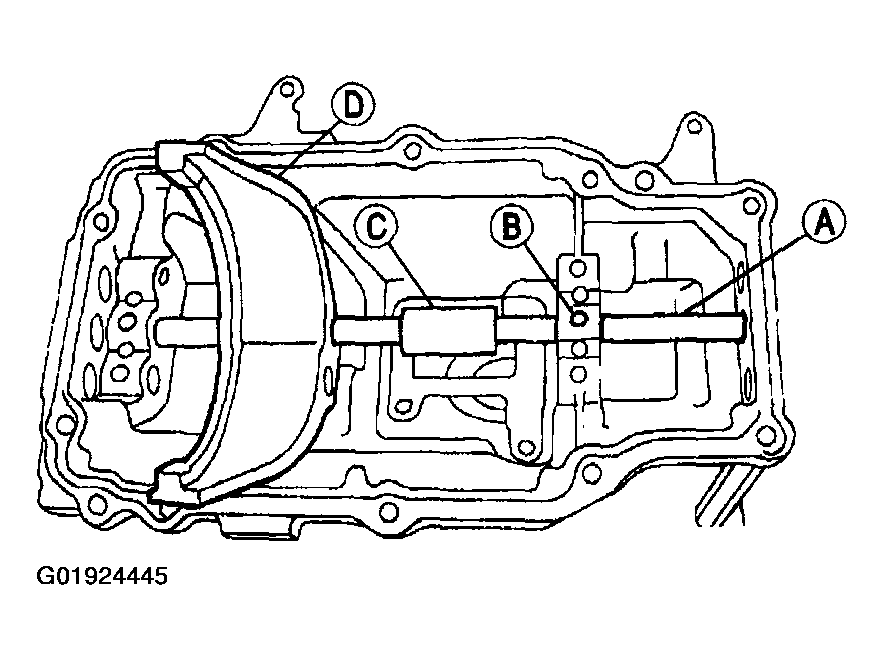
- Position the (B) detent ball and spring, the (C) shift gate, the (D) shift fork and spring and install the (A) third/fourth shift rail.
 Courtesy of MAZDA MOTORS CORP.
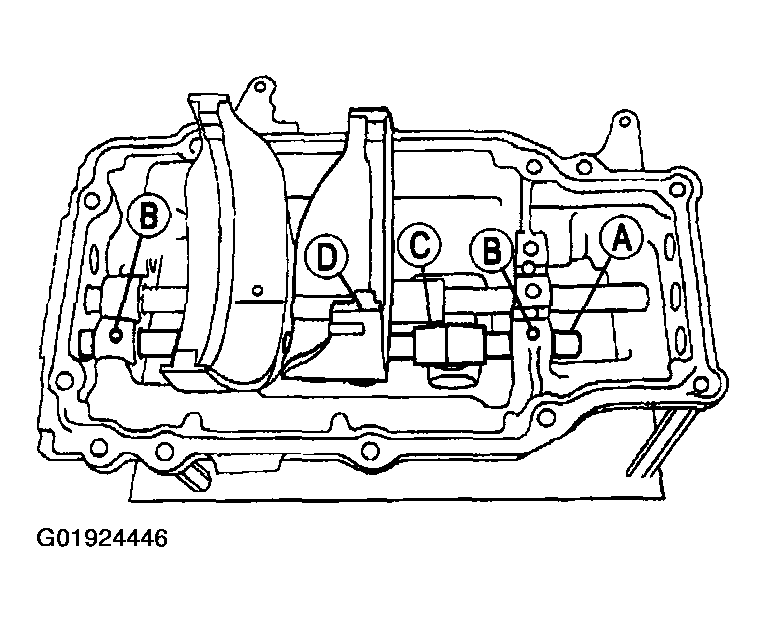
- Position the (B) detent ball and spring, the (C) shift gate, the (D) shift fork and spring and install the (A) first/second shift rail.
 Courtesy of MAZDA MOTORS CORP.
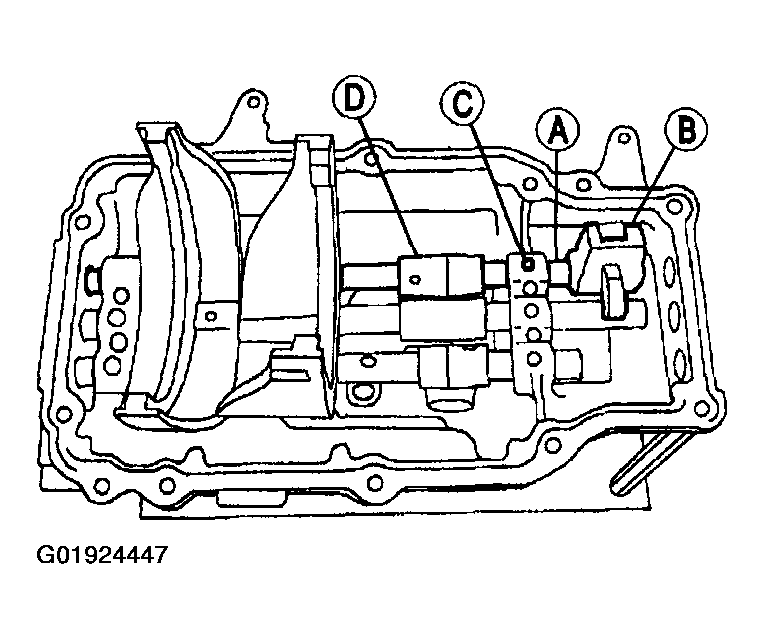
- Position the (B) fifth/reverse shift control, the (C) detent ball and spring and the (D) shift gate and install the (A) fifth/reverse shift rail.
 Courtesy of MAZDA MOTORS CORP.
- Install the three rubber service bore plugs.
- Install the new shift gate spring pins.
- Install the backup lamp switch.
- Install the backup lamp switch pin.
- Install the backup lamp switch.
- Install the lower gearshift lever.
- Position the gearshift lever.
- Position the dust cover.
- Install the bolts.
- Tightening torque 8.1 Nm (72 inlbf)