Dashboard Removal/Installation
- Disconnect the negative battery cable.
- Remove the glove compartment. (See
GLOVE COMPARTMENT REMOVAL/INSTALLATION
.)
- Remove the passenger-side air bag module. (See
PASSENGER-SIDE AIR BAG MODULE
.)
- Remove the instrument cluster. (See
INSTRUMENT CLUSTER REMOVAL/INSTALLATION
.)
- Remove the console lower cover.
- Remove the lower panel.
- Remove the steering shaft. (See
STEERING WHEEL AND COLUMN REMOVAL/INSTALLATION
.)
- Remove the A-pillar trim. (See
A-PILLAR TRIM REMOVAL/INSTALLATION
.)
- Remove the side panel.
- Remove the front side trim. (See
FRONT SIDE TRIM REMOVAL/INSTALLATION
.)
- Disconnect the antenna plug.
- For vehicles equipped with the wire-type climate control unit, disconnect the wires for the front A/C unit. (See
FRONT CLIMATE CONTROL UNIT REMOVAL
.) (See
FRONT CLIMATE CONTROL UNIT INSTALLATION
.)
- Disconnect the connectors.
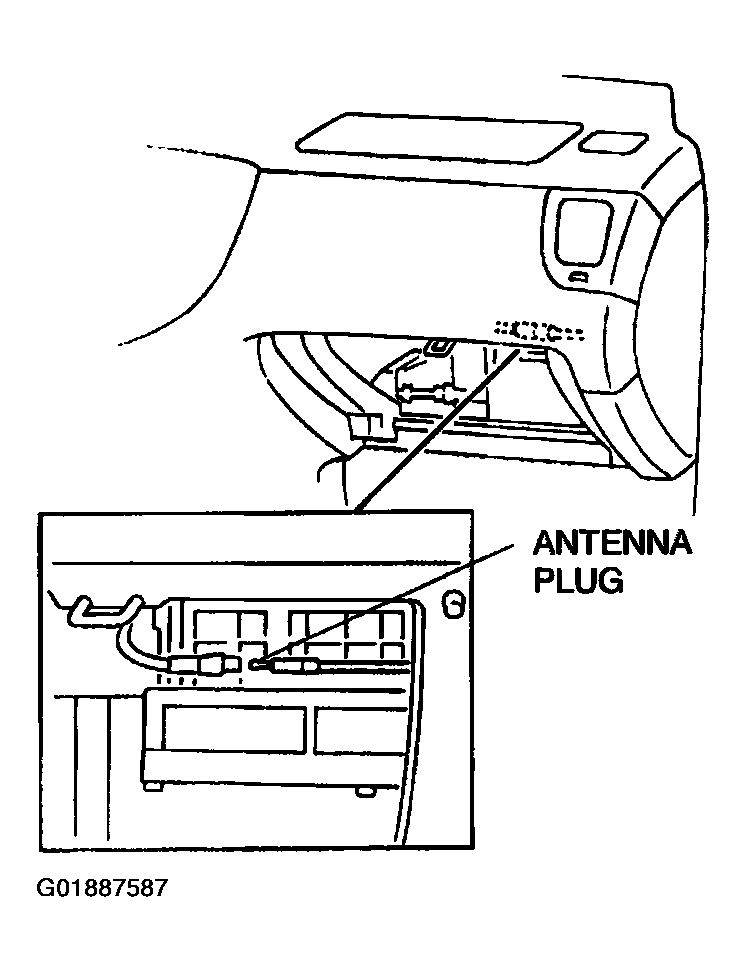 Courtesy of MAZDA MOTORS CORP.
- Remove the bolts.
WARNING:
- Removing the dashboard without supporting it can be dangerous. The dashboard may fall and injure you. Always perform these procedure together with at least another person.
CAUTION:
- Removing the dashboard with the thermosensor of the front A/C unit connected can cause thermosensor damage. When removing the dashboard, verify that the thermosensor connector is disconnected.
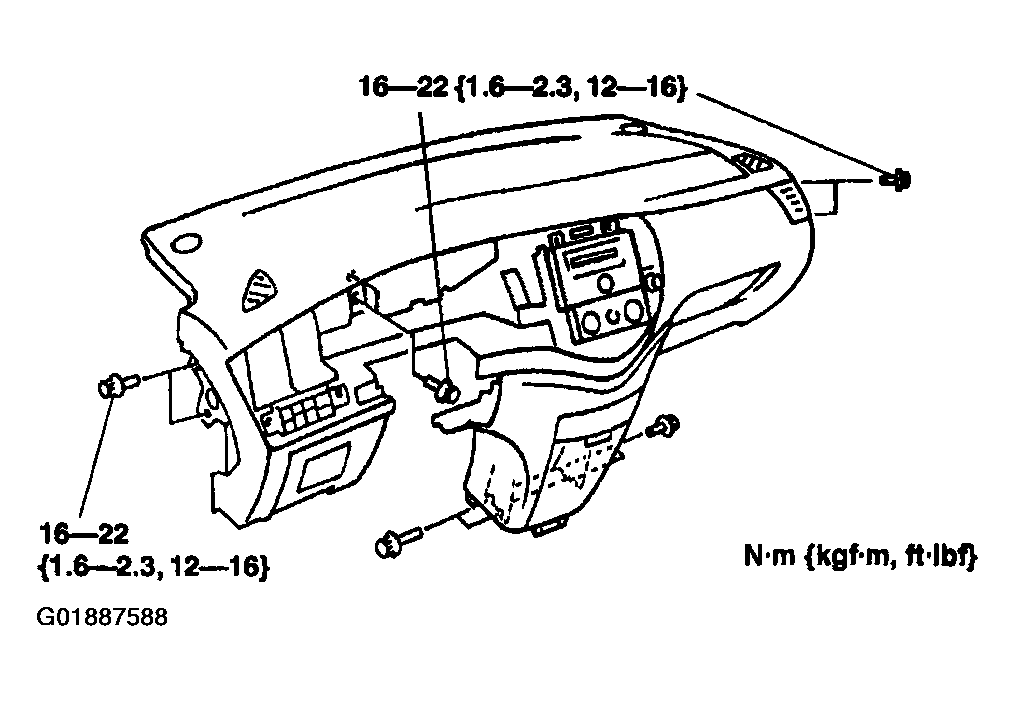 Courtesy of MAZDA MOTORS CORP.
- Remove the dashboard from the vehicle.
- Incline the dashboard slowly forward.
- Lift up the dashboard while it is inclined forward.
- Remove the dashboard from the vehicle through the passenger-side front door.
- Install in the reverse order of removal.
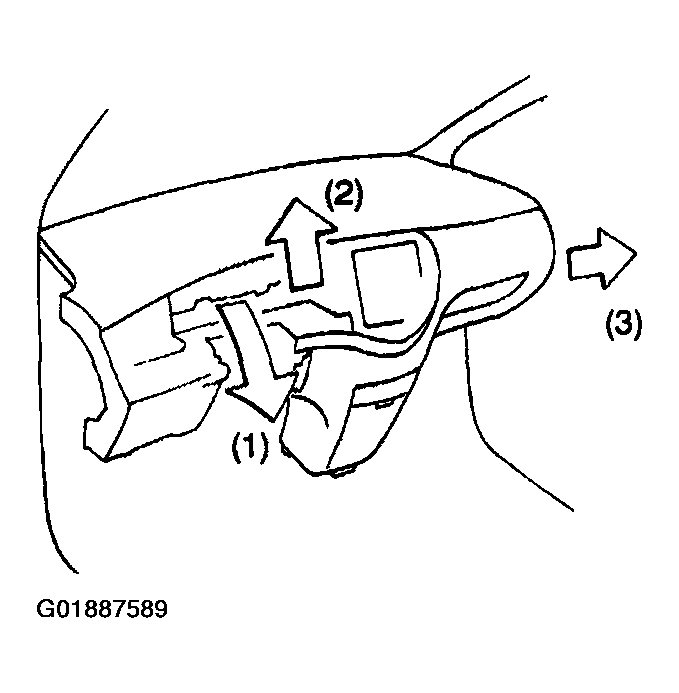 Courtesy of MAZDA MOTORS CORP.