Transaxle - Installation
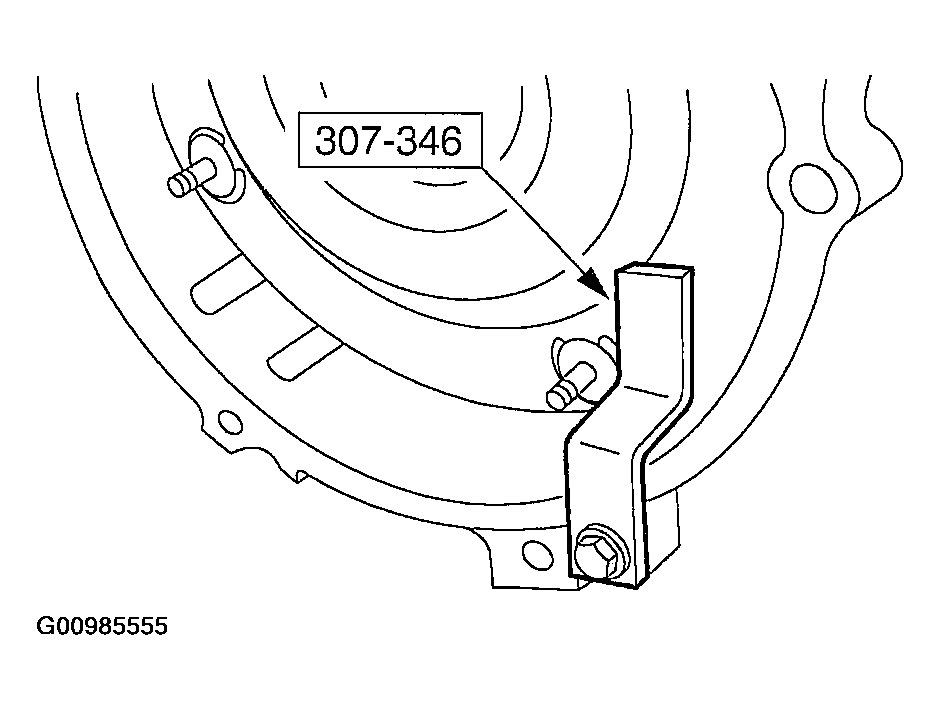
- If installing a new or re-manufactured transaxle, install the roll restrictor bracket.
 Courtesy of MAZDA MOTORS CORP.
NOTE:
- If the torque converter was not installed during assembly it must be installed now.
- Using the special tool, install the torque converter.
 Courtesy of MAZDA MOTORS CORP.
NOTE:
- The torque converter hub must be fully seated into the transaxle pump drive gear.
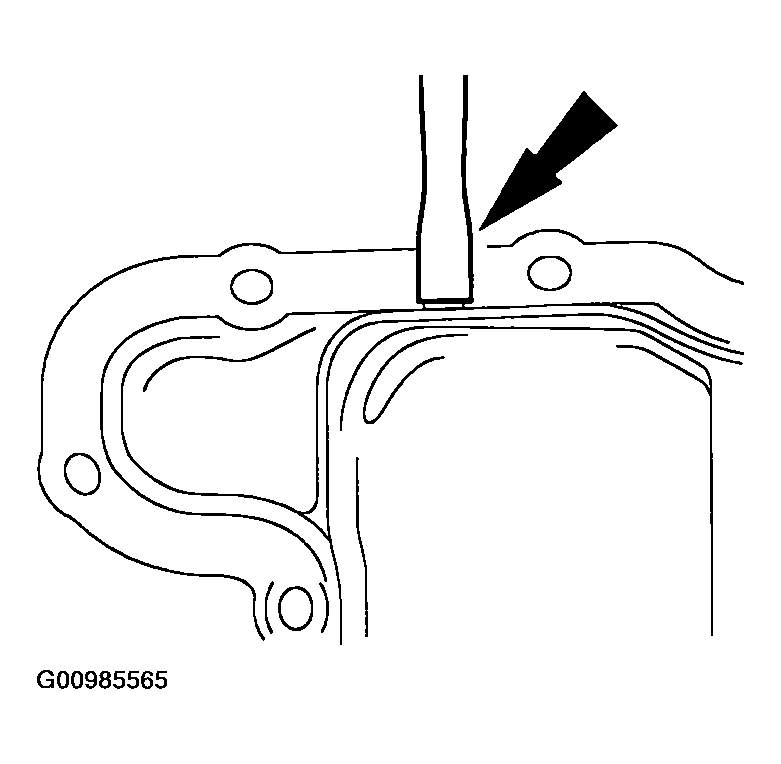
- Check the installation depth of the torque converter.
- Lay a straightedge on the transaxle converter housing.
- Check the clearance between the straight edge and the pilot hub.
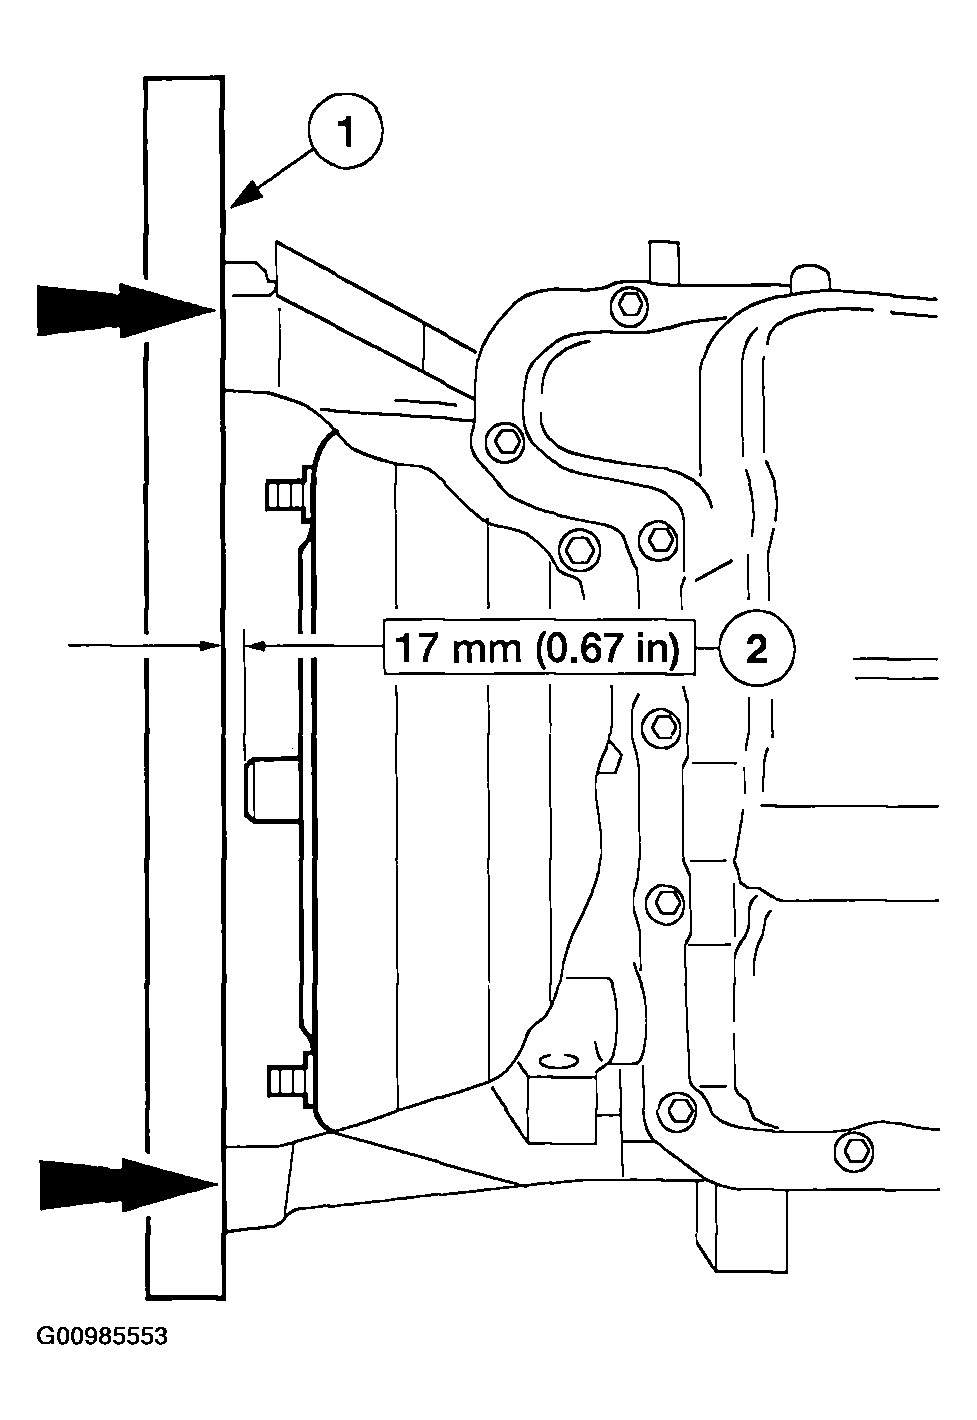 Courtesy of MAZDA MOTORS CORP.
- Lubricate the torque converter pilot hub with Multi-Purpose Grease.
 Courtesy of MAZDA MOTORS CORP.
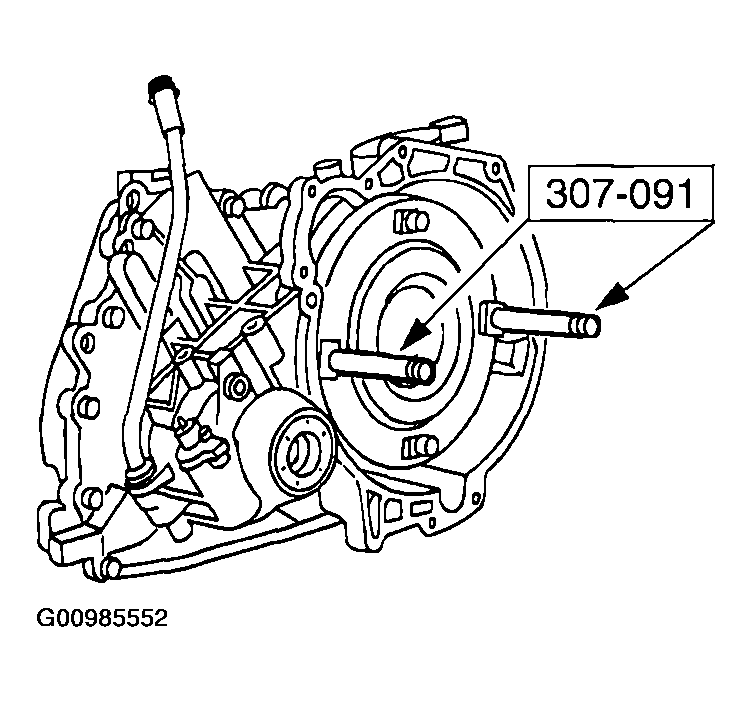
- Install the special tool.
 Courtesy of MAZDA MOTORS CORP.
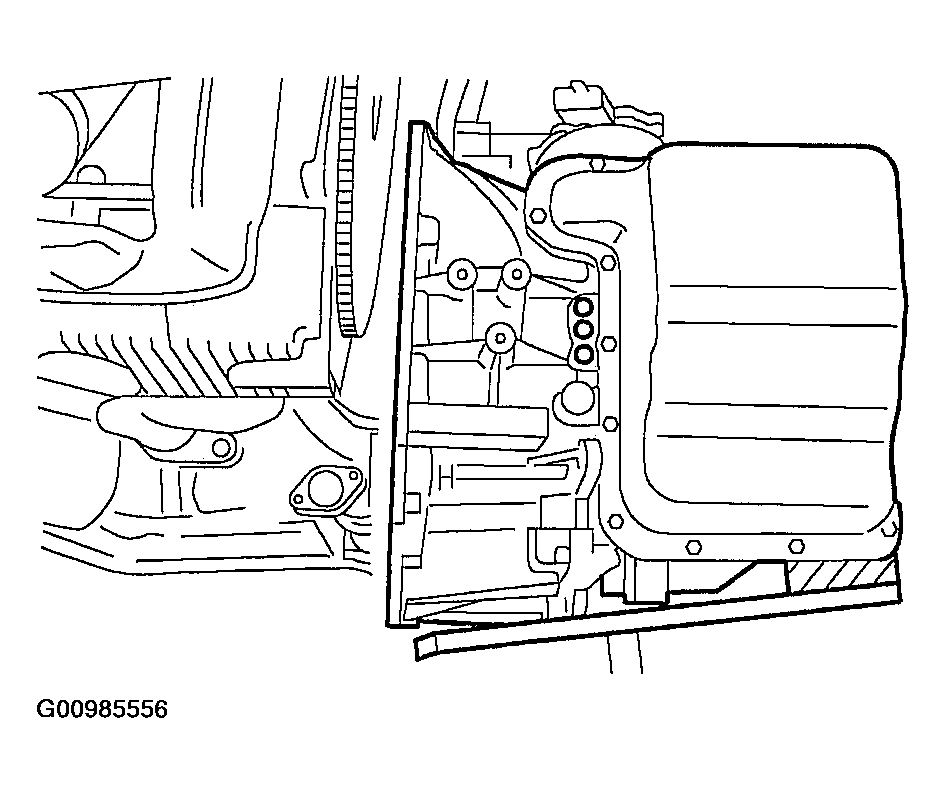
- Position the transaxle in place.
 Courtesy of MAZDA MOTORS CORP.
- Remove the special tool.
 Courtesy of MAZDA MOTORS CORP.
- Move the transaxle assembly toward the engine assembly and install the bolt.
 Courtesy of MAZDA MOTORS CORP.
- Install the bolts.
 Courtesy of MAZDA MOTORS CORP.
- Remove the transaxle jack.
- Install the fluid cooler line.
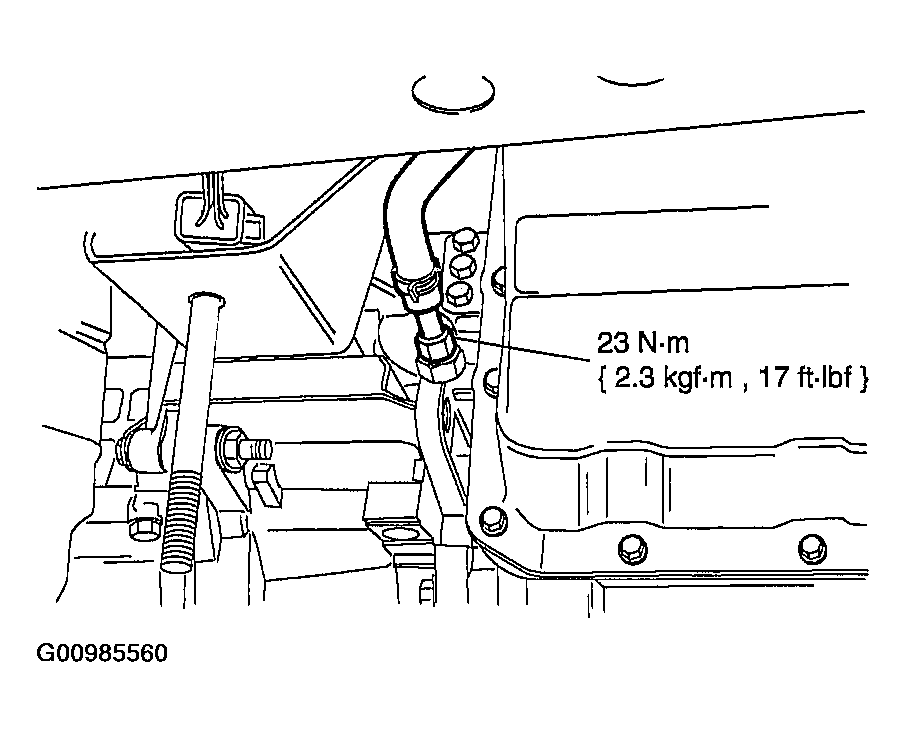 Courtesy of MAZDA MOTORS CORP.
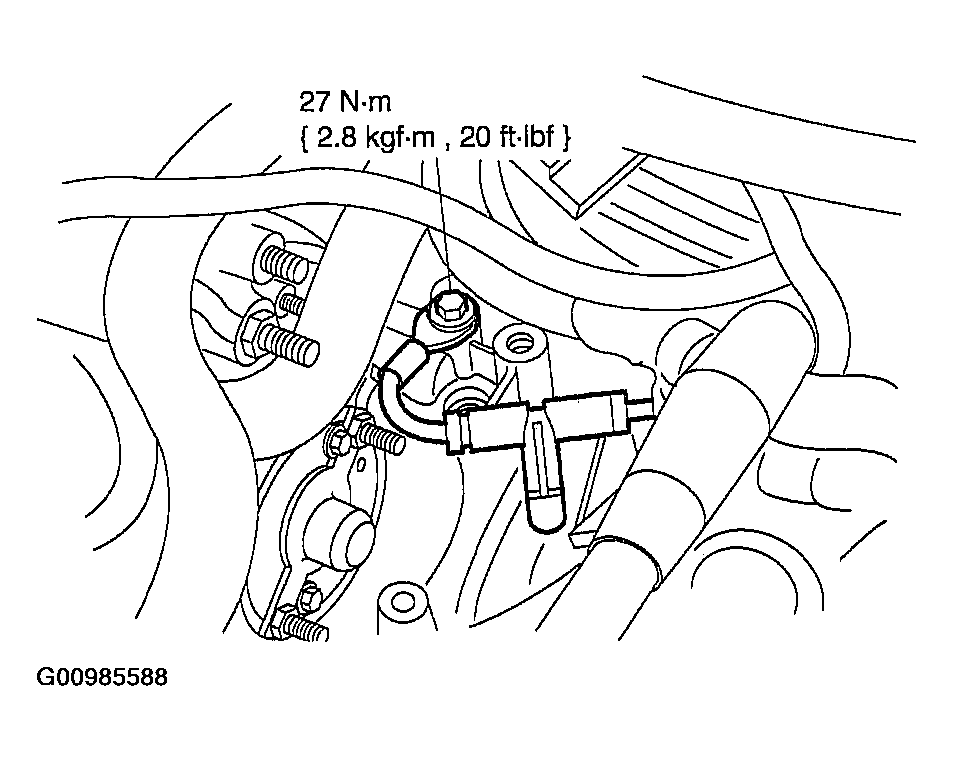
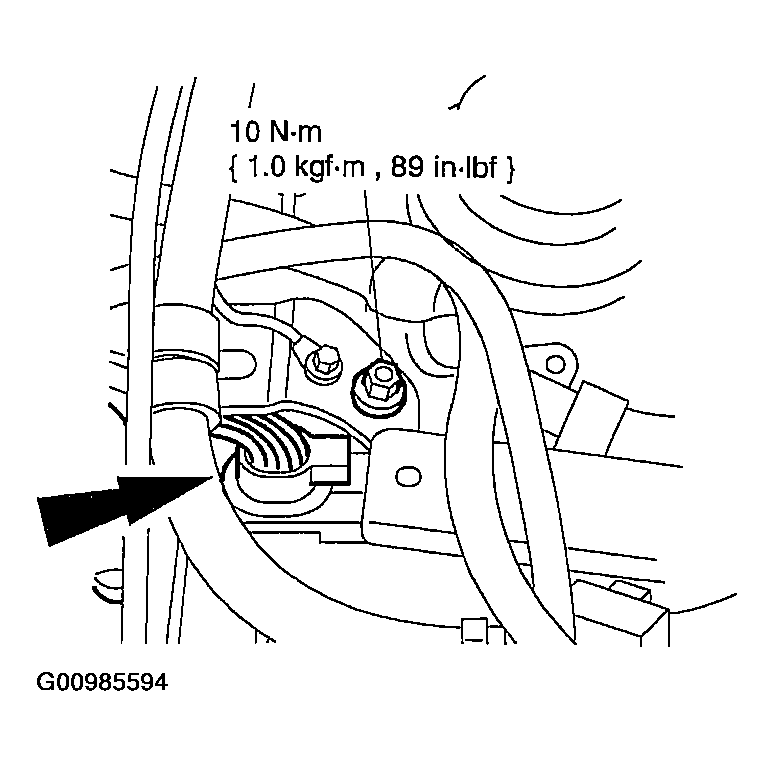
- Install the OSS sensor.
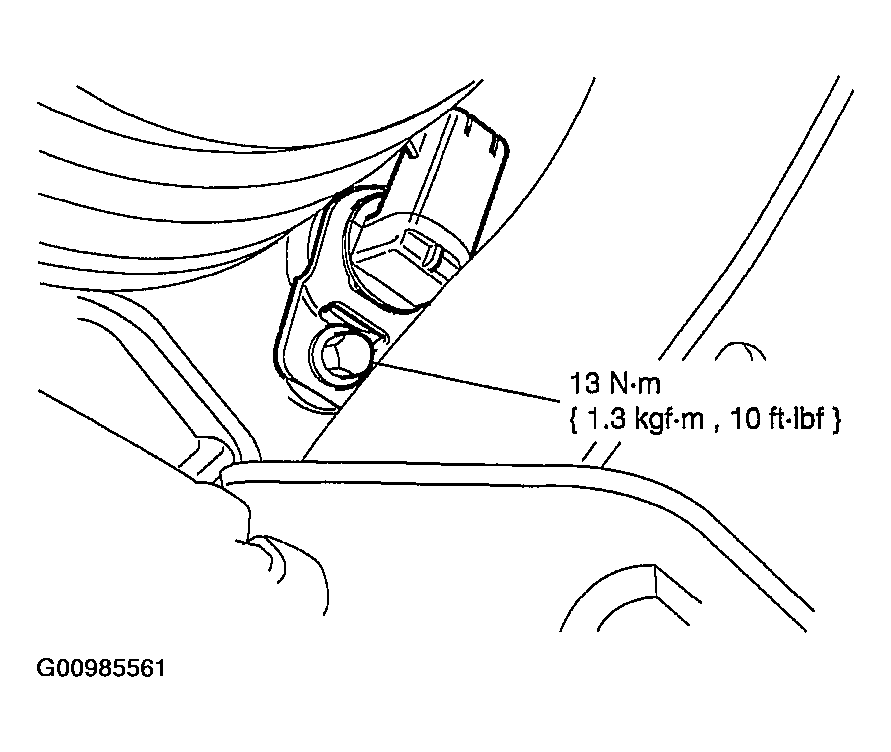 Courtesy of MAZDA MOTORS CORP.
- Install the fluid cooler tube.
- Install the fluid cooler tube.
- Install the bolt.
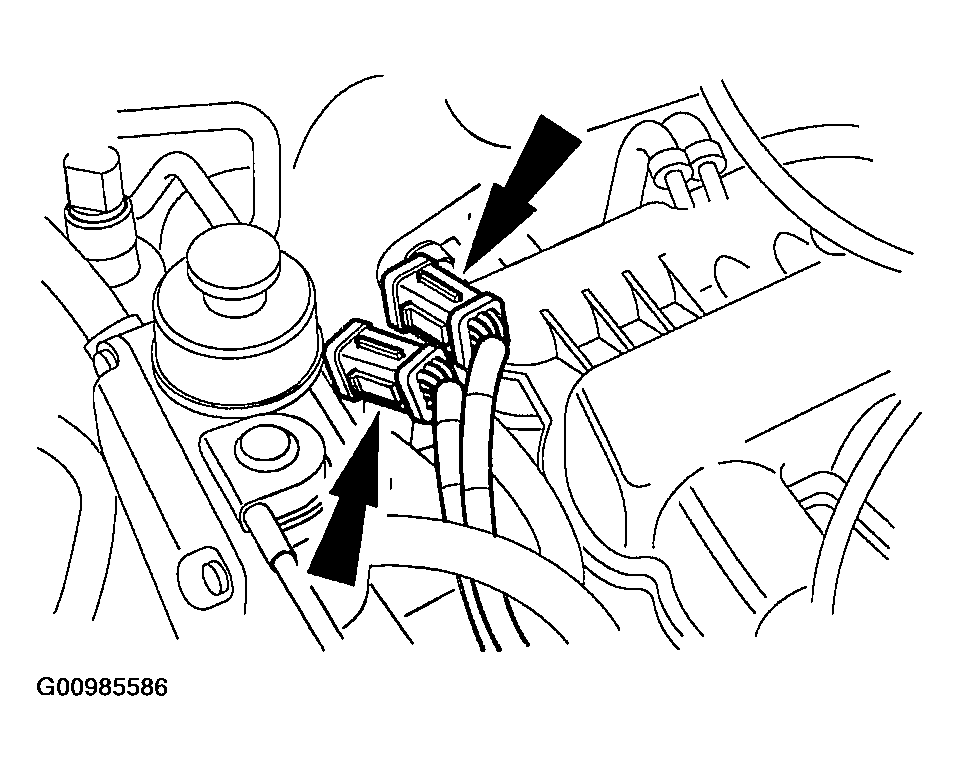
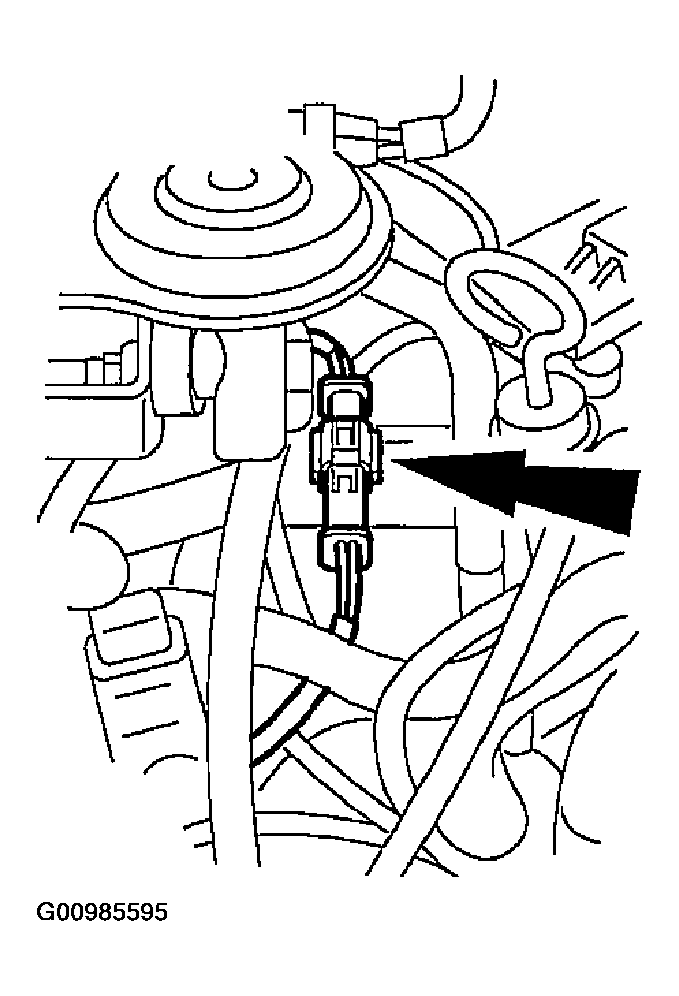
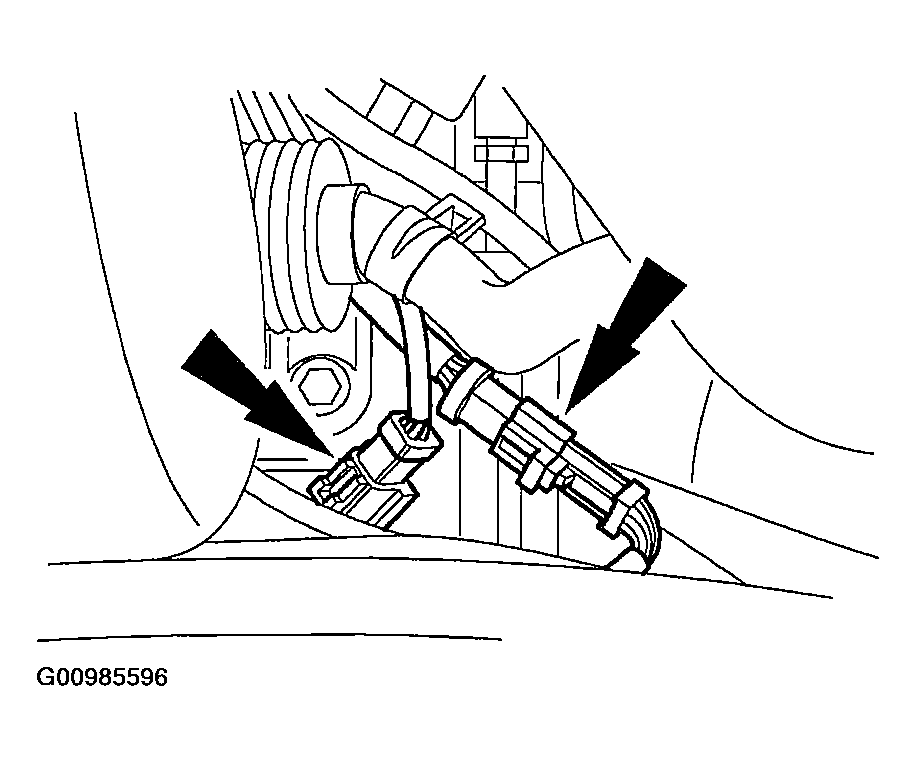
- Connect the output shaft speed (OSS) sensor.
- Connect the turbine shaft speed (TSS) sensor (white connector).
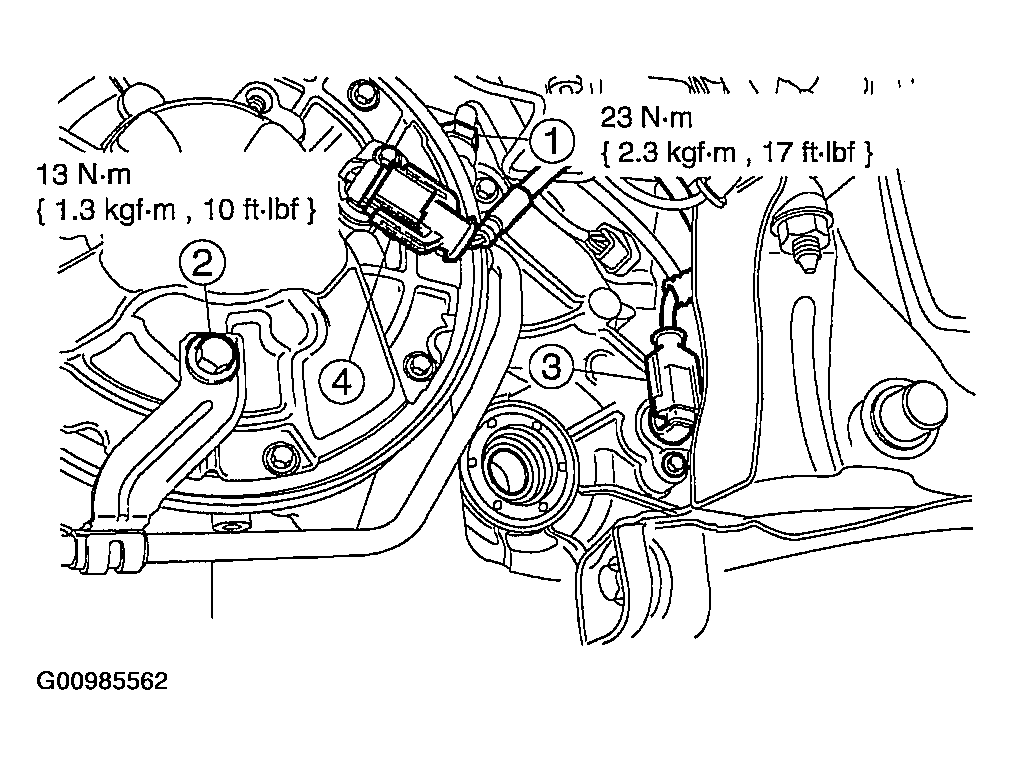 Courtesy of MAZDA MOTORS CORP.
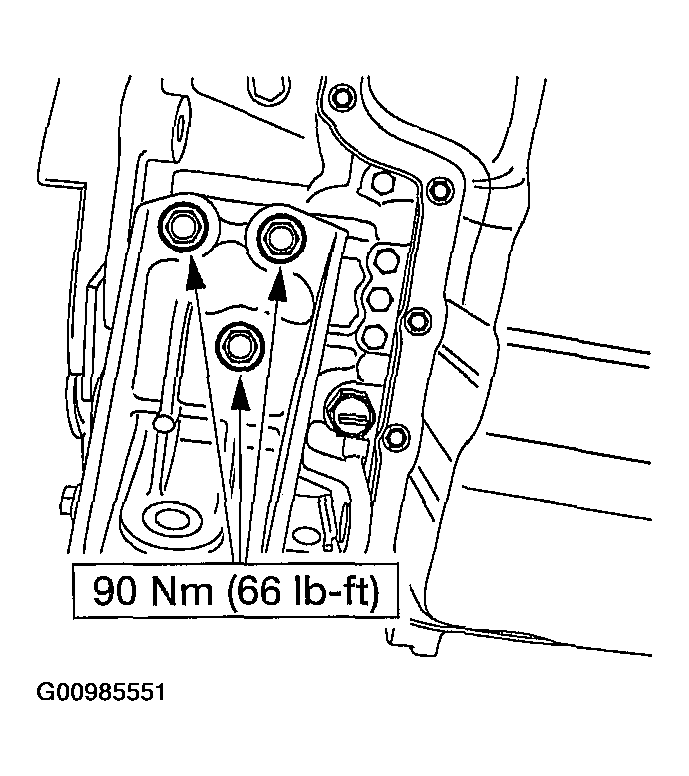
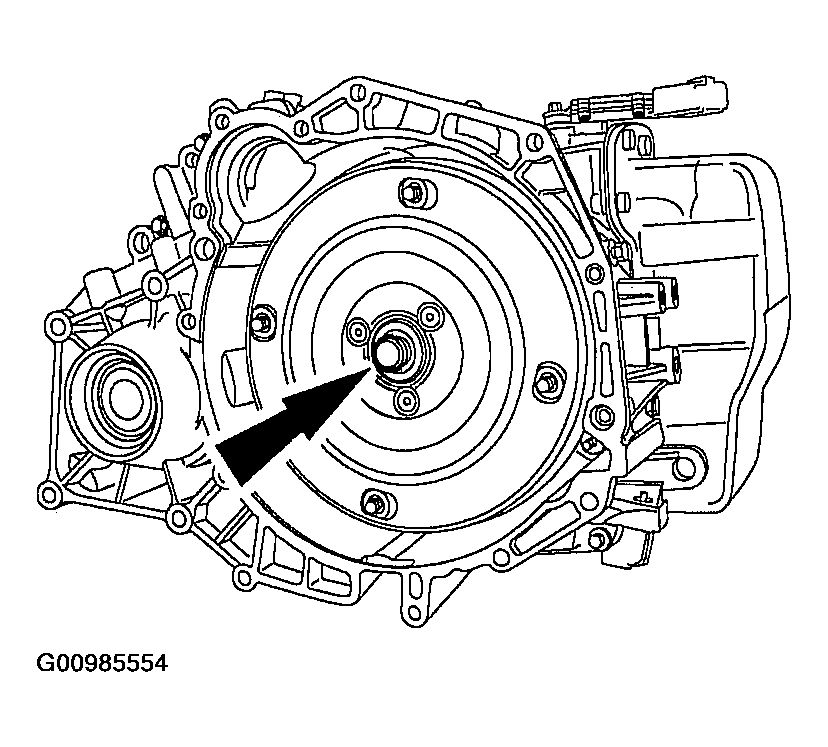
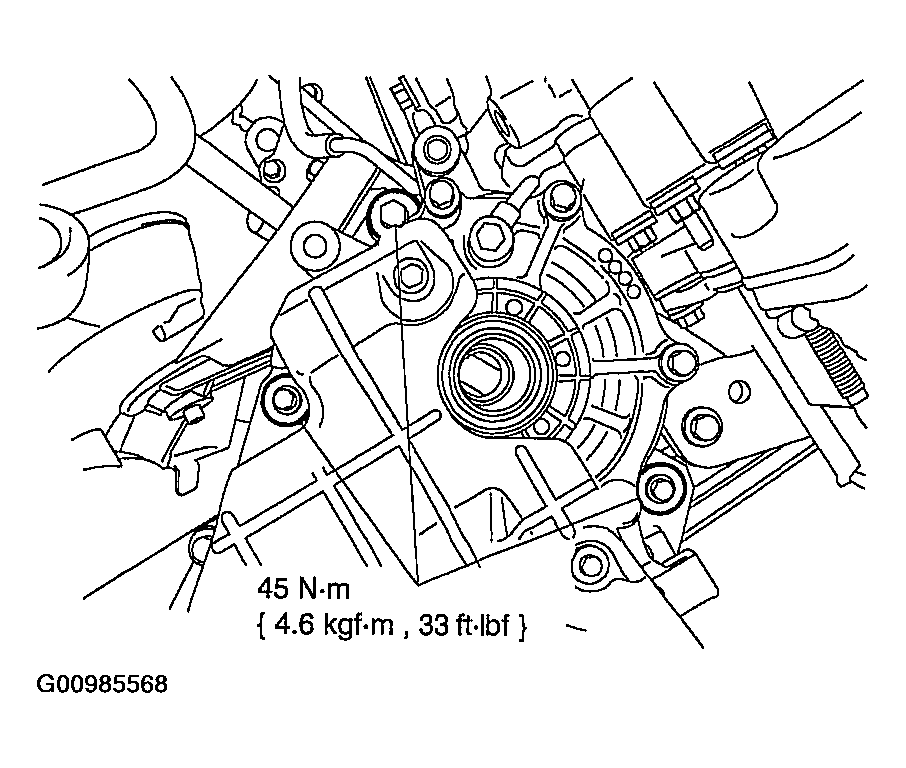
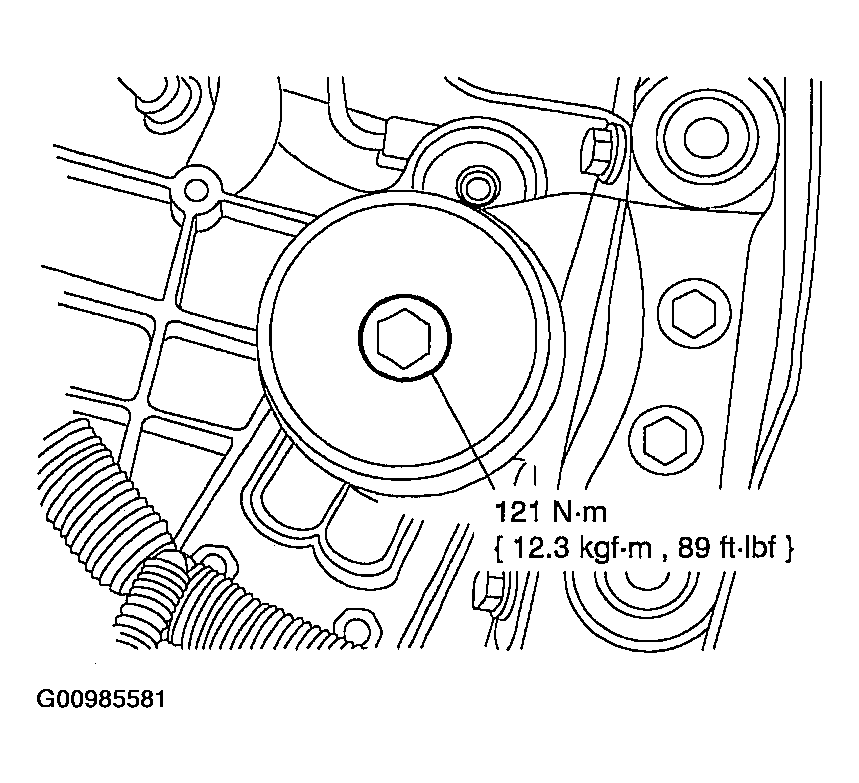
- Install four flexplate nuts.
 Courtesy of MAZDA MOTORS CORP.
- Install the access cover.
 Courtesy of MAZDA MOTORS CORP.
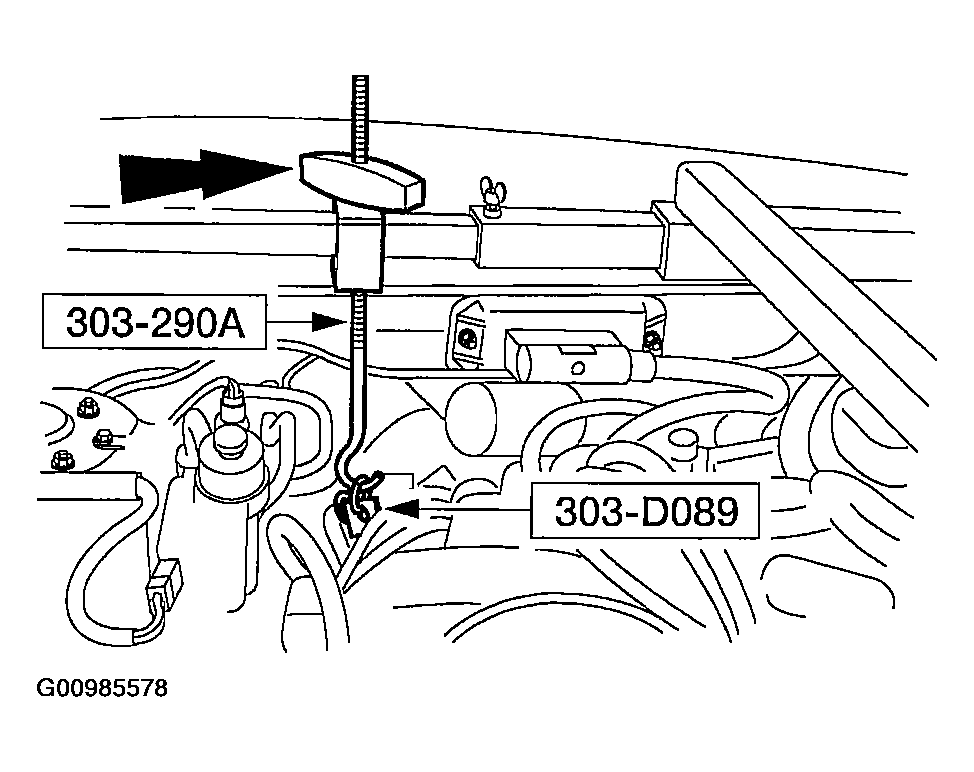
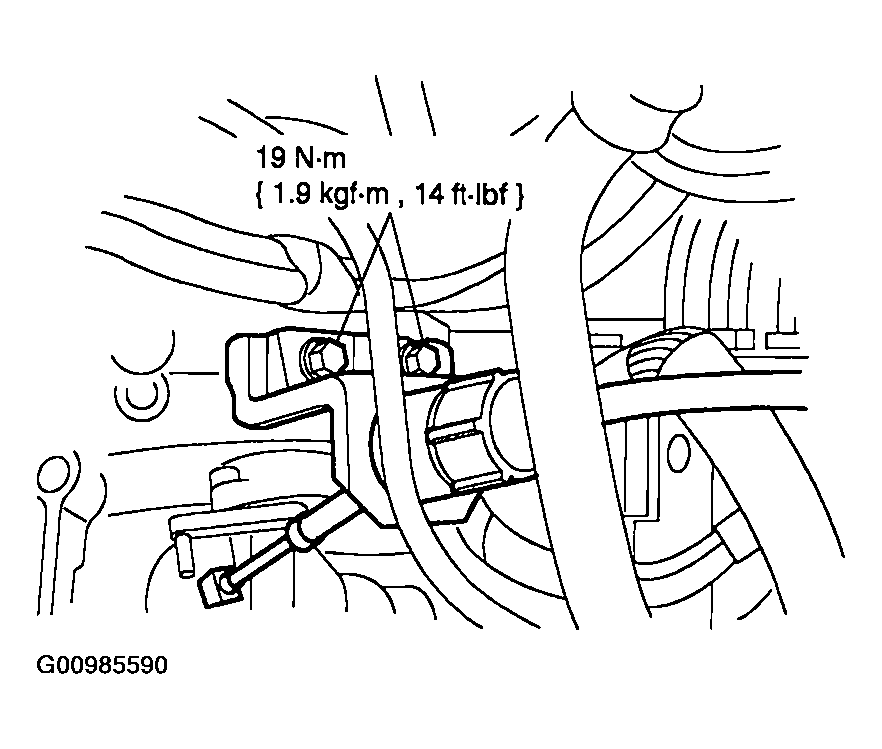
- Connect the main control cover vent tube.
 Courtesy of MAZDA MOTORS CORP.
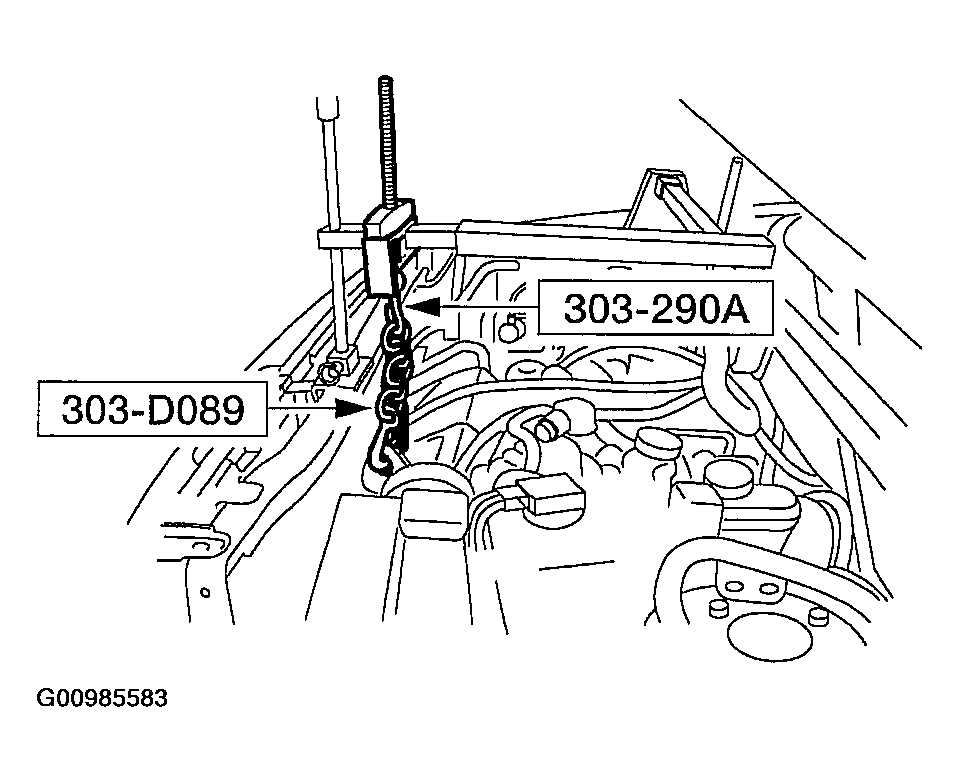
- Lower the vehicle.
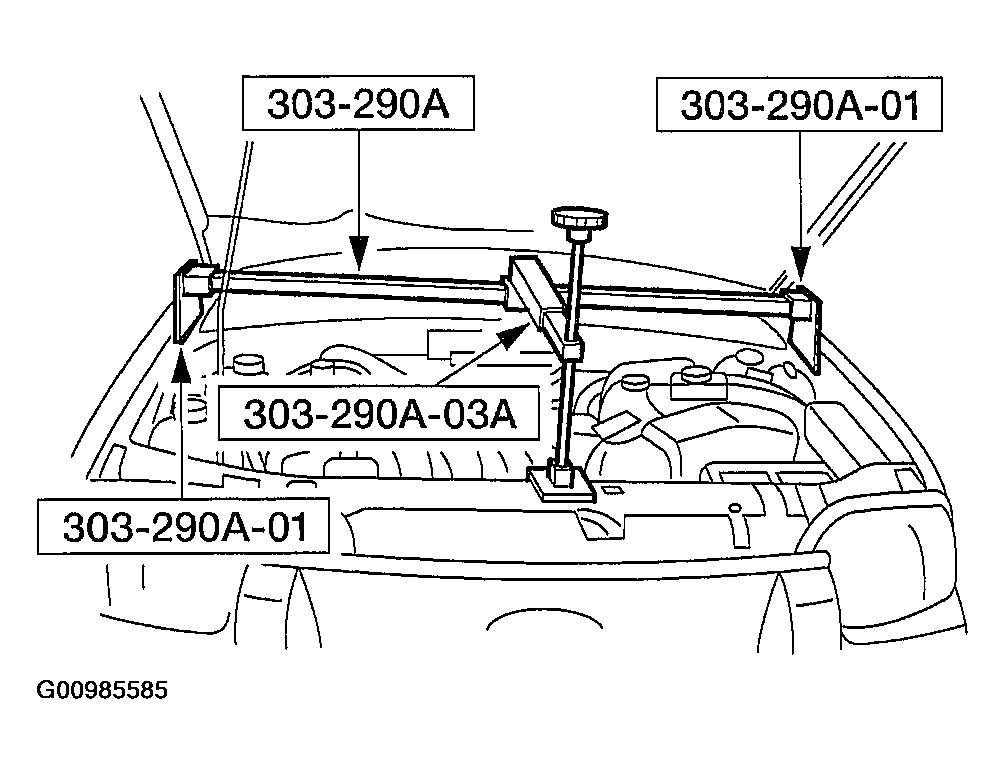
- Using the special tool, raise the transaxle enough to install the cross brace.
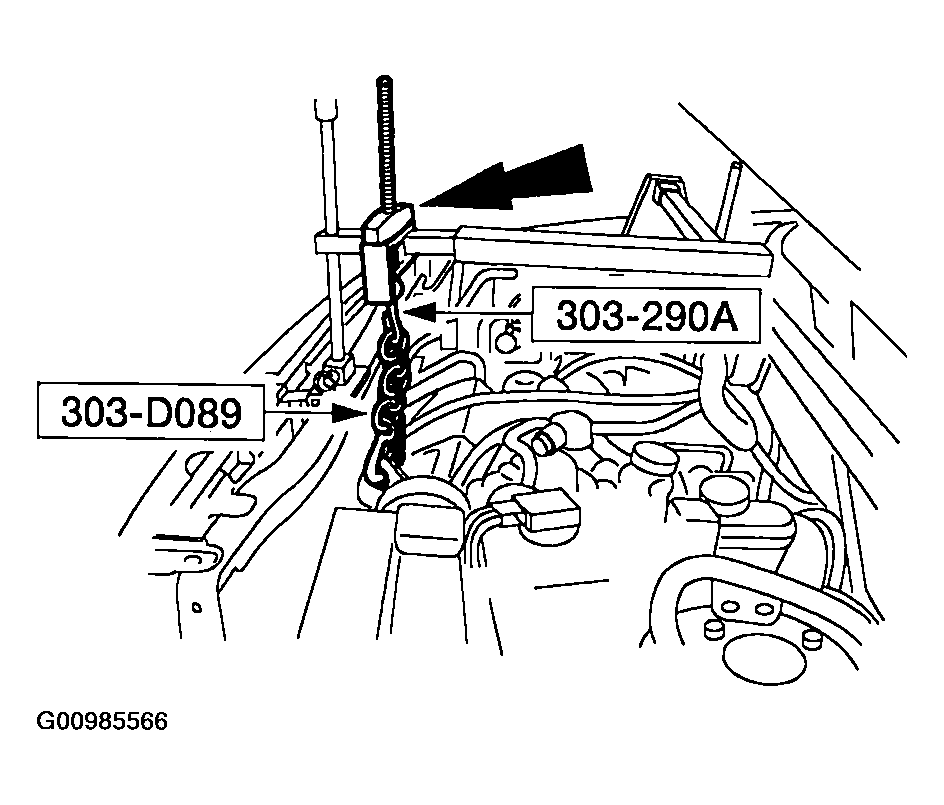 Courtesy of MAZDA MOTORS CORP.
- Raise the vehicle.
- Install the PTO unit and bolt.
 Courtesy of MAZDA MOTORS CORP.
- Install the PTO bolts.
 Courtesy of MAZDA MOTORS CORP.
- Install the cross brace.
 Courtesy of MAZDA MOTORS CORP.
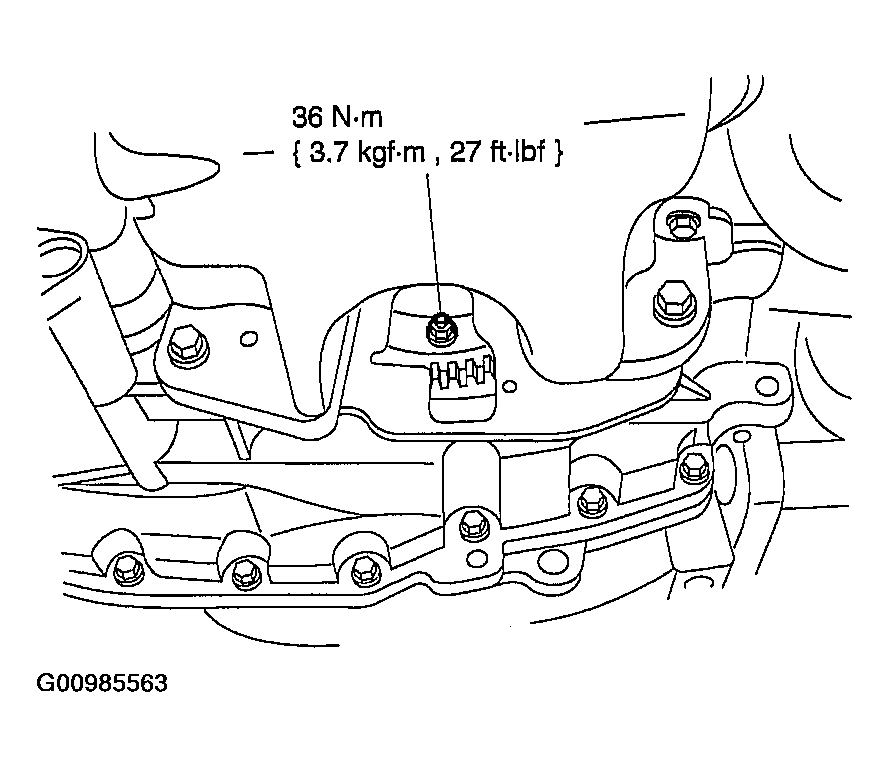
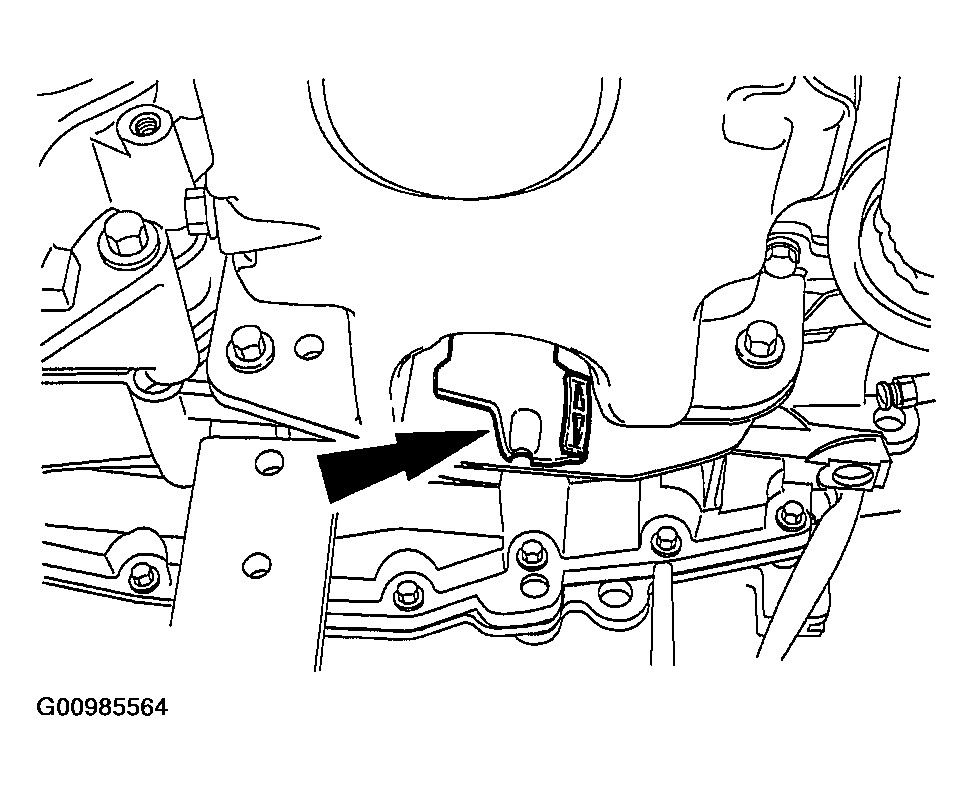
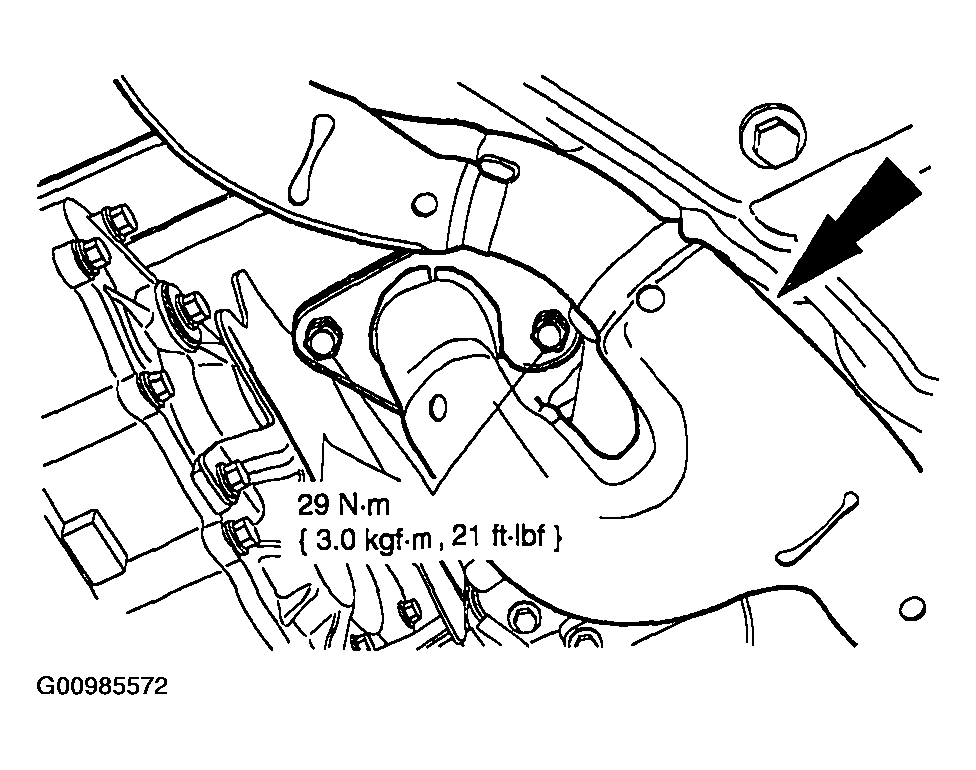
- Install the crossmember dampener.
 Courtesy of MAZDA MOTORS CORP.
- Install the PTO bracket.
 Courtesy of MAZDA MOTORS CORP.
- For four-wheel-drive vehicles, install the RH exhaust manifold. Refer to
EXHAUST MANIFOLD - RH
.
- If equipped, install the driveshaft. Refer to
DRIVESHAFT
.
- Install the exhaust pipe, and connect the exhaust pipe flange.
 Courtesy of MAZDA MOTORS CORP.
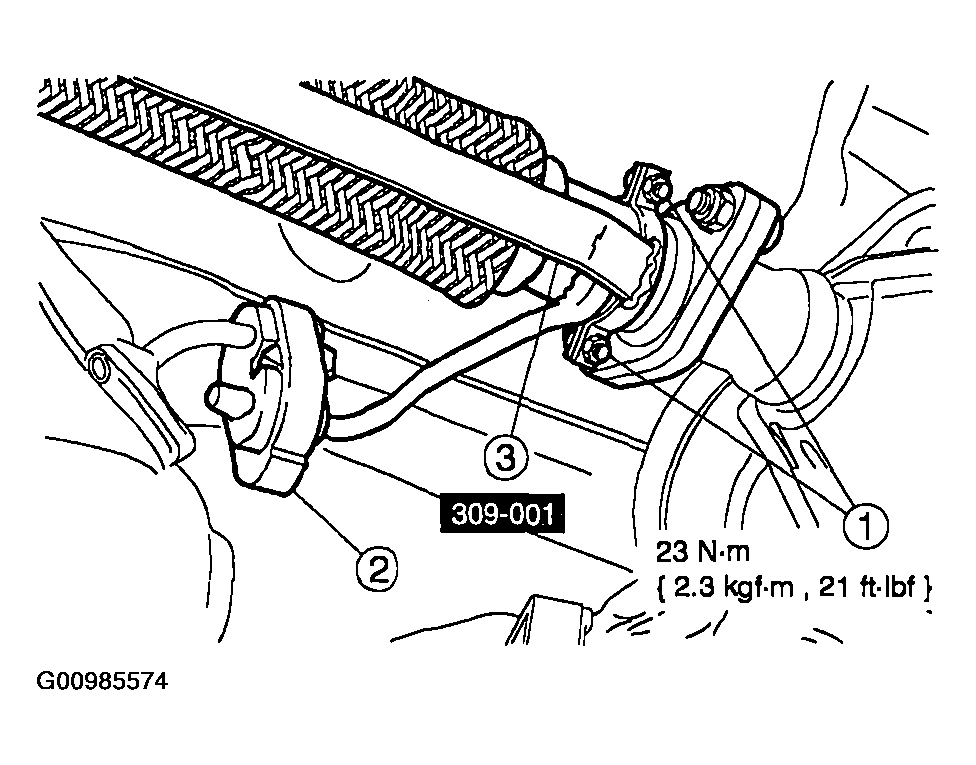
- Connect the front flange.
 Courtesy of MAZDA MOTORS CORP.
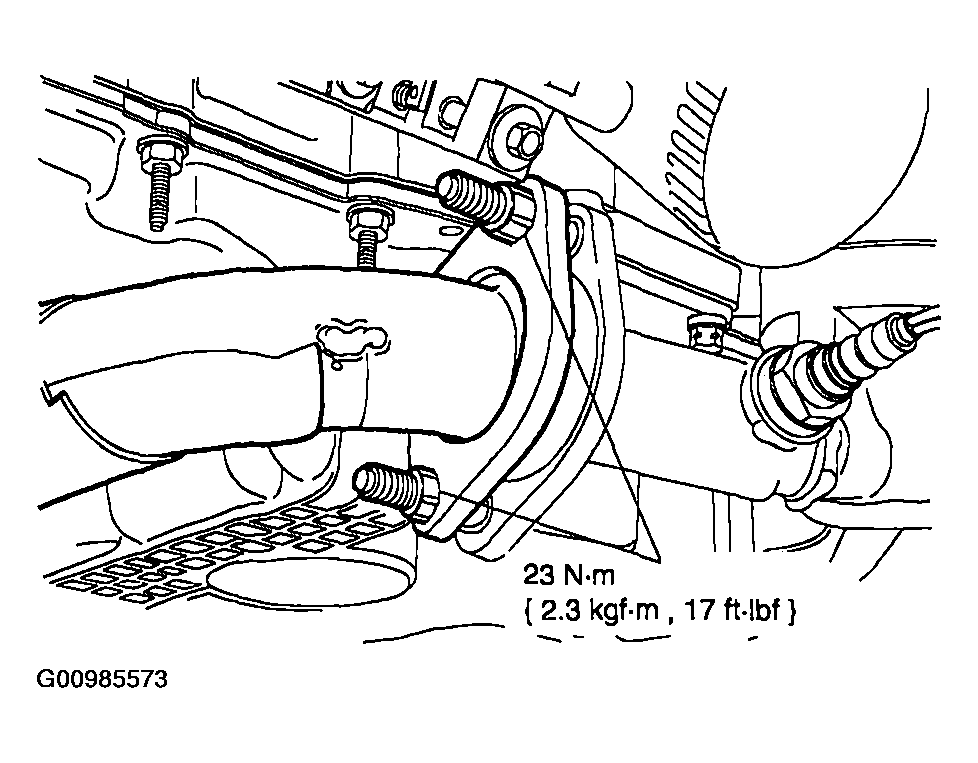
- Install the exhaust pipe.
- Install the pipe, and install the bolts.
- Install the rubber hanger.
- Remove the special tool.
 Courtesy of MAZDA MOTORS CORP.
- Connect the HO2S sensor wire to the oil pan bolt studs and connect the connector.
 Courtesy of MAZDA MOTORS CORP.
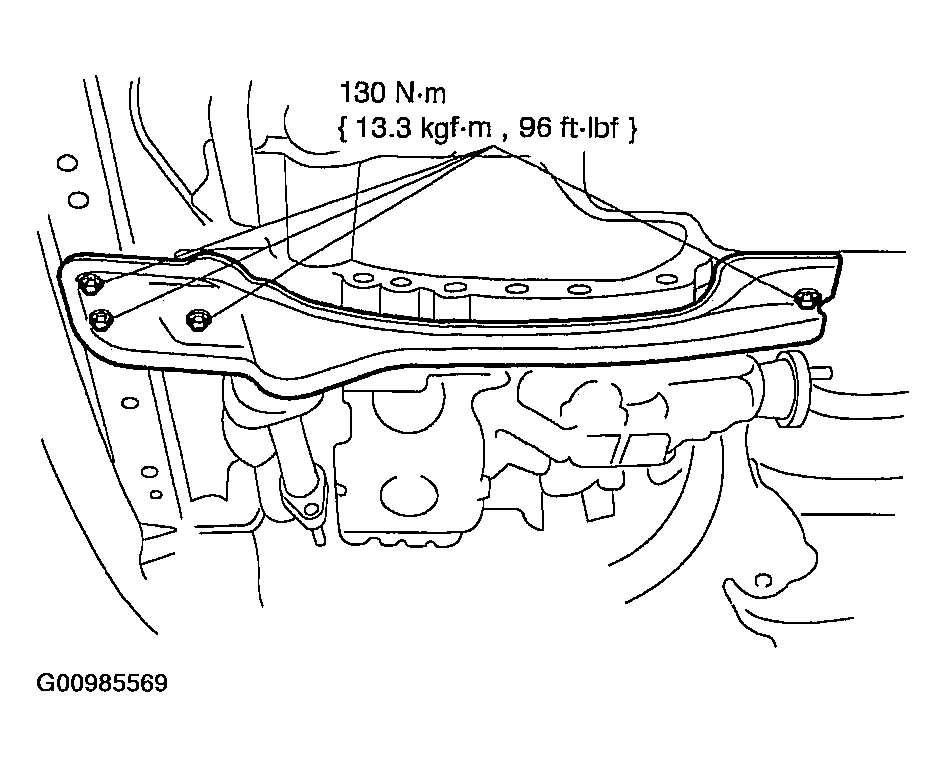
- Install the cross brace.
 Courtesy of MAZDA MOTORS CORP.
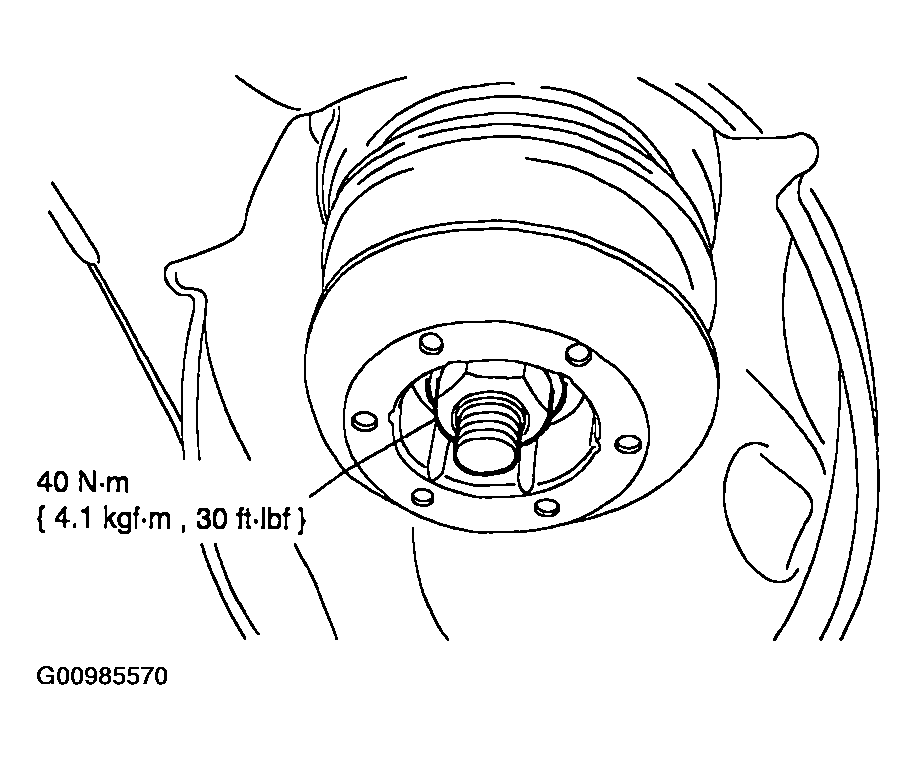
- Install the LH halfshaft assembly. Refer
HALFSHAFT -- FRONT
.
CAUTION:
- Align the mounting bracket studs and the intermediate shaft bearing bracket holes with the marks made during removal.
- Install the RH halfshaft, intermediate shaft bearing, and intermediate shaft assembly. Refer
HALFSHAFT -- FRONT
.
- Install the two splash shields.
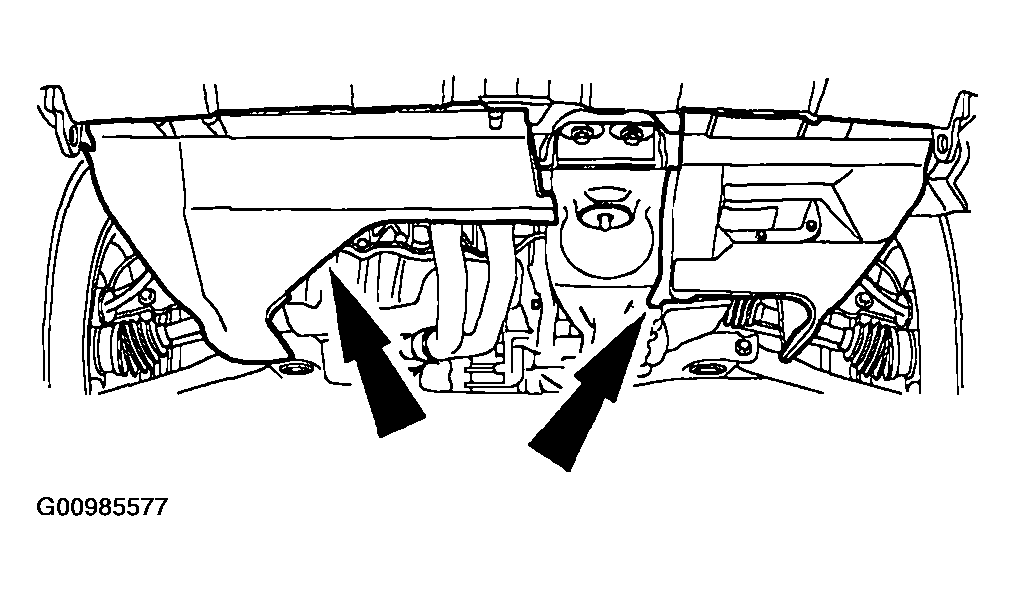 Courtesy of MAZDA MOTORS CORP.
- Install both front wheels.
- Lower the vehicle.
- Lower the engine onto the RH engine mount.
 Courtesy of MAZDA MOTORS CORP.
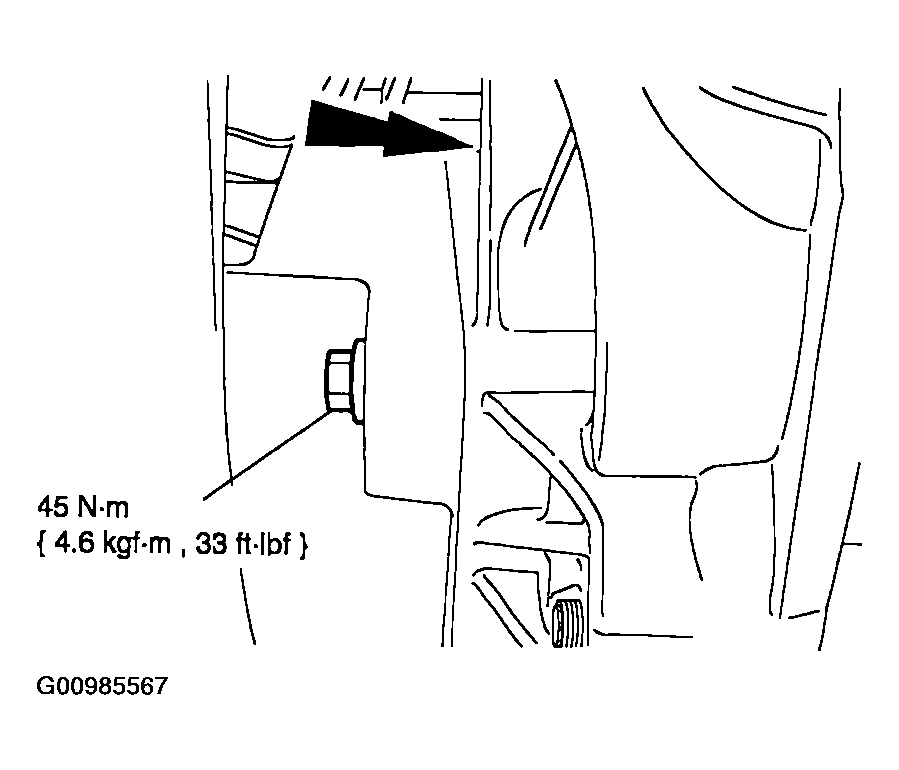
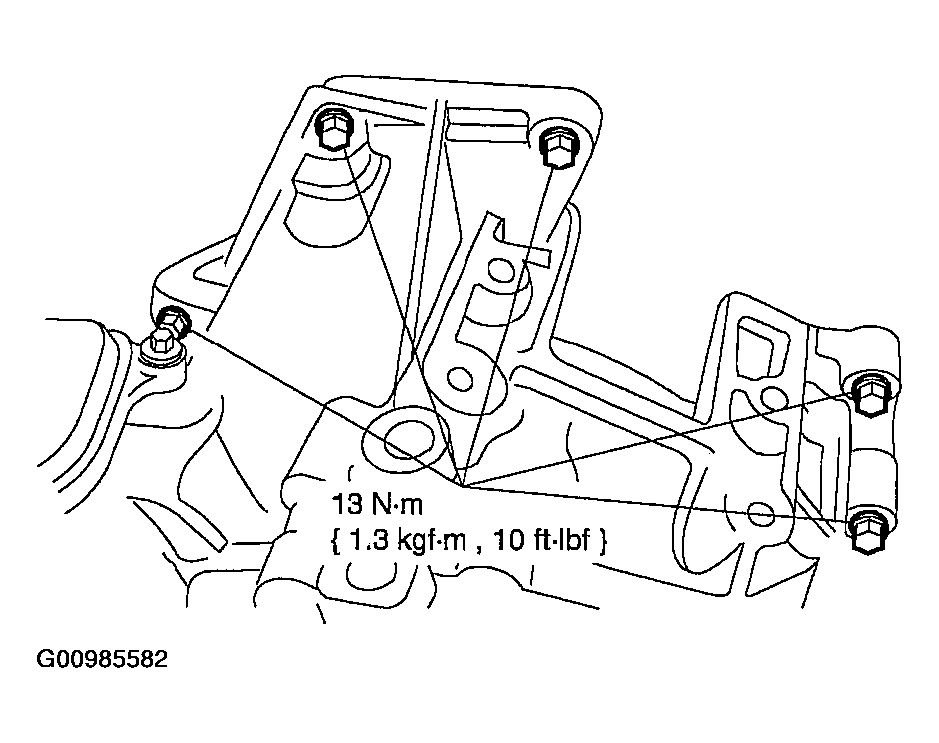
- Install the bolt for the RH engine mount.
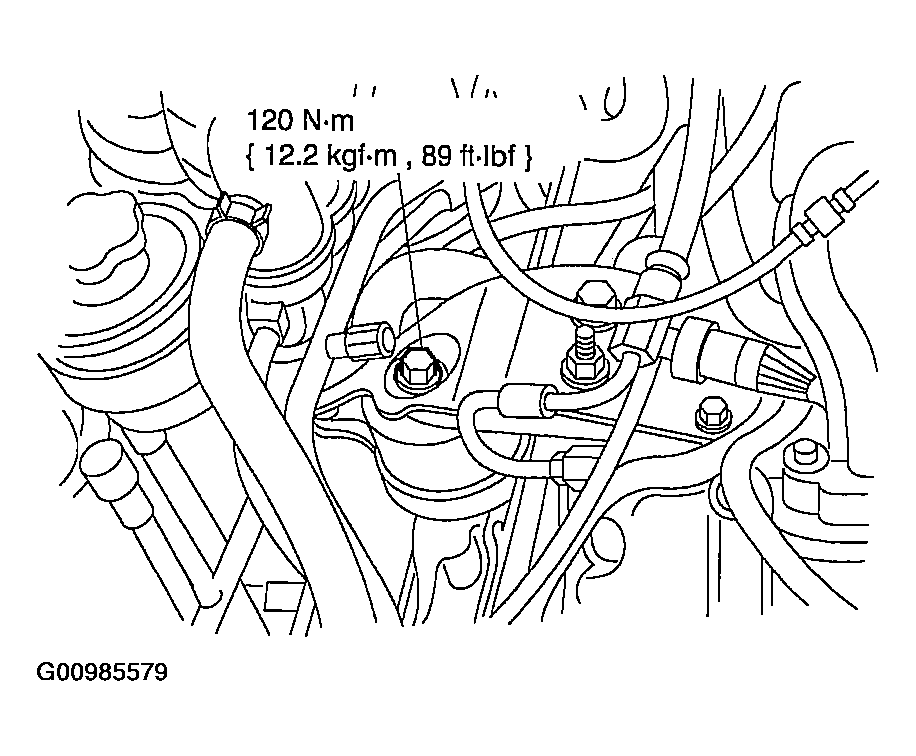 Courtesy of MAZDA MOTORS CORP.
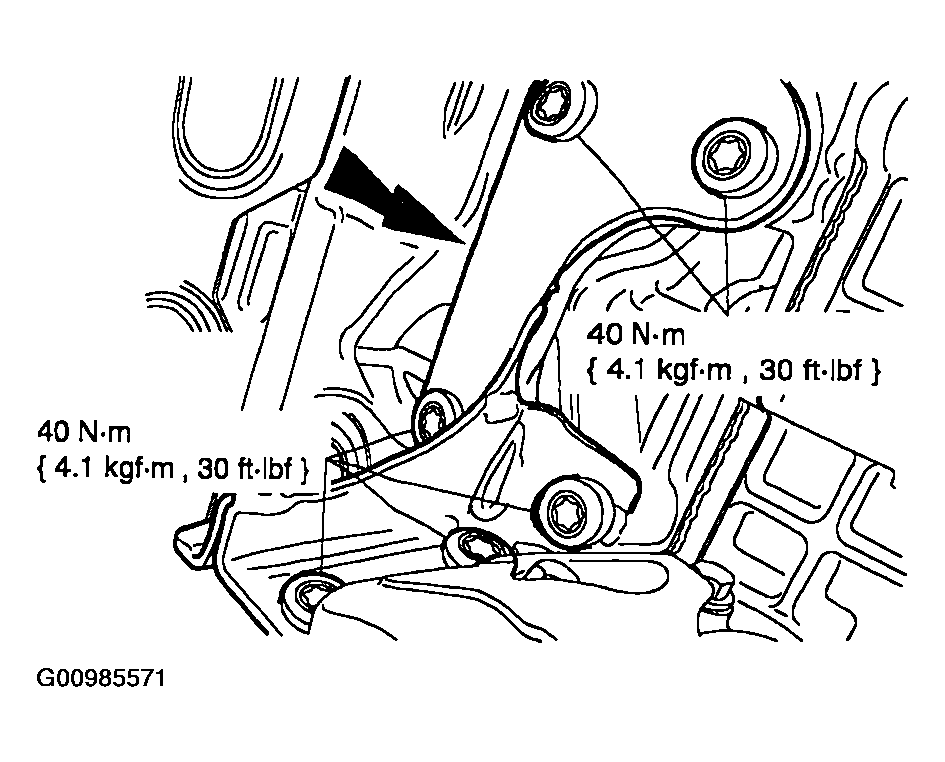
- Install the rear transaxle mount.
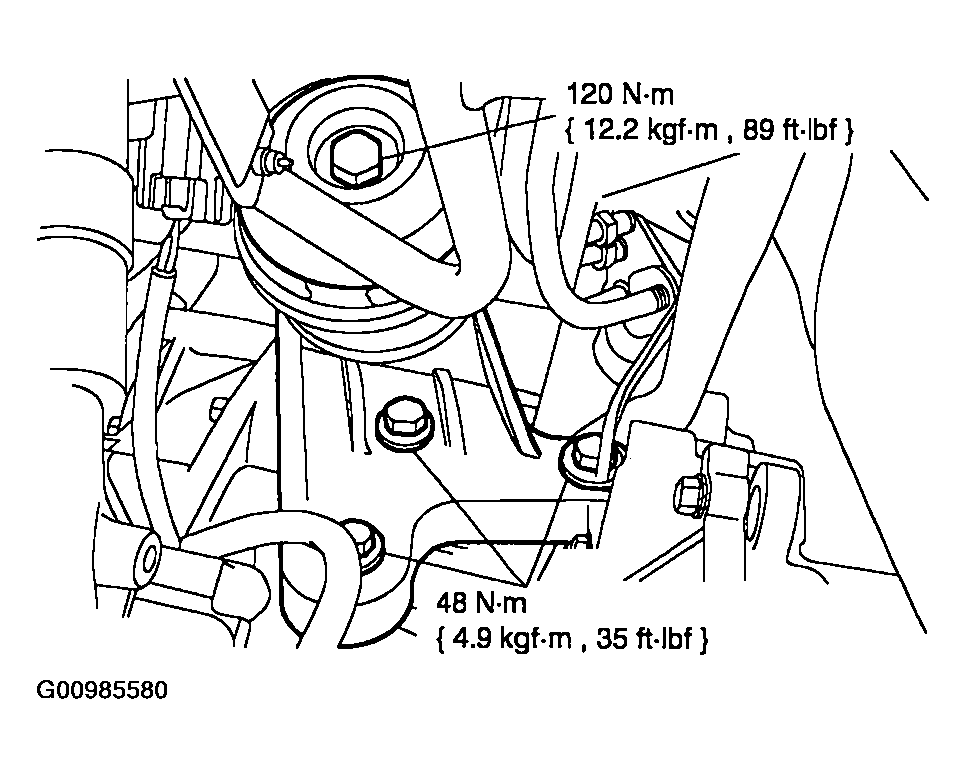 Courtesy of MAZDA MOTORS CORP.
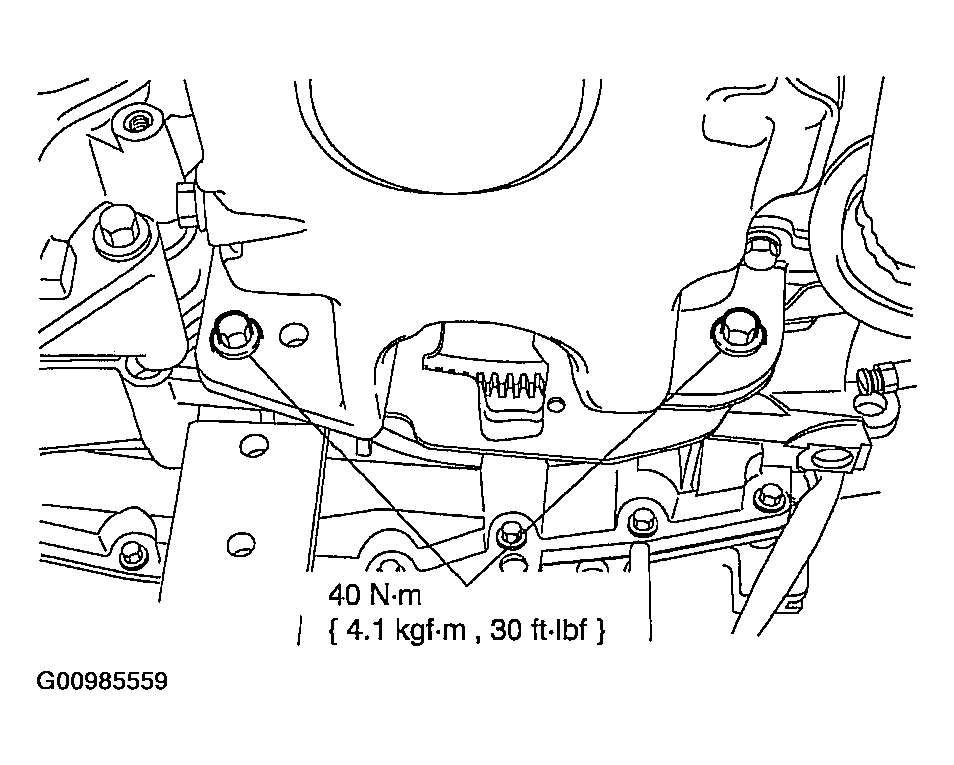
- Install the transaxle mount assembly.
 Courtesy of MAZDA MOTORS CORP.
- Install the bolts.
 Courtesy of MAZDA MOTORS CORP.
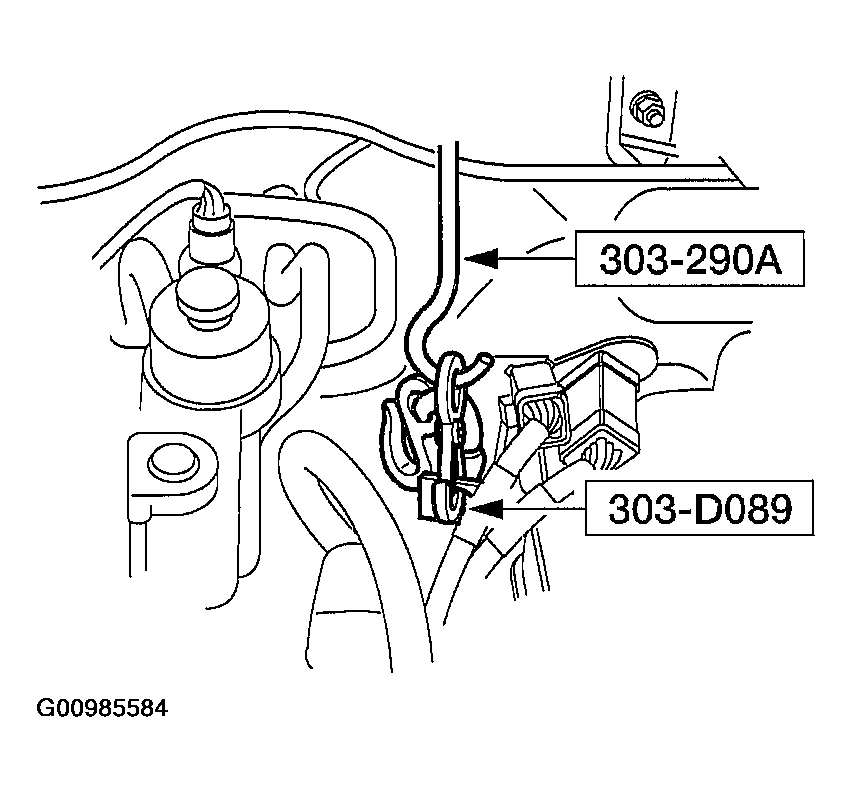
- Remove the special tool.
 Courtesy of MAZDA MOTORS CORP.
- Remove the special tool.
 Courtesy of MAZDA MOTORS CORP.
- Remove the special tool.
 Courtesy of MAZDA MOTORS CORP.
- Connect the electrical connectors to the valve cover.
 Courtesy of MAZDA MOTORS CORP.
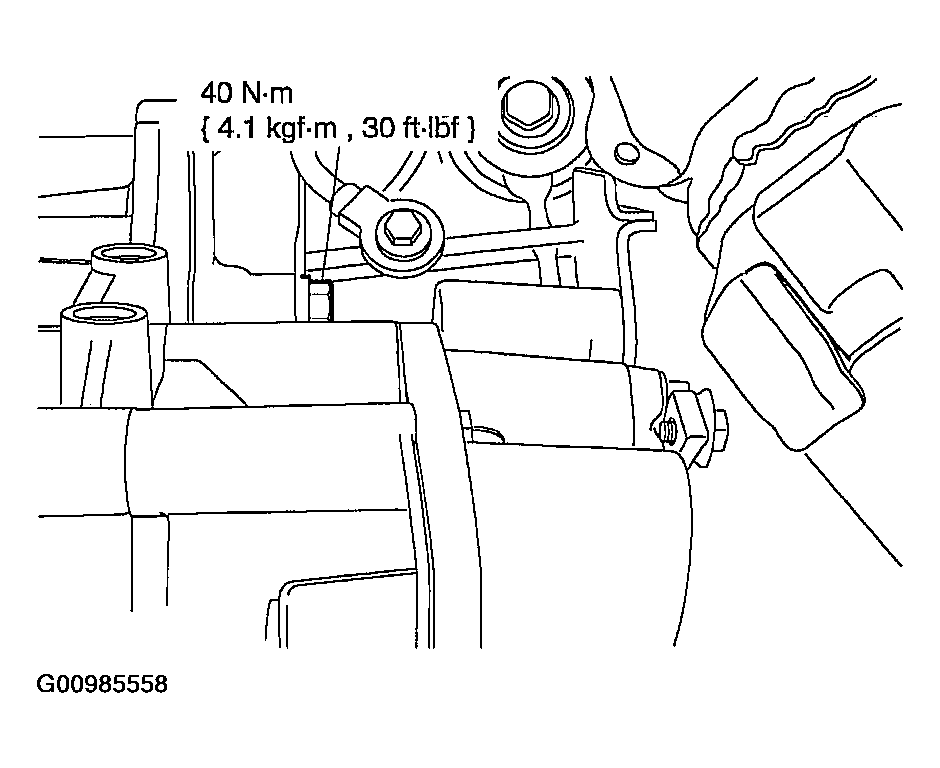
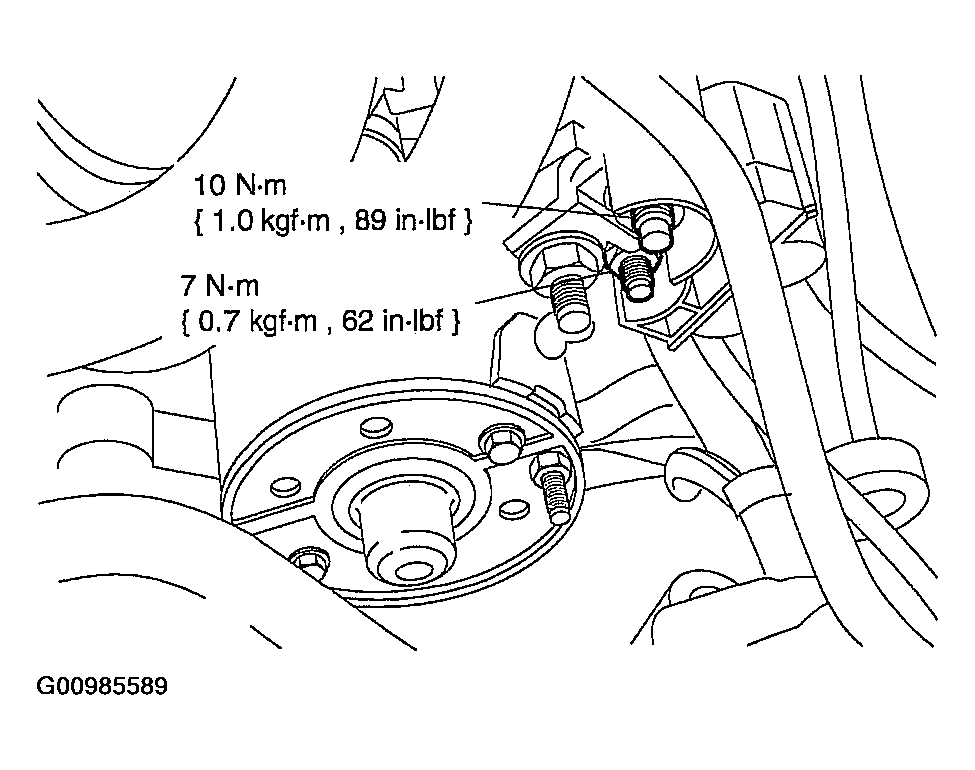
- Install the starter motor, and install two bolts.
 Courtesy of MAZDA MOTORS CORP.
- Install the ground cable.
 Courtesy of MAZDA MOTORS CORP.
- Install the starter motor harness connector.
 Courtesy of MAZDA MOTORS CORP.
- Install the shift cable and bracket.
 Courtesy of MAZDA MOTORS CORP.
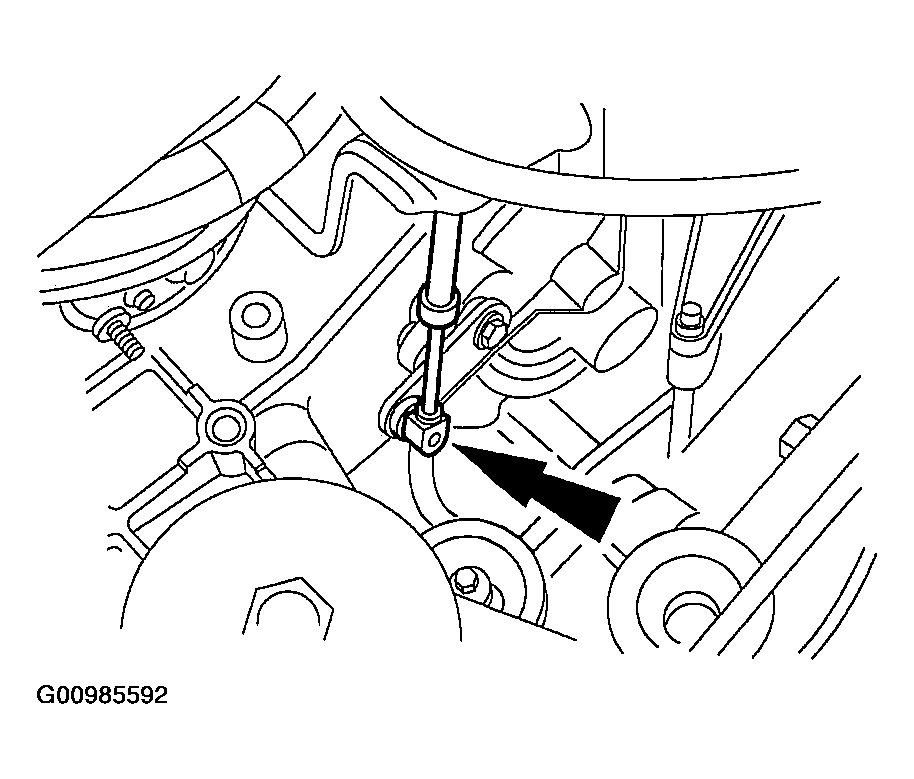
- Install the wire harness clip to the shift cable bracket.
 Courtesy of MAZDA MOTORS CORP.
- Connect the shift cable.
 Courtesy of MAZDA MOTORS CORP.
- Connect the wire harness.
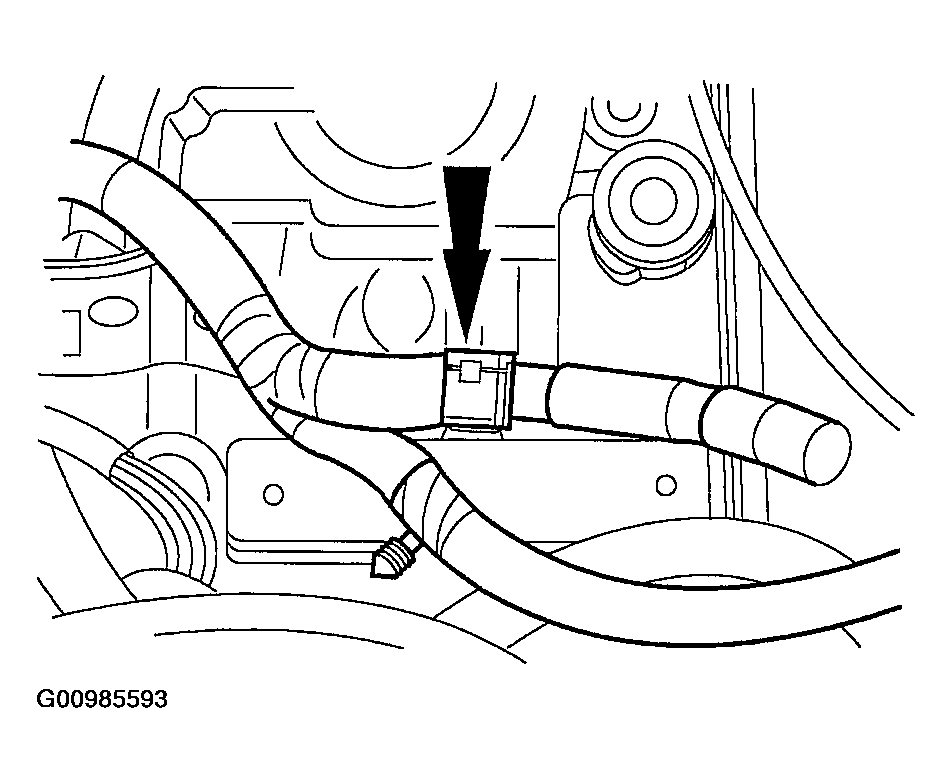 Courtesy of MAZDA MOTORS CORP.
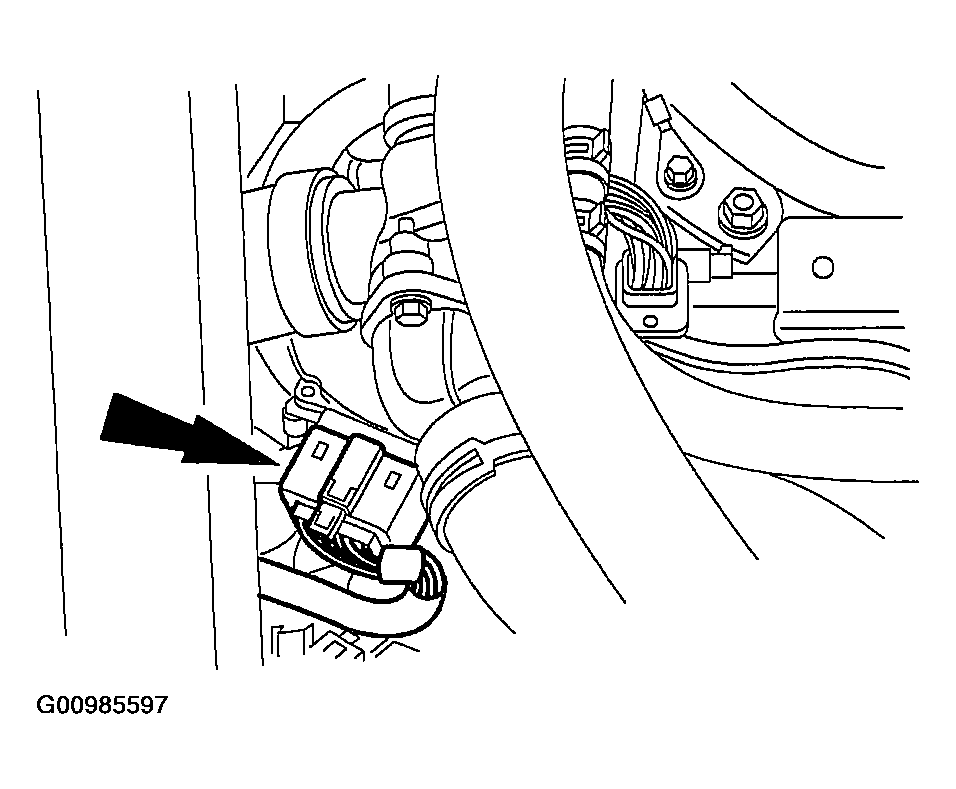
- Install the wire harness bracket, and connect the transaxle harness connector.
 Courtesy of MAZDA MOTORS CORP.
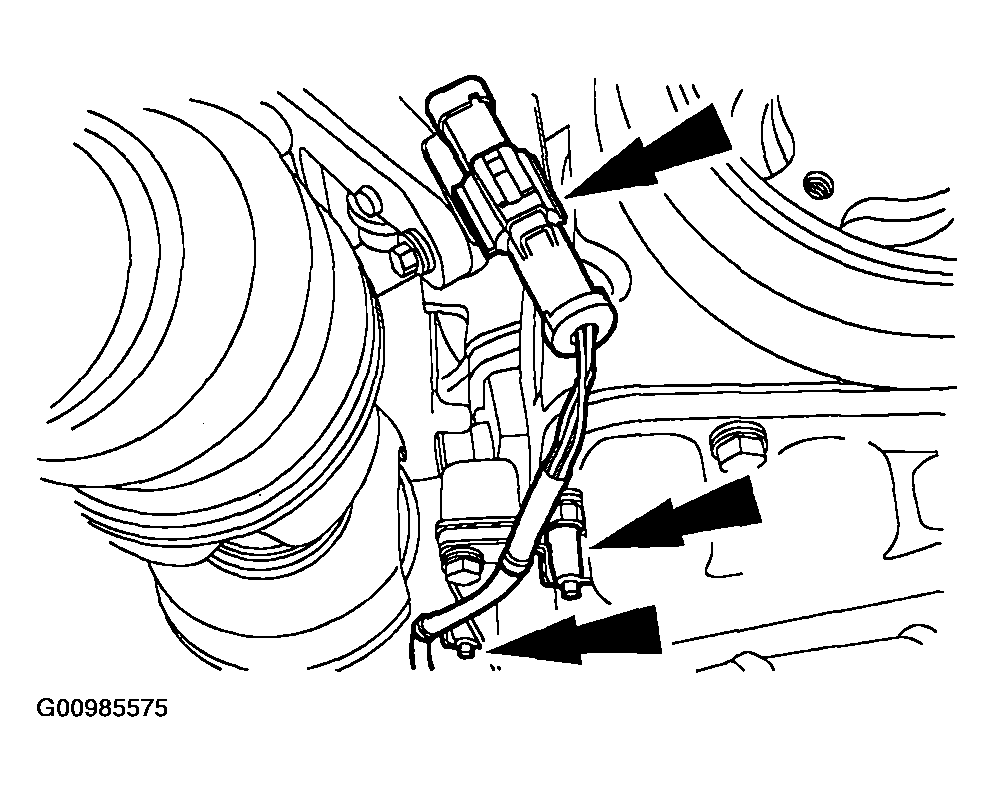
- Connect the HO2S sensor.
 Courtesy of MAZDA MOTORS CORP.
- Connect the two HO2S sensors.
 Courtesy of MAZDA MOTORS CORP.
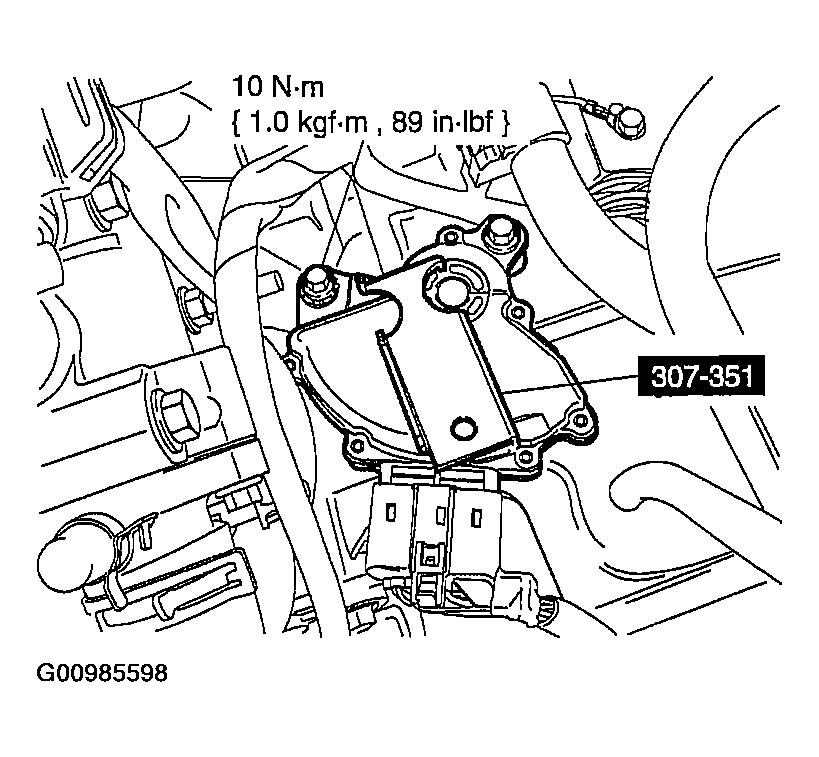
- Connect the transaxle range (TR) sensor.
 Courtesy of MAZDA MOTORS CORP.
NOTE:
- If not done during assembly, the digital TR sensor must be aligned.
- Using the special tool, align the digital TR sensor.
 Courtesy of MAZDA MOTORS CORP.
- Install the air cleaner assembly.
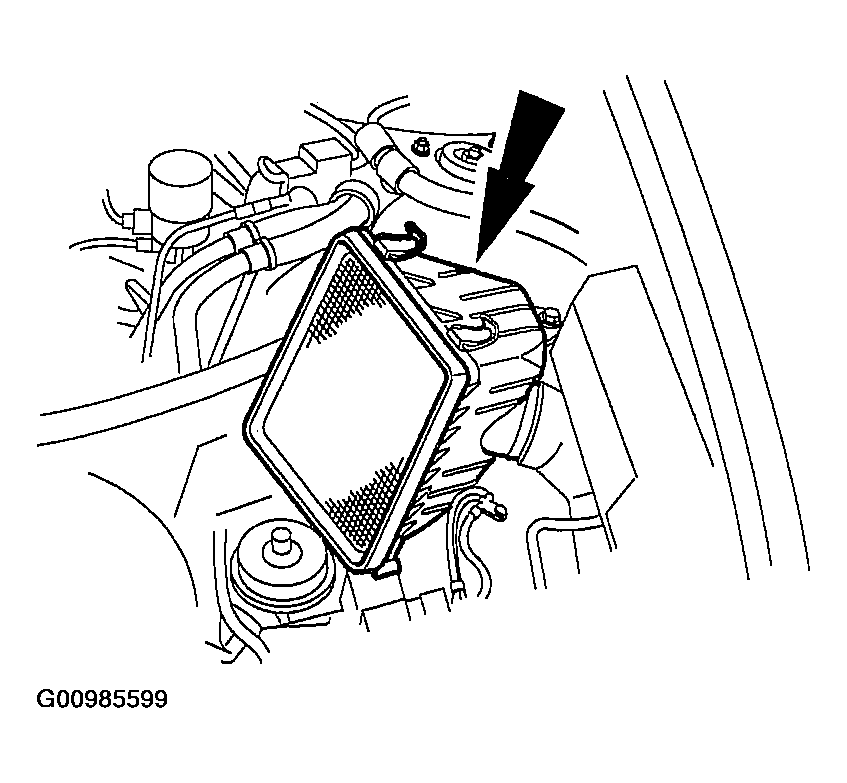 Courtesy of MAZDA MOTORS CORP.
- Install the intake tube and air cleaner cover.
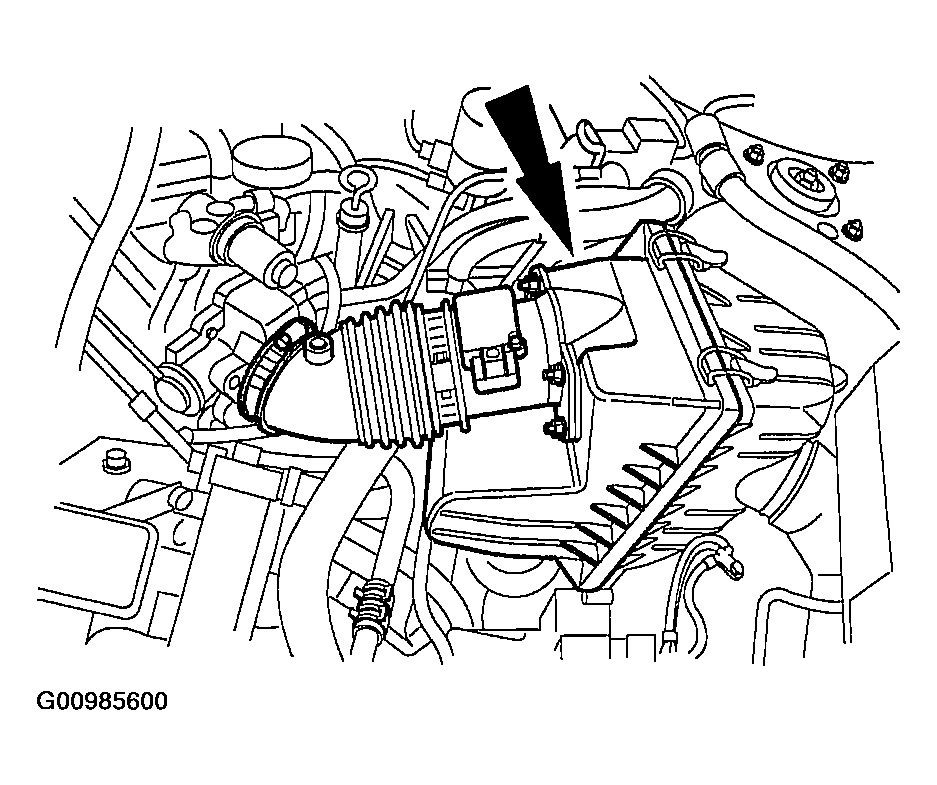 Courtesy of MAZDA MOTORS CORP.
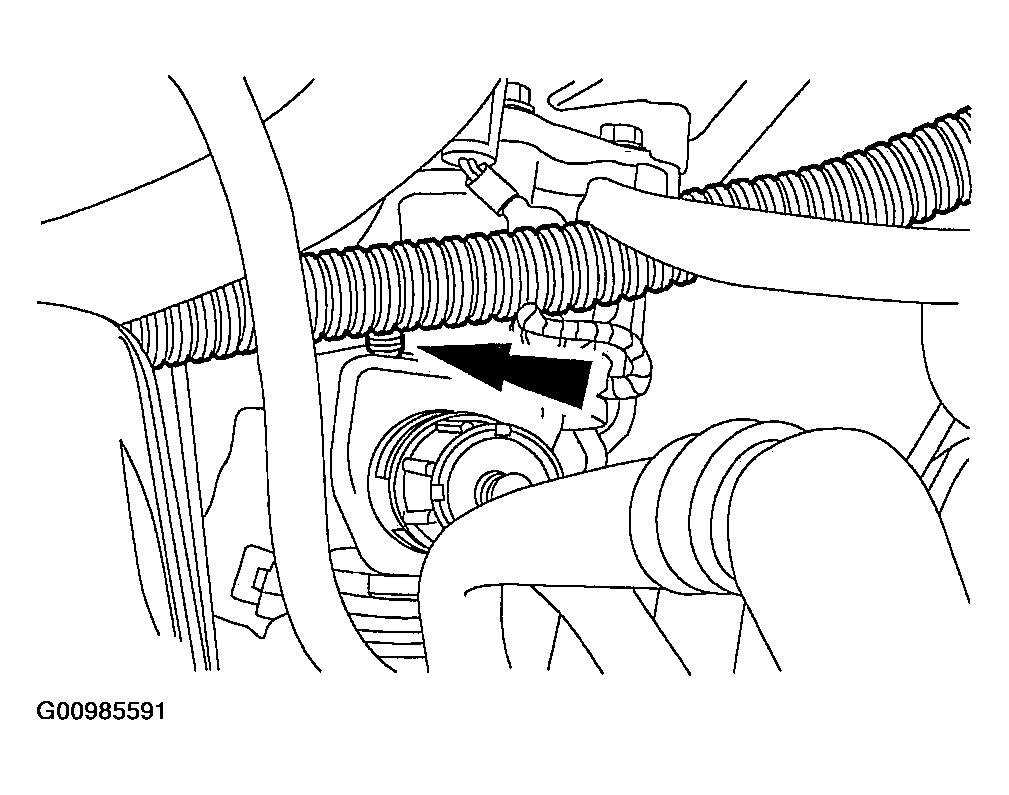
- Connect the breather tube and mass air flow (MAF) / intake air temperature (IAT) sensor.
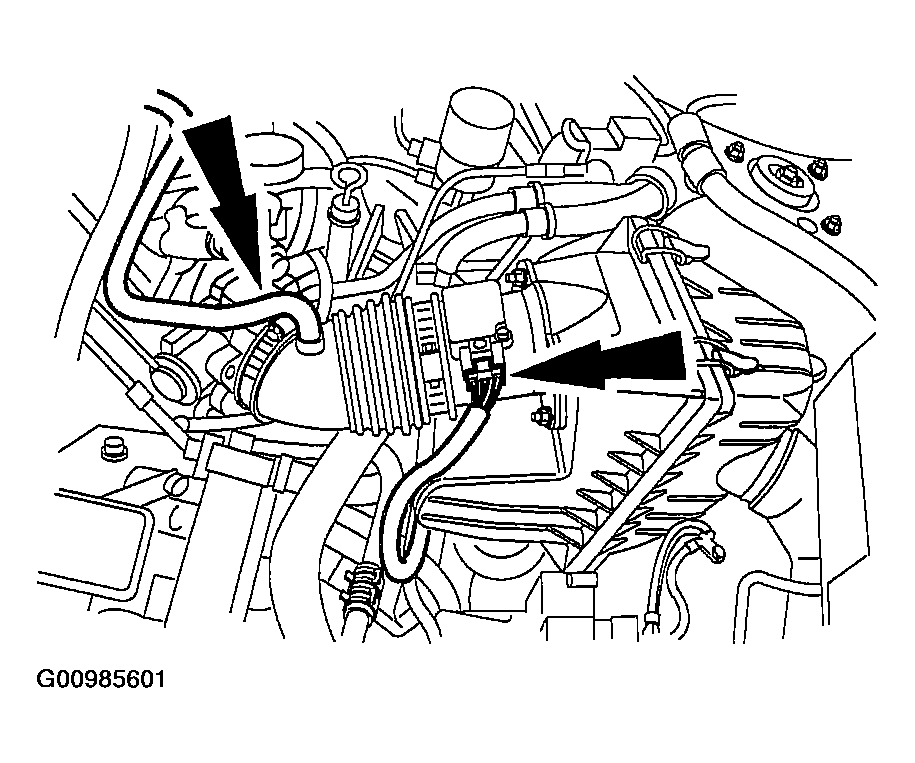 Courtesy of MAZDA MOTORS CORP.
NOTE:
- Before installing the battery tray, check the vent tube hose for any obstructions, kinks or incorrect routing position.
- Install the battery and tray.
- Connect the battery cables.
- Check the power take off (PTO) unit. Refer to
POWER TAKE OFF UNIT DRAINING AND FILLING
.
- Fill the transaxle. Refer to
TRANSAXLE FLUID DRAIN AND REFILL
.