Rear Outer Handle Removal/Installation
- Disconnect the negative battery cable. (Vehicles with power window system)
- Fully roll up the rear door glass.
- Remove the sail garnish. (5 door) (See
SAIL GARNISH REMOVAL/INSTALLATION
.)
- Remove the regulator handle. (Vehicles with manual window system) (See
REGULATOR HANDLE REMOVAL
.) (See
REGULATOR HANDLE INSTALLATION
.)
- Remove the rear door trim. (See
REAR DOOR TRIM REMOVAL/INSTALLATION
.)
- Remove the hole cover.
- Remove the hole plug.
- Remove the bolt.
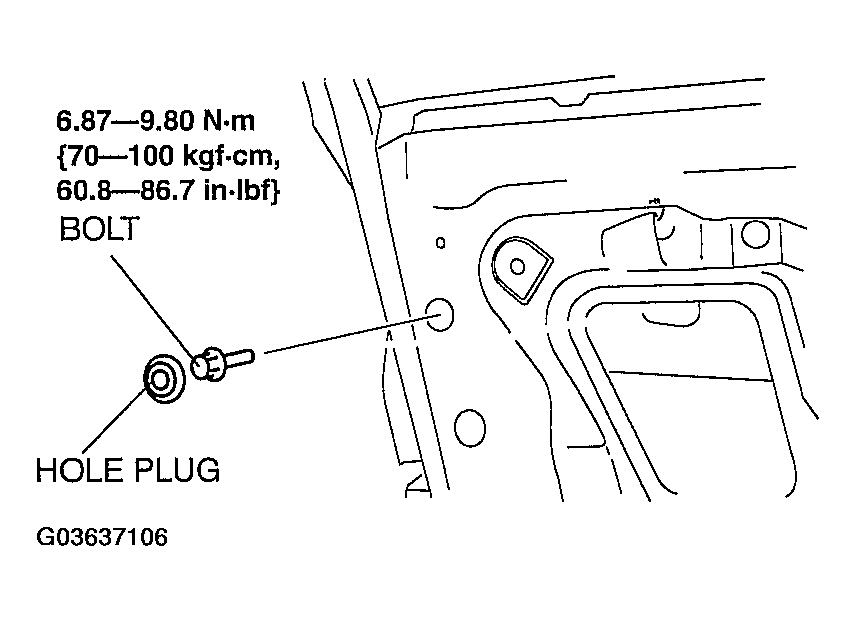 Courtesy of MAZDA MOTORS CORP.
- Remove the nut, then remove the pad.
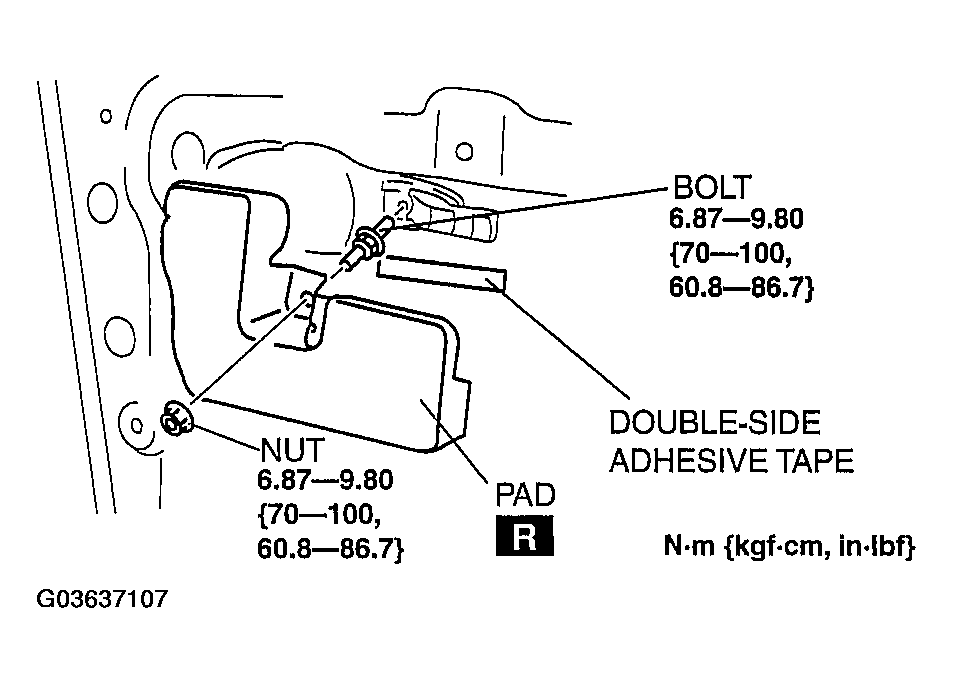 Courtesy of MAZDA MOTORS CORP.
- Remove the bolt.
- Detach the rod from the outer handle.
- Secure the rear part of the rear outer handle and, with the rear outer handle lever pulled outward (1), remove the rear part of the rear outer handle from the rear door.
- Install in the reverse order of removal.
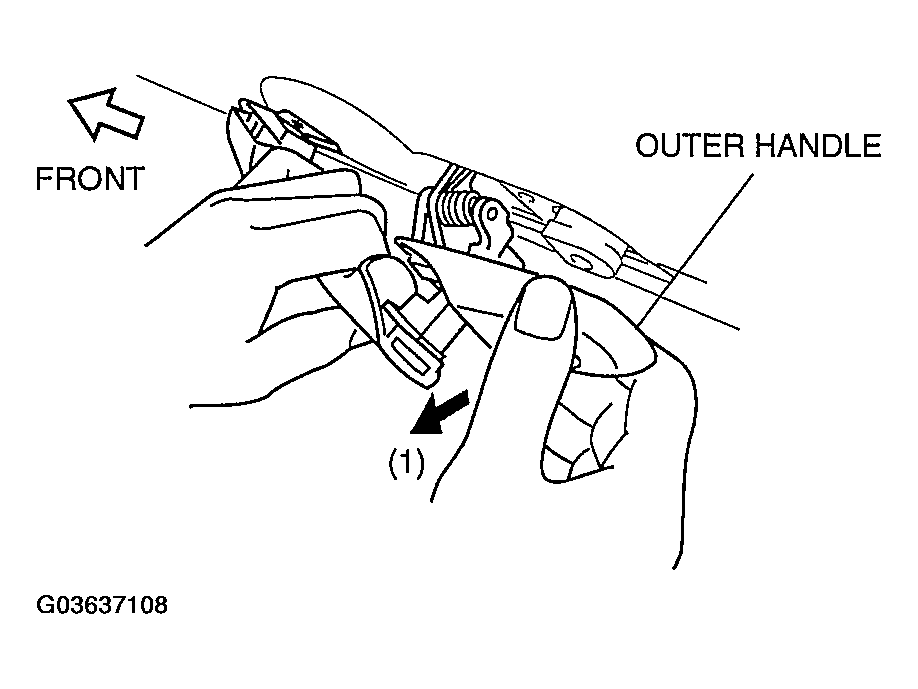 Courtesy of MAZDA MOTORS CORP.