Rear Window Glass Removal
- Disconnect the negative battery cable.
- Remove the following parts:
- Rear wiper arm and blade (See
REAR WIPER ARM AND BLADE REMOVAL/INSTALLATION
.)
- Liftgate lower trim (See
LIFTGATE LOWER TRIM REMOVAL/INSTALLATION
.)
- Rear spoiler (See
REAR SPOILER REMOVAL
.)
- High-mount brake light (See
HIGH MOUNT BRAKE LIGHT REMOVAL/INSTALLATION
.)
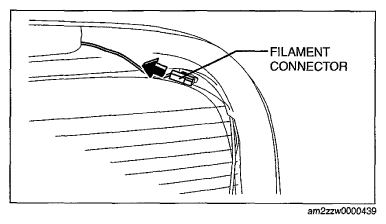
- Disconnect the filament connector.
 Courtesy of MAZDA MOTORS CORP.
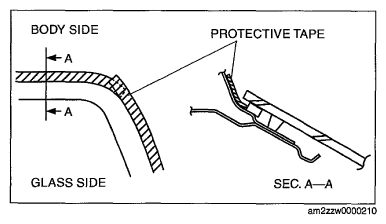
- Apply protective tape along the edge of the body.
NOTE:
- Overlap and adhere the protective tape to the corners to prevent damage.
 Courtesy of MAZDA MOTORS CORP.
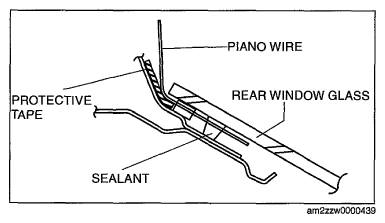
- Avoiding the pin on the inside of the vehicle, insert piano wire which has been cut to sufficient length.
WARNING:
- Using piano wire with bare hands can cause injury. Always wear gloves when using piano wire.
NOTE:
- Before removing the rear window glass from the body, mark the position of the glass by affixing tape to the glass and body panel.
 Courtesy of MAZDA MOTORS CORP.
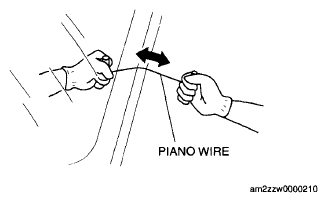
- Wind each end of piano wire around a bar.
NOTE:
- Use a long sawing action to spread the work over the whole length of piano wire to prevent it from breaking due to localized heating.
- Secure one end of piano wire, and while pulling the other end, cut the sealant around the rear window glass.
 Courtesy of MAZDA MOTORS CORP.
- Pinch the pin from the inside of the vehicle and detach it.
- Remove the rear window glass.
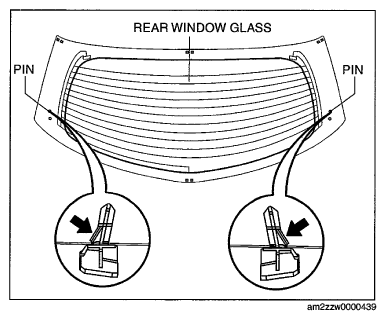 Courtesy of MAZDA MOTORS CORP.