Rear Outer Handle Removal/Installation
- Fully close the rear door glass.
- Disconnect the negative battery cable.
- Remove the rear door trim. (See
REAR DOOR TRIM REMOVAL/INSTALLATION
.)
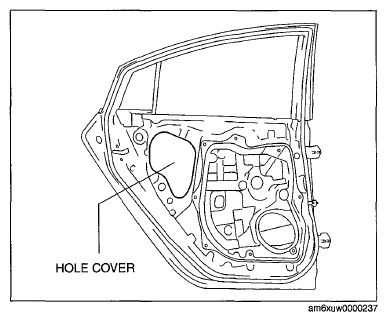
- Remove the hole cover.
 Courtesy of MAZDA MOTORS CORP.
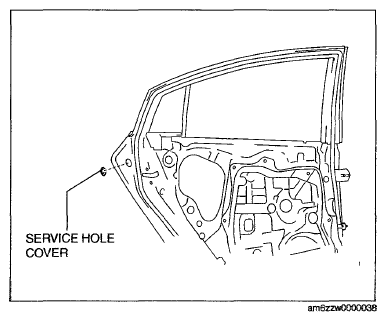
- Remove the service hole cover.
 Courtesy of MAZDA MOTORS CORP.
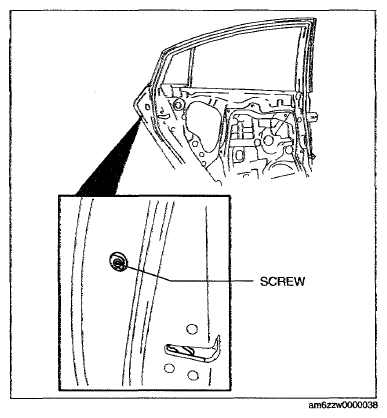
- Remove the screw from the service hole.
NOTE:
- The screw cannot be removed because of the stopper.
 Courtesy of MAZDA MOTORS CORP.
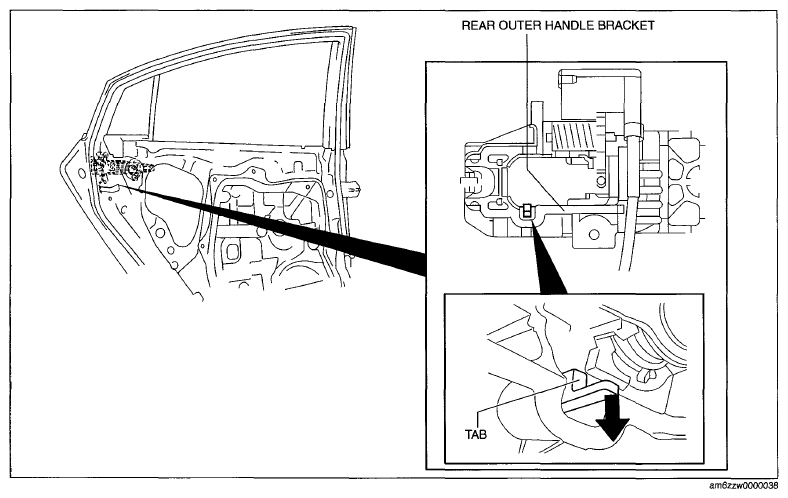
- Press the tab on the rear outer handle bracket in the direction of the arrow.
 Courtesy of MAZDA MOTORS CORP.
- Maintaining the condition in procedure 7, remove the outer handle garnish.
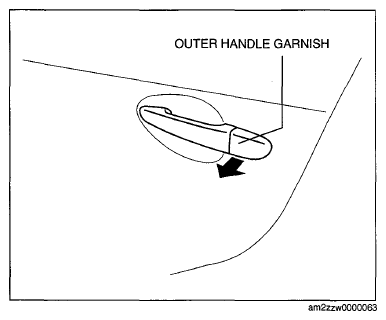 Courtesy of MAZDA MOTORS CORP.
- Remove the rear outer handle.
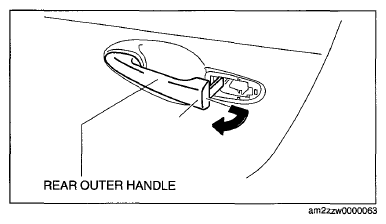 Courtesy of MAZDA MOTORS CORP.
- Loosen the screw.
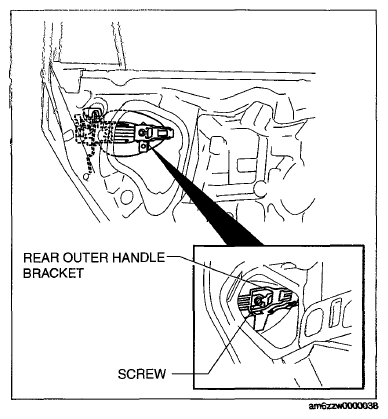 Courtesy of MAZDA MOTORS CORP.
- Press down the rod holder in the direction of arrow (1) and remove the rear outer handle bracket in the direction of arrow (2).
- Install in the reverse order of removal.
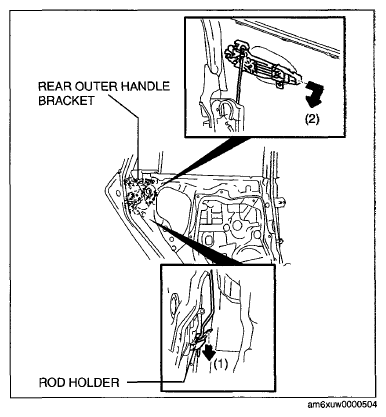 Courtesy of MAZDA MOTORS CORP.