Door Glass Adjustment
- Fully close the door glass.
- Remove the door trim. (See
DOOR TRIM REMOVAL/INSTALLATION
).
- Remove the door module panel. (See
DOOR MODULE PANEL REMOVAL/INSTALLATION
).
- Connect the power window regulator connector.
- Loosen the glass stopper installation bolts.
- Loosen the power window regulator and door glass tightening nuts.
- Align the door glass with the rear edge of the front beltline molding.
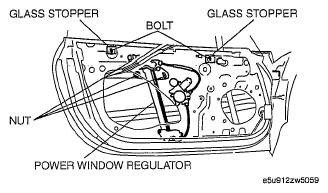 Courtesy of MAZDA MOTORS CORP.
NOTE:
- The standard position for the rear edge of the front beltline molding is 1 mm {0.04 in} from the rear edge of the door panel. If the standard position for the rear edge of the front beltline molding has deviated, align the rear edge of the door glass to the standard position for the rear edge position of the front beltline molding.
- Lightly tighten the power window regulator and door glass tightening nuts.
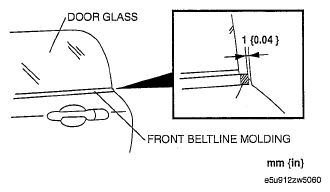 Courtesy of MAZDA MOTORS CORP.
- Adjust the clearance between the upper edge of the door glass and the door glass guide.
| Clearance |
Standard |
Minimum |
Maximum |
| a |
1.0 mm {0.04 in} |
0 mm {0 in} |
1.5 mm {0.06 in} |
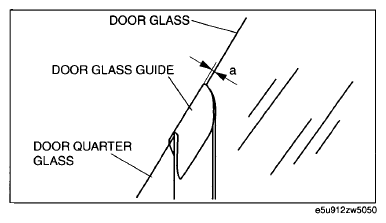 Courtesy of MAZDA MOTORS CORP.
- Adjust the door glass position.
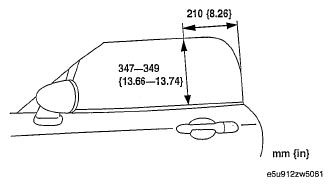 Courtesy of MAZDA MOTORS CORP.
- Tighten the power window regulator and door glass tightening nuts.
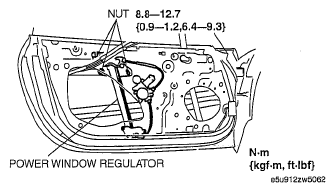 Courtesy of MAZDA MOTORS CORP.
- Tighten the bolts while pressing the glass stopper in the direction of the arrows shown in figure.
- Verify that the door glass opens and closes smoothly.
- Install the door module panel. (See
DOOR MODULE PANEL REMOVAL/INSTALLATION
).
- Install the door trim. (See
DOOR TRIM REMOVAL/INSTALLATION
).
- Close the door with the convertible top, detachable hardtop, or power retractable hardtop closed and verify that the door glass opens and closes smoothly.
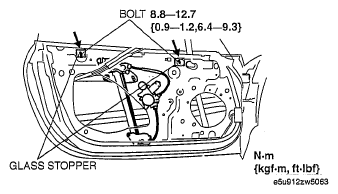 Courtesy of MAZDA MOTORS CORP.