Selector Lever Removal/Installation
- Disconnect the negative battery cable. (See NEGATIVE BATTERY CABLE DISCONNECTION/CONNECTION [SKYACTIV-G 2.5]
.)
- Remove the selector lever knob (type A).
- Perform the following procedure to remove the selector lever knob (type B).
NOTE:
- If the servicing is difficult, release the shift lock manually and shift the selector lever to the N position.
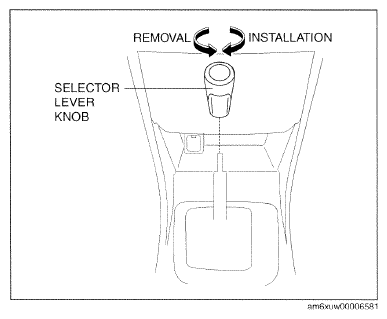 Courtesy of MAZDA MOTORS CORP.
- Insert the tool (width: 6 mm or less, thickness: 1 mm or less) as shown in the figure.
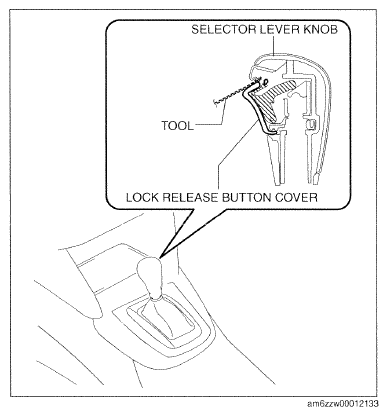 Courtesy of MAZDA MOTORS CORP.
- Move the tool in the direction of arrow (1) in the figure and detach the hook. Move the lock release button cover in the direction of arrow (2) in the figure and remove it.
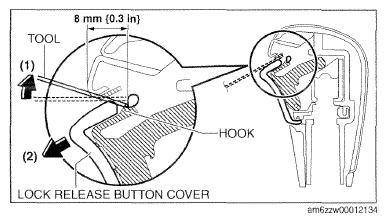 Courtesy of MAZDA MOTORS CORP.
- Remove the spring.
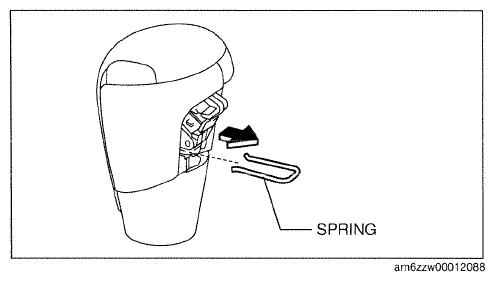 Courtesy of MAZDA MOTORS CORP.
- Remove the selector lever knob.
- Remove the front console. (See
FRONT CONSOLE REMOVAL/INSTALLATION
.)
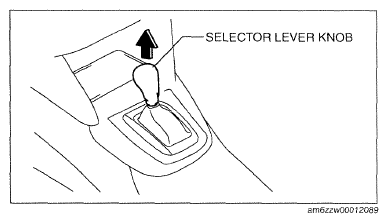 Courtesy of MAZDA MOTORS CORP.
- Disconnect the selector lever component connector.
- Remove the selector cable (selector lever side). (See
SELECTOR CABLE REMOVAL/INSTALLATION .)
- Remove the rear vent duct. (With rear vent) (See
REAR VENT DUCT REMOVAL/INSTALLATION
.)
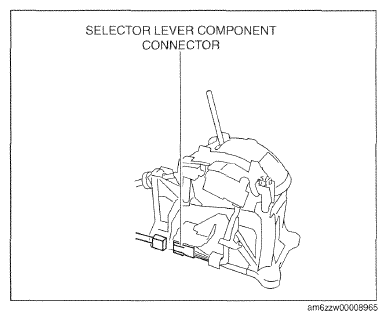 Courtesy of MAZDA MOTORS CORP.
- Remove the nuts from the selector lever.
- Remove the selector lever.
- Install the selector lever.
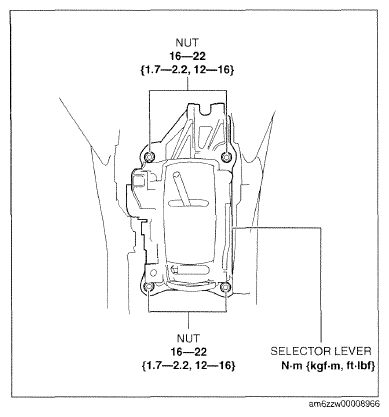 Courtesy of MAZDA MOTORS CORP.
- Install the nuts from the selector lever.
- Install the rear vent duct. (With rear vent) (See
REAR VENT DUCT REMOVAL/INSTALLATION
.)
- Install the selector cable (selector lever side). (See
SELECTOR CABLE REMOVAL/INSTALLATION .)
Courtesy of MAZDA MOTORS CORP.
- Connect the selector lever component connector.
- Install the front console. (See
FRONT CONSOLE REMOVAL/INSTALLATION
.)
- Perform the following procedure to install the selector lever knob (type B).
- Install the spring to the selector lever knob.
CAUTION:
- Install the spring so that it is stopped by the stopper.
Courtesy of MAZDA MOTORS CORP.
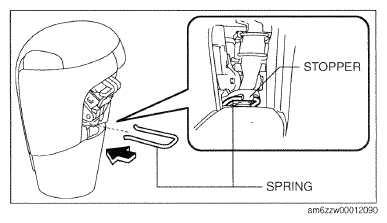 Courtesy of MAZDA MOTORS CORP.
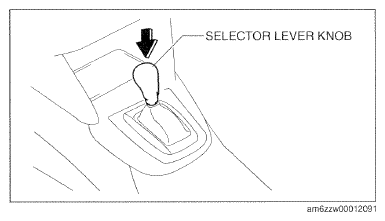
- Install the selector lever knob to the selector lever component.
 Courtesy of MAZDA MOTORS CORP.
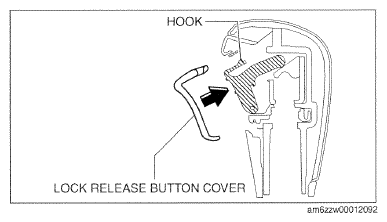
- Install the lock release button cover so that it engages with the hook of the selector lever knob.
 Courtesy of MAZDA MOTORS CORP.
- Install the selector lever knob (type A).
- Connect the negative battery cable. (See
NEGATIVE BATTERY CABLE DISCONNECTION/CONNECTION [SKYACTIV-G 2.5]
.)
Courtesy of MAZDA MOTORS CORP.