Hatchback (5HB)
- Remove sealant along the perimeter of the glass using a utility knife or scraper. (When reusing the glass)
- Clean and degrease an approx. 50 mm {2.0 in}
wide strip along the perimeter of the glass.
- Inspect the glass for cracks. If it is cracked, chamfer it using sandpaper.
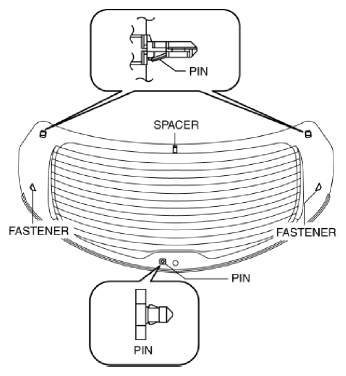
- Install spacers, pins and fastener to the glass as shown in the figure.
 Courtesy of MAZDA MOTORS CORP.
NOTE:
- When reusing the glass, align it with the alignment mark placed before the glass was removed.
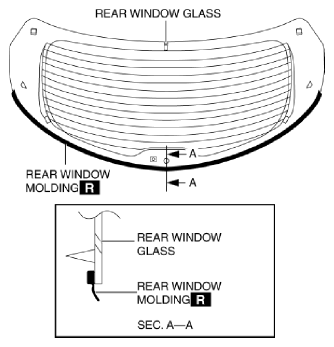
- Install the rear window moldong. (When reusing the glass)
 Courtesy of MAZDA MOTORS CORP.
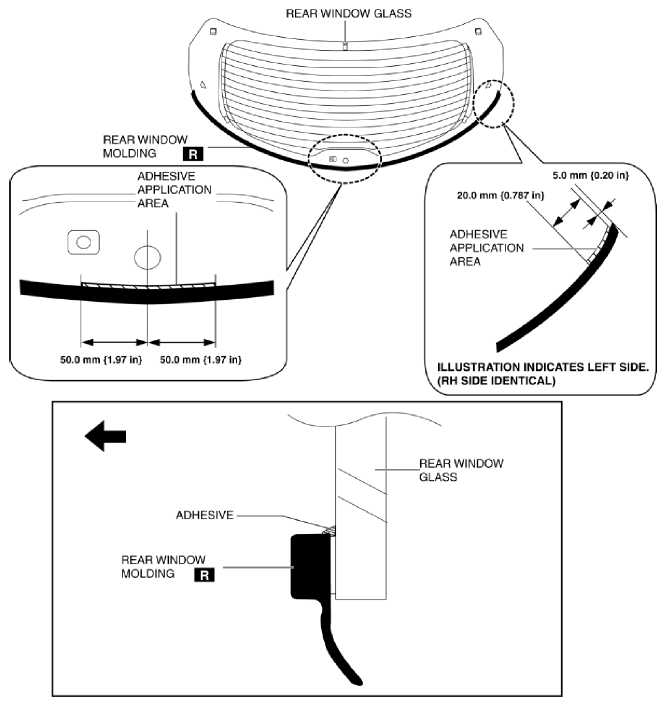
- Apply adhesive to the area shown in the figure.
 Courtesy of MAZDA MOTORS CORP.
NOTE:
- Follow the instructions for the product being used to determine the adhesive drying time.
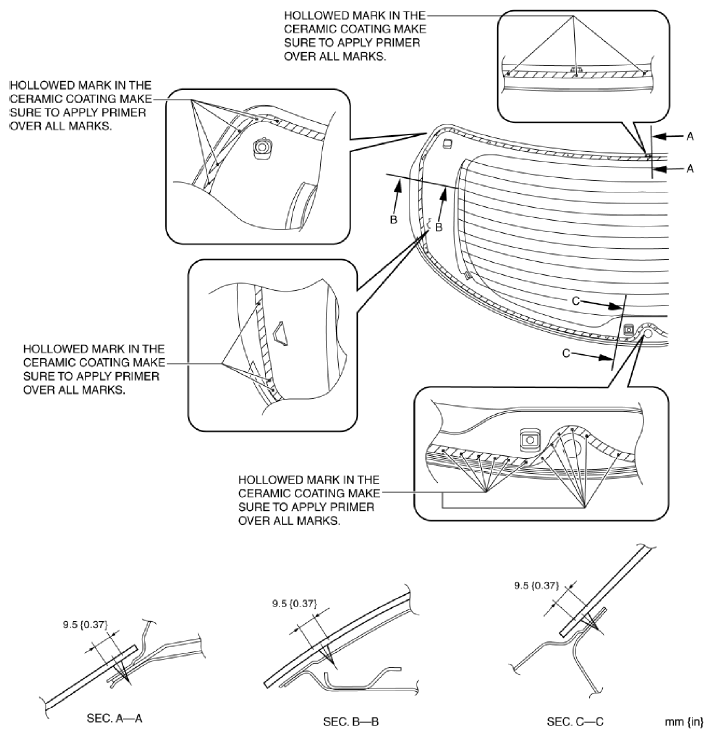
- Apply primer to the area of the glass shown in the figure.
- Follow the primer product instructions for the drying time.
CAUTION:
- To prevent weakening of the primer adhesion, keep the bonding surface free of dirt, moisture, and grease. Do not touch the surface with your hand.
NOTE:
- Apply primer to the hollowed marks in the ceramic coating.
 Courtesy of MAZDA MOTORS CORP.
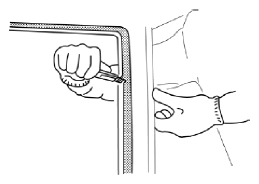
- Cut away the old sealant using a utility knife or scraper so that 1-2 mm {0.04-0.07 in}
thickness of sealant remains along the perimeter of the frame.
 Courtesy of MAZDA MOTORS CORP.
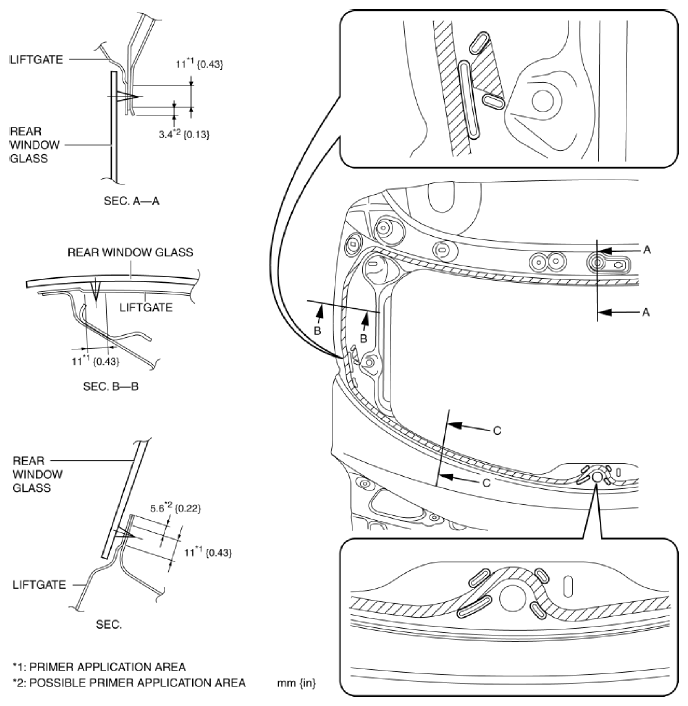
- Clean and degrease along the perimeter of the bonding area on the body.
- Apply primer to the area of the body shown in the figure.
- Follow the primer product instructions for the drying time.
CAUTION:
- To prevent weakening of the primer adhesion, keep the bonding surface free of dirt, moisture, and grease. Do not touch the surface with your hand.
 Courtesy of MAZDA MOTORS CORP.
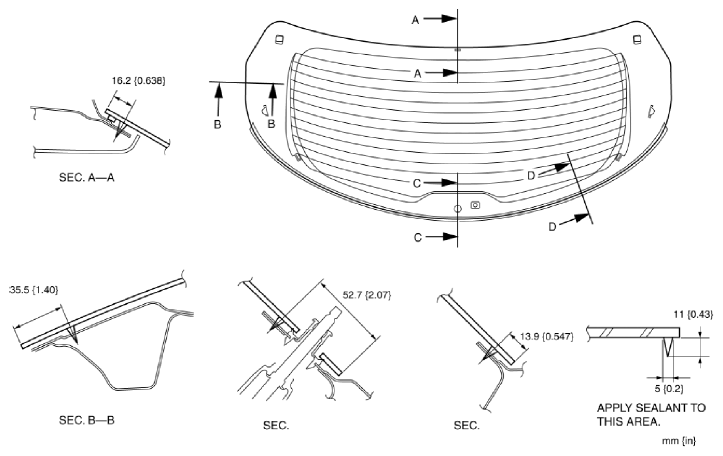
- Apply sealant to the area of the glass surface as shown in the figure.
 Courtesy of MAZDA MOTORS CORP.
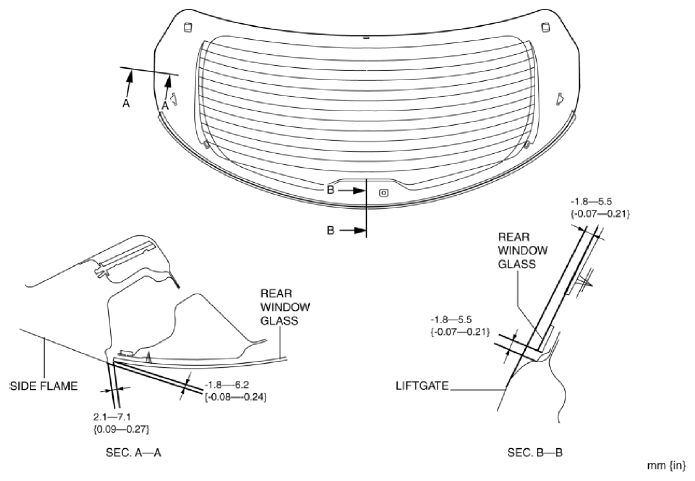
- Install the rear window glass.
- Verify that the gap at the upper and lower parts of the glass is within the specification shown in the figure, then press along the perimeter of the glass.
 Courtesy of MAZDA MOTORS CORP.
- Connect the filament connectors in the direction of the arrow in the order of (1), (2) shown in the figure.
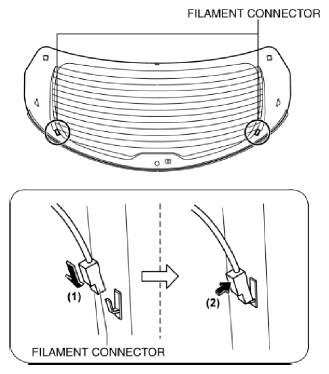 Courtesy of MAZDA MOTORS CORP.
- Connect the antenna feeder No. 3 connector.
- Install the following parts:
- Outer bushing (Refer to REAR WIPER MOTOR REMOVAL/INSTALLATION
.)
- Rear wiper motor (Refer to REAR WIPER MOTOR REMOVAL/INSTALLATION
.)
- Rear wiper arm and blade (Refer to REAR WIPER ARM AND BLADE REMOVAL/INSTALLATION
.)
- Rear spoiler (Refer to REAR SPOILER INSTALLATION
.)
- Liftgate lower trim (Refer to LIFTGATE LOWER TRIM REMOVAL/INSTALLATION
.)
- Liftgate recess (Refer to LIFTGATE RECESS REMOVAL/INSTALLATION
.)
- Liftgate side trim (Refer to LIFTGATE SIDE TRIM REMOVAL/INSTALLATION
.)
- Liftgate upper trim (Refer to LIFTGATE UPPER TRIM REMOVAL/INSTALLATION
.)
- Connect the negative battery cable. (Refer to NEGATIVE BATTERY CABLE DISCONNECTION/CONNECTION [SKYACTIV-G 2.0, SKYACTIV-G 2.5]
.)
- Allow the sealant to harden completely. Reference for sealant hardening time: 24 h
NOTE:
- Follow the product instructions for the sealant hardening time.