Center Display Removal/Installation
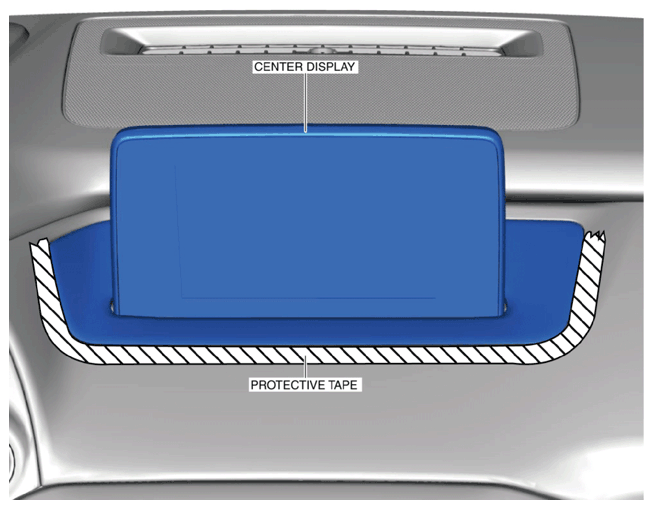
- Affix protective tape to the position shown in the figure.
CAUTION:
- If work using protective tape is performed in an area where the temperature can increase drastically or the protective tape is left adhered for a long period of time, tape adhesive could remain area where the protective tape was applied when the it is peeled off. When applying protective tape, avoid areas where the temperature of the tape can increase drastically and peel off the protective tape soon after the work is completed.
 Courtesy of MAZDA.
- Disconnect the negative battery terminal. (Refer to NEGATIVE BATTERY TERMINAL DISCONNECTION/CONNECTION
.)
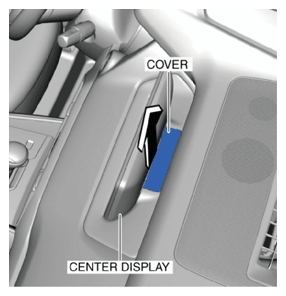
- Remove the cover shown in the figure.
 Courtesy of MAZDA.
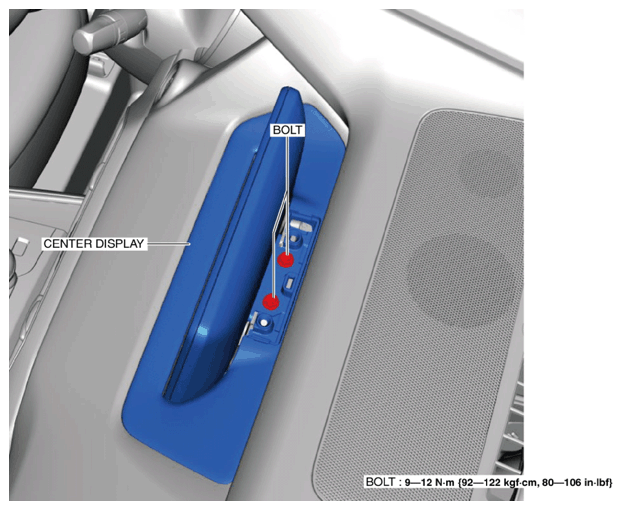
- Remove the bolts.
 Courtesy of MAZDA.
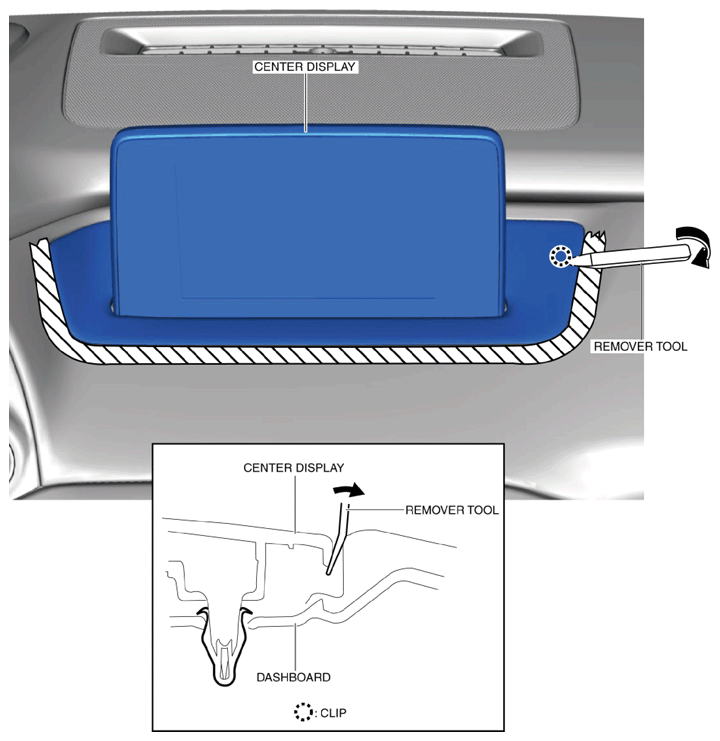
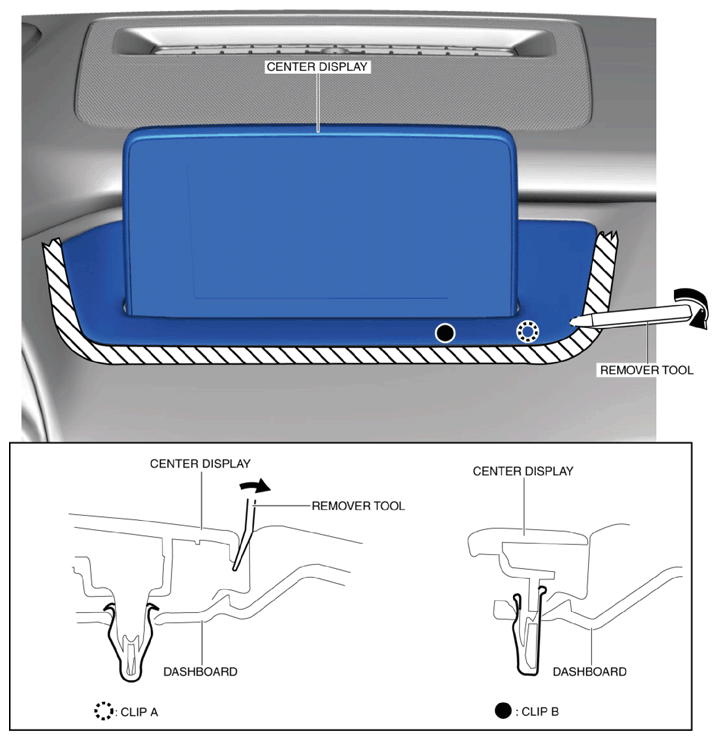
- Insert the remover tool into the position shown in the figure.
 Courtesy of MAZDA.
- Move the remover tool in the direction of the arrow shown in the figure and detach the clip from the dashboard.
- Insert the remover tool into the position shown in the figure.
 Courtesy of MAZDA.
- Move the remover tool in the direction of the arrow shown in the figure and detach clip A and B from the dashboard.
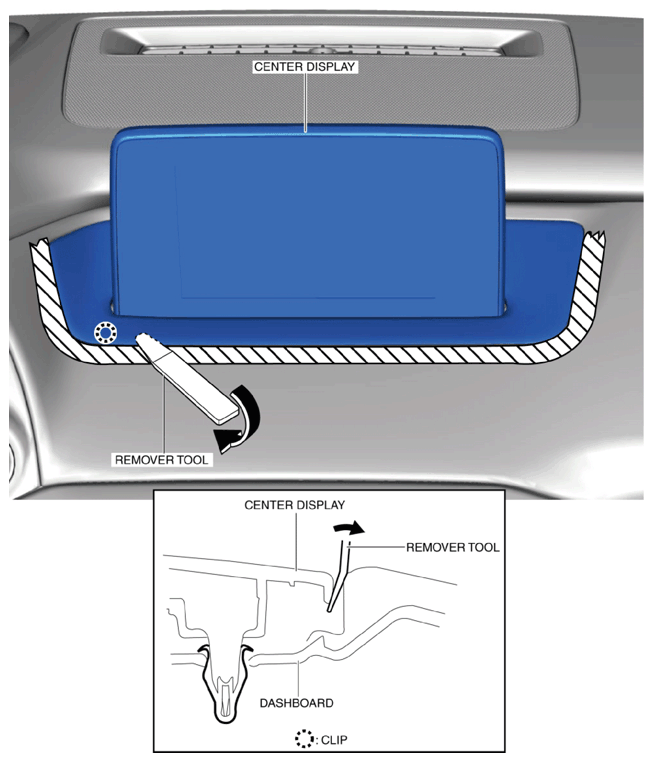
- Insert the remover tool into the position shown in the figure.
 Courtesy of MAZDA.
- Move the remover tool in the direction of the arrow shown in the figure and detach the clip from the dashboard.
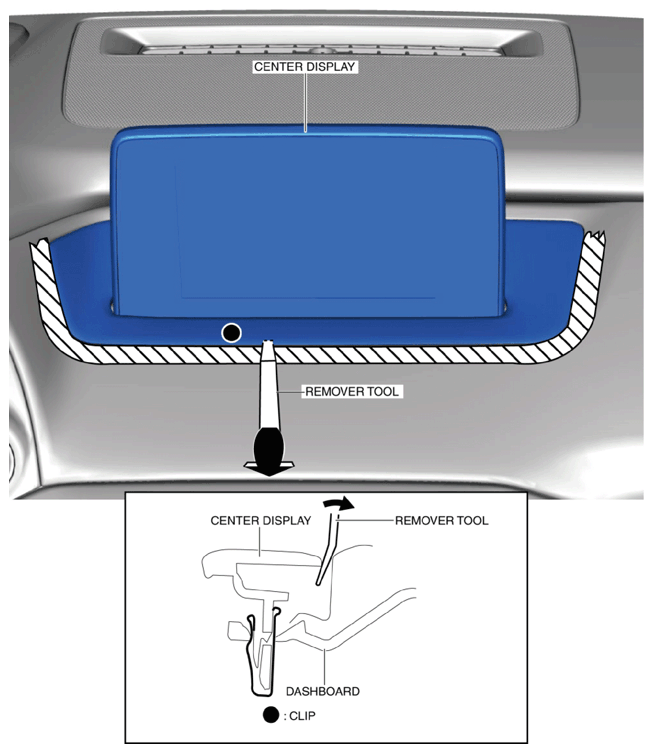
- Insert the remover tool into the position shown in the figure.
 Courtesy of MAZDA.
- Move the remover tool in the direction of the arrow shown in the figure and detach the clip from the dashboard.
- Insert the remover tool into the position shown in the figure.
 Courtesy of MAZDA.
- Move the remover tool in the direction of the arrow shown in the figure and detach the clip from the dashboard.
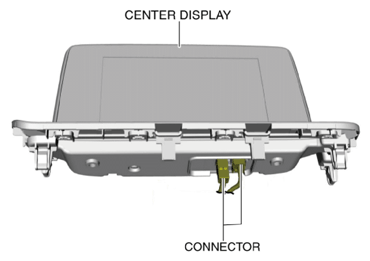
- Disconnect the connectors.
 Courtesy of MAZDA.
- Remove the center display.
- Install in the reverse order of removal.