Replacing Combiner
- Refer to ACTIVE DRIVING DISPLAY INSPECTION and stop the combiner at an angle of 10 degrees. (See ACTIVE DRIVING DISPLAY INSPECTION .)
- Switch the ignition off.
- Disconnect the negative battery cable. (See NEGATIVE BATTERY CABLE DISCONNECTION/CONNECTION
.)
- Remove the following parts:
- Meter hood (See METER HOOD REMOVAL/INSTALLATION
.)
- Upper column cover (See COLUMN COVER REMOVAL/INSTALLATION
.)
- Instrument cluster (See INSTRUMENT CLUSTER REMOVAL/INSTALLATION .)
- Lift up the cover hook in the direction of arrow (1) shown in the figure, move it in the direction of arrow (2), and detach the cover hooks from the active driving display.
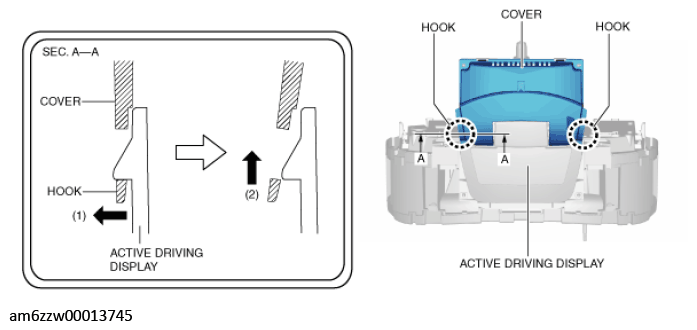 Courtesy of MAZDA MOTORS CORP.
- Press the cover tab in the direction of arrow (1) shown in the figure, move it in the direction of arrow (2), and detach the cover tabs from the active driving display.
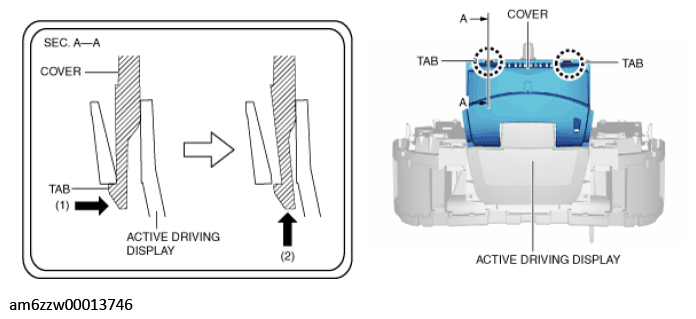 Courtesy of MAZDA MOTORS CORP.
- Remove the cover.
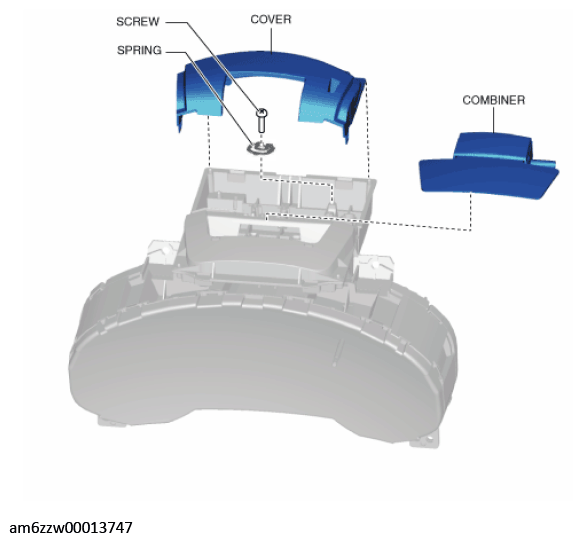 Courtesy of MAZDA MOTORS CORP.
- Remove the screw.
- Remove the spring.
- Remove the combiner. (See COMBINER ASSEMBLY NOTE .)
- Install in the reverse order of removal.