Shift Control Module Removal/Installation: Installation
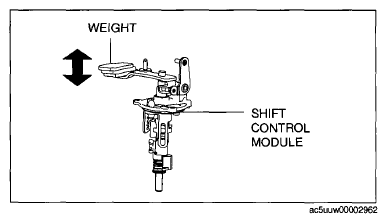
- Verify that the shift control module is in the neutral position.
NOTE:
- If the shift control module is in the neutral position, the shift lever with the weight can be moved up and down to a large extent.
 Courtesy of MAZDA MOTORS CORP.
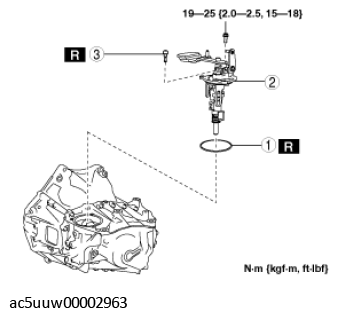
- Install the shift control module in the order shown in the figure.
 Courtesy of MAZDA MOTORS CORP.
 COMPONENT DESCRIPTION
| 1 |
O-ring |
| 2 |
Shift control module |
| 3 |
Breather |
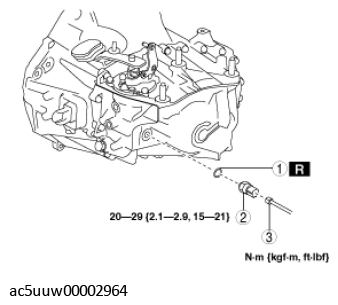
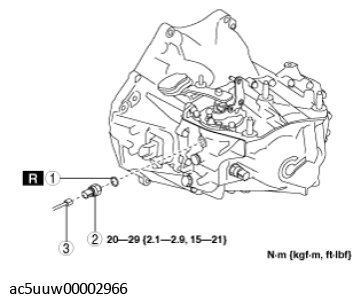
- Install the back-up light switch in the order shown in the figure.
 Courtesy of MAZDA MOTORS CORP.
 COMPONENT DESCRIPTION
| 1 |
Gasket |
| 2 |
Back-up light switch |
| 3 |
Connector |
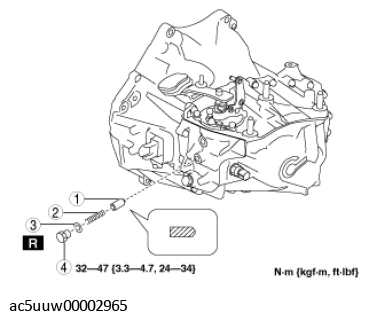
- Install the detent ball pin in the order shown in the figure.
 Courtesy of MAZDA MOTORS CORP.
 COMPONENT DESCRIPTION
| 1 |
Detent ball pin |
| 2 |
Spring |
| 3 |
Gasket |
| 4 |
Plug |
- Install the neutral switch in the order shown in the figure.
 Courtesy of MAZDA MOTORS CORP.
 COMPONENT DESCRIPTION
| 1 |
Gasket |
| 2 |
Neutral switch |
| 3 |
Connector |
- Connect the control cable to the manual transaxle.
 Courtesy of MAZDA MOTORS CORP.
- Make sure that the shift lever can be shifted smoothly.
- Install the battery, battery tray and PCM component. (See BATTERY REMOVAL/INSTALLATION
.)
- Install the air cleaner, air hose and fresh air duct as a single unit. (See INTAKE-AIR SYSTEM REMOVAL/INSTALLATION
.)
- Connect the negative battery cable. (See NEGATIVE BATTERY CABLE DISCONNECTION/CONNECTION
.)
- Install the plug hole plate. (See PLUG HOLE PLATE REMOVAL/INSTALLATION
.)