Test No. 1
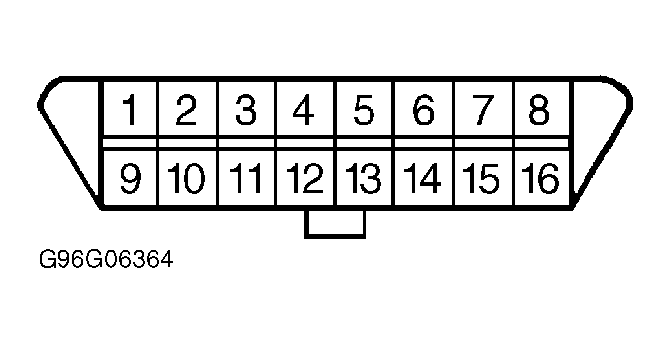
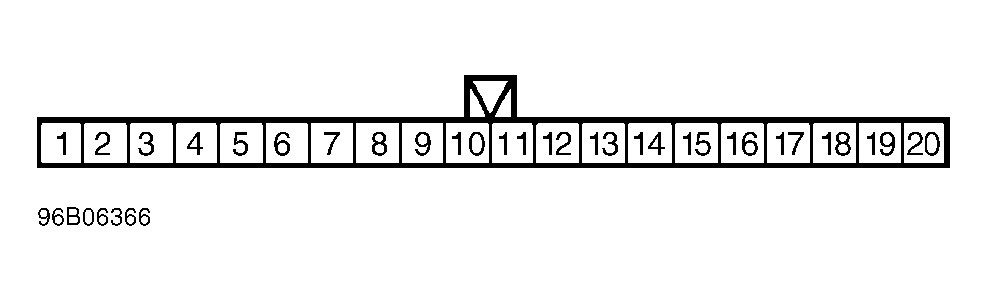
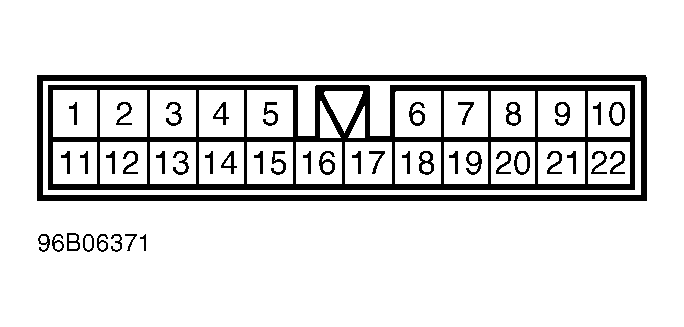
- Check for battery voltage at DLC terminal No. 16 (Red/Black wire). If battery voltage is not present, go to next step. If battery voltage is present, go to step 5).
- Check for battery voltage at Joint Connector 1 (J/C 1) terminal No. 6 (Red/Black wire). Connector is located behind top left of instrument panel. If battery voltage is present, go to step 5). If battery voltage is not present, go to next step.
- Check for battery voltage at joint connector terminal No. 3 (Red/Black wire). If battery voltage is present, repair connector. If battery voltage is not present, go to next step.
- Check for battery voltage at junction block connector B-50 (behind right kick panel) terminal No. 10 (Red/Black wire). If battery voltage is present, repair open Red/Black wire.
- Using an ohmmeter, check for continuity between ground and DLC connector terminals No. 4 (Black wire) and No. 5 (Black/White wire). If continuity is not present, repair open to ground. If continuity is present, scan tool is faulty. Retest using a known-good scan tool.
 Courtesy of MITSUBISHI MOTOR SALES OF AMERICA.
 Courtesy of MITSUBISHI MOTOR SALES OF AMERICA.
 Courtesy of MITSUBISHI MOTOR SALES OF AMERICA.
 Courtesy of MITSUBISHI MOTOR SALES OF AMERICA.
 Courtesy of MITSUBISHI MOTOR SALES OF AMERICA.
 Courtesy of MITSUBISHI MOTOR SALES OF AMERICA.
 Courtesy of MITSUBISHI MOTOR SALES OF AMERICA.
 Courtesy of MITSUBISHI MOTOR SALES OF AMERICA.
 Courtesy of MITSUBISHI MOTOR SALES OF AMERICA.
 Courtesy of MITSUBISHI MOTOR SALES OF AMERICA.
Courtesy of MITSUBISHI MOTOR SALES OF AMERICA.
Courtesy of MITSUBISHI MOTOR SALES OF AMERICA.
Courtesy of MITSUBISHI MOTOR SALES OF AMERICA.
 Courtesy of MITSUBISHI MOTOR SALES OF AMERICA.
Courtesy of MITSUBISHI MOTOR SALES OF AMERICA.