Battery Cables: Installation: Positive
 Courtesy of MITSUBISHI MOTOR SALES OF AMERICA.
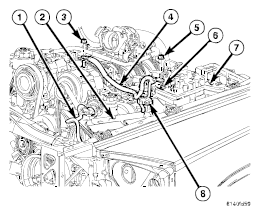
- Position the battery positive cable (4 and 8) in the vehicle.
- Install the nut (5) securing the cable to the Integrated Power Module (IPM) (7) stud (6). Tighten the nut to 11.5 N.m (105 in. lbs.).
- Install the nut (3) securing the cable (4) to the alternator. Tighten the nut to 14 N.m (125 in. lbs.).
 Courtesy of MITSUBISHI MOTOR SALES OF AMERICA.
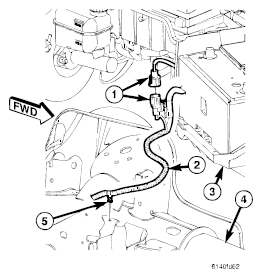
- Install the cable pushpin (5) into the left frame rail (4).
- Connect the starter solenoid wire harness connector (1).
 Courtesy of MITSUBISHI MOTOR SALES OF AMERICA.
- Raise the vehicle on a hoist.
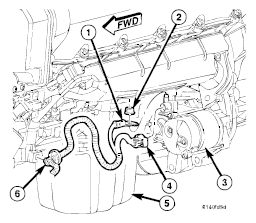
- Install the nut (2) securing the cable (1) to the starter solenoid (3). Tighten the nut to 13 N.m (115 in. lbs.).
- Connect the battery cable retaining pushpin (6) securing the cable to the engine block.
- Lower the vehicle.
 Courtesy of MITSUBISHI MOTOR SALES OF AMERICA.
- Connect the battery positive cable terminal clamp (8). Tighten the battery terminal clamp pinch-bolt hex nut to 5 N.m (45 in. lbs.).
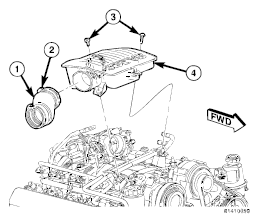 Courtesy of MITSUBISHI MOTOR SALES OF AMERICA.
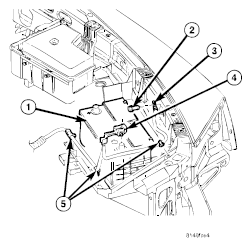
- Position the resonator (4) into the vehicle. Install the bolts (3) into the air intake resonator (4) and tighten the band clamp (2) on the air inlet tube (1).
- Connect the battery negative cable terminal clamp. Tighten the battery terminal clamp pinch-bolt hex nut to 5 N.m (45 in. lbs.).
- Check the vehicle for normal operation.