Bolt Length, Number and Location:
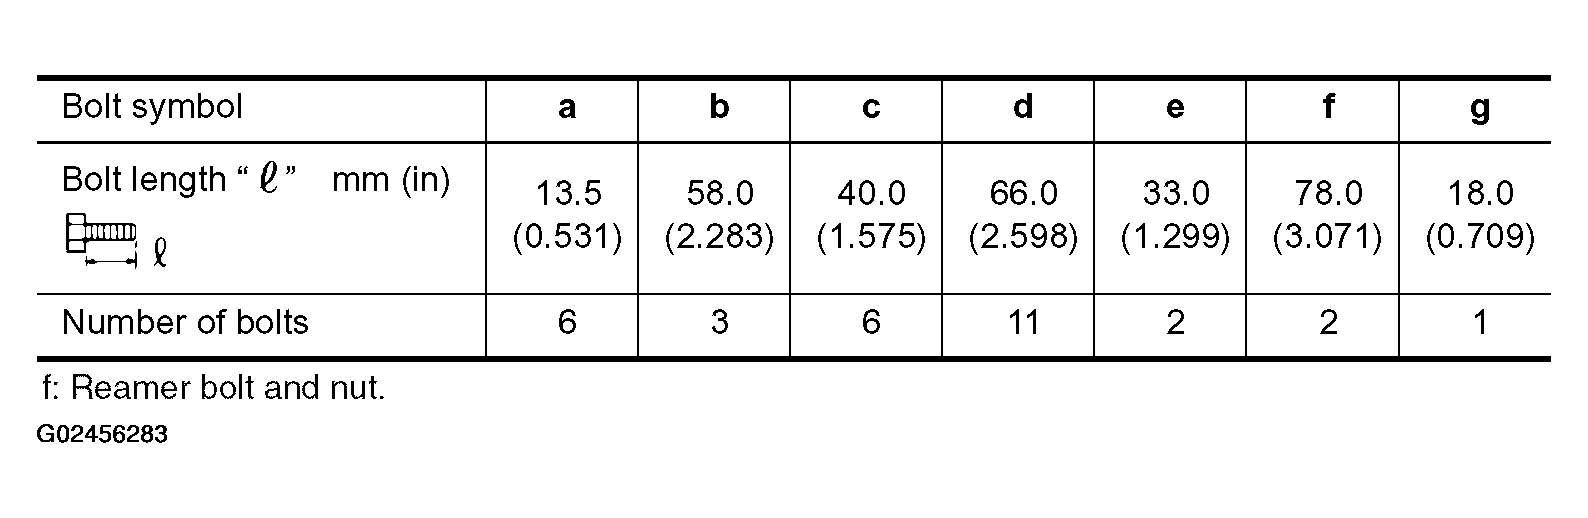 Courtesy of NISSAN MOTOR CO., U.S.A.
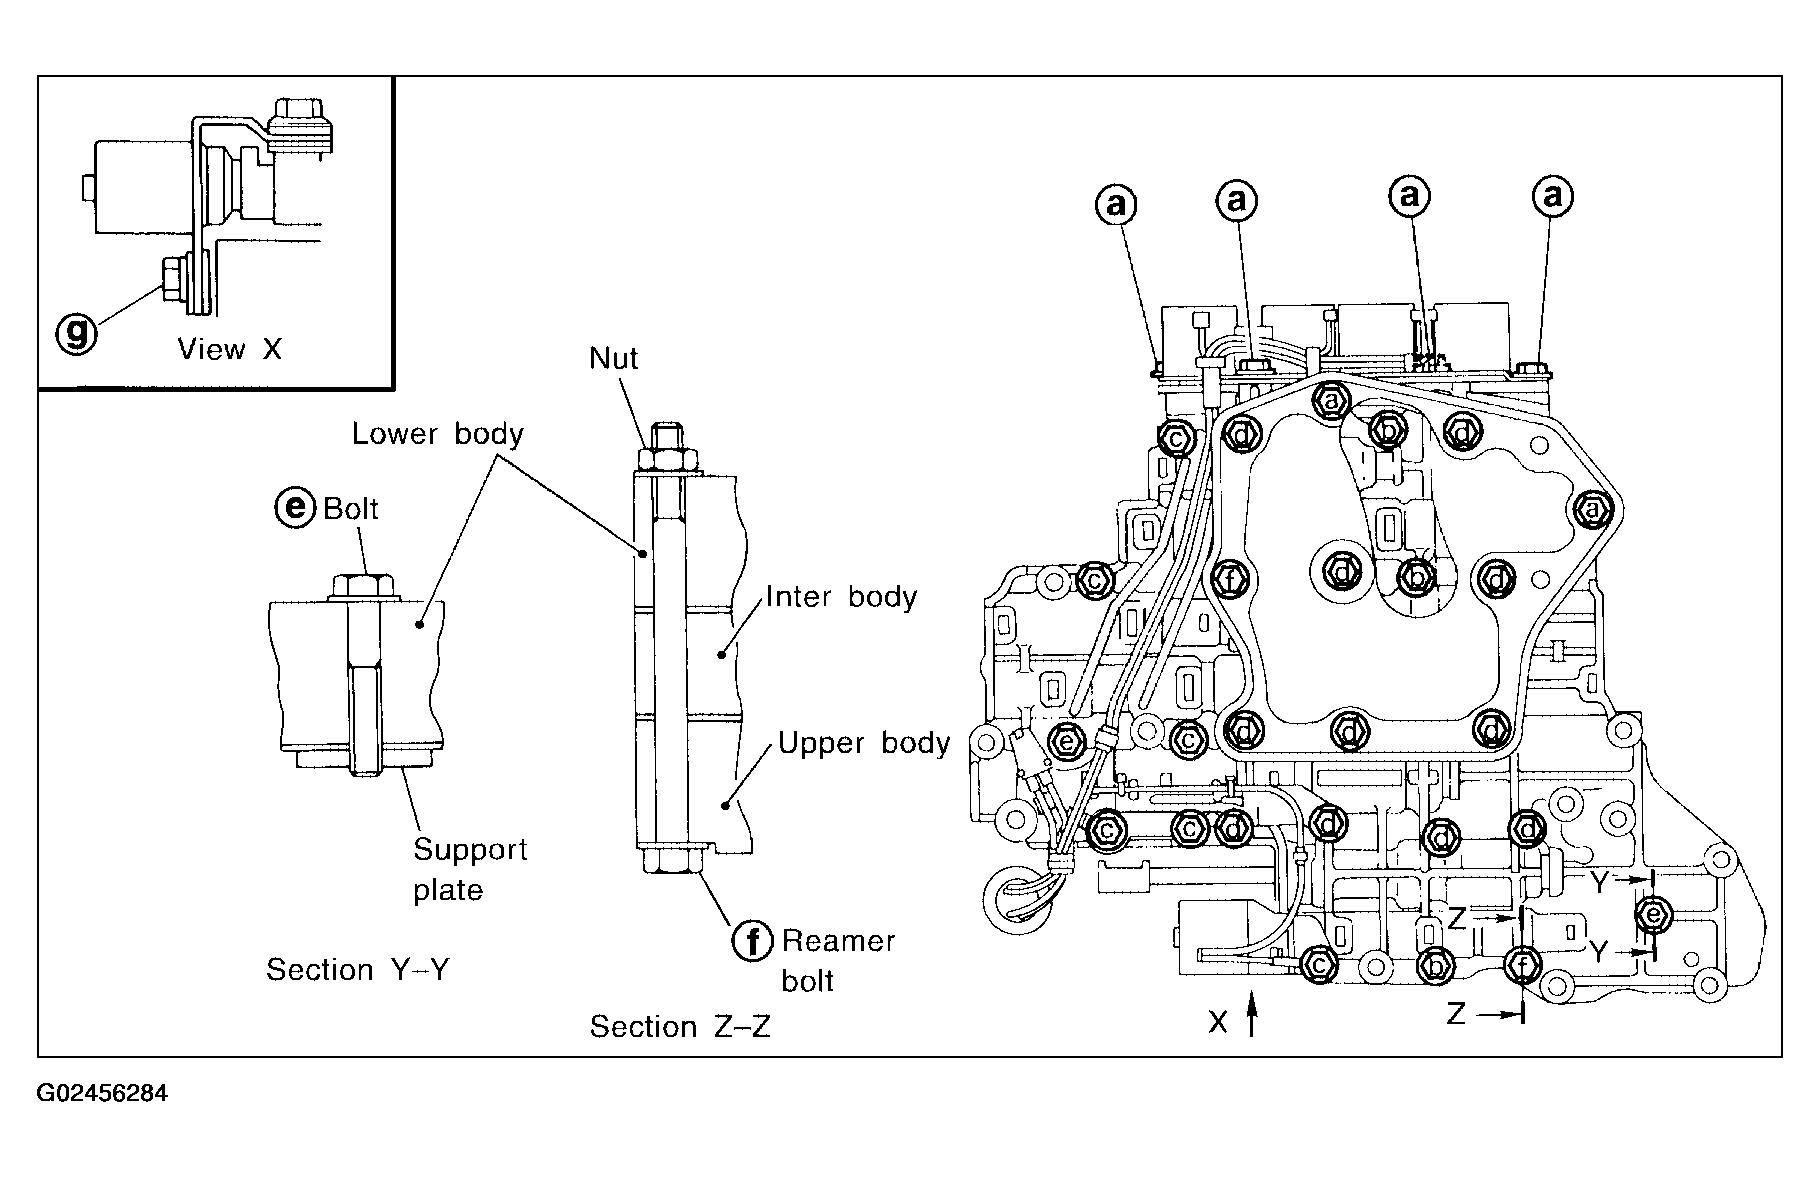 Courtesy of NISSAN MOTOR CO., U.S.A.
- Remove bolts a
, d
and nut f
and remove oil strainer from control valve assembly.
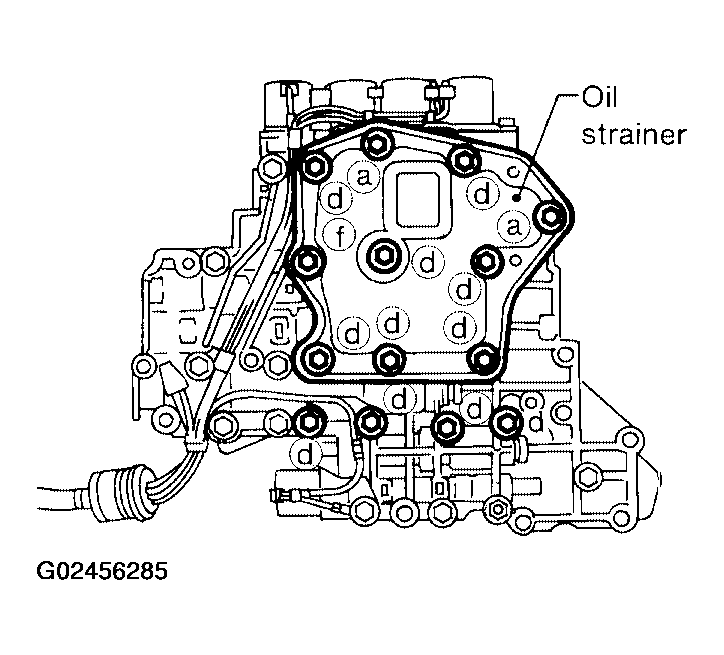 Courtesy of NISSAN MOTOR CO., U.S.A.
- Remove solenoid valve assembly and line pressure solenoid valve from control valve assembly.
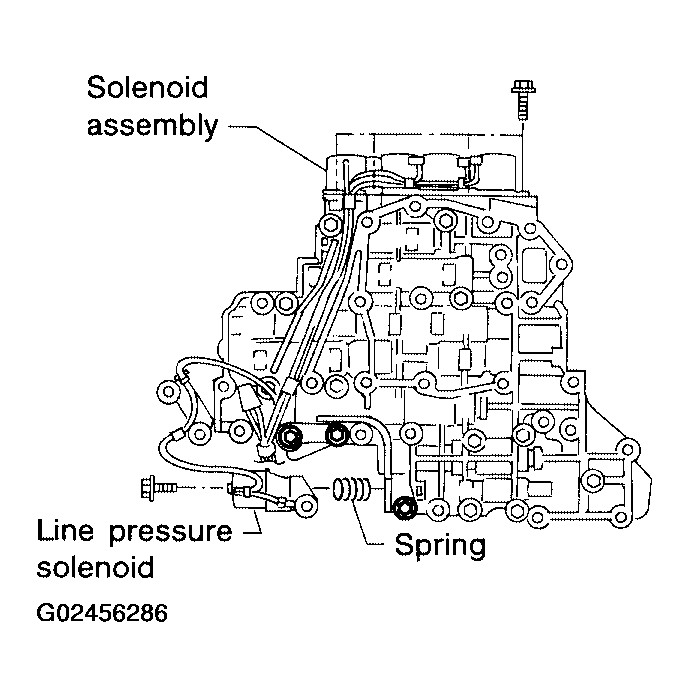 Courtesy of NISSAN MOTOR CO., U.S.A.
- Remove O-rings from solenoid valves and terminal body.
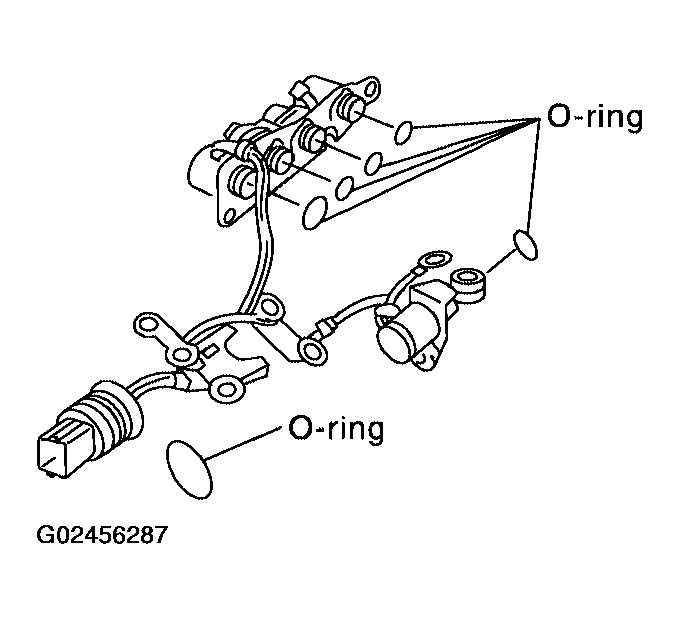 Courtesy of NISSAN MOTOR CO., U.S.A.
- Place upper body facedown, and remove bolts b
, c
and nut f
.
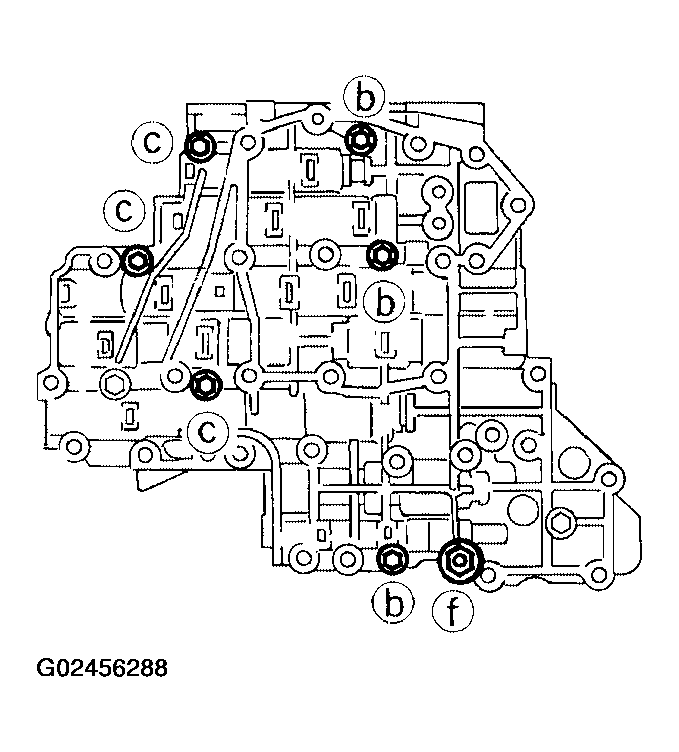 Courtesy of NISSAN MOTOR CO., U.S.A.
- Remove inter body from lower body.
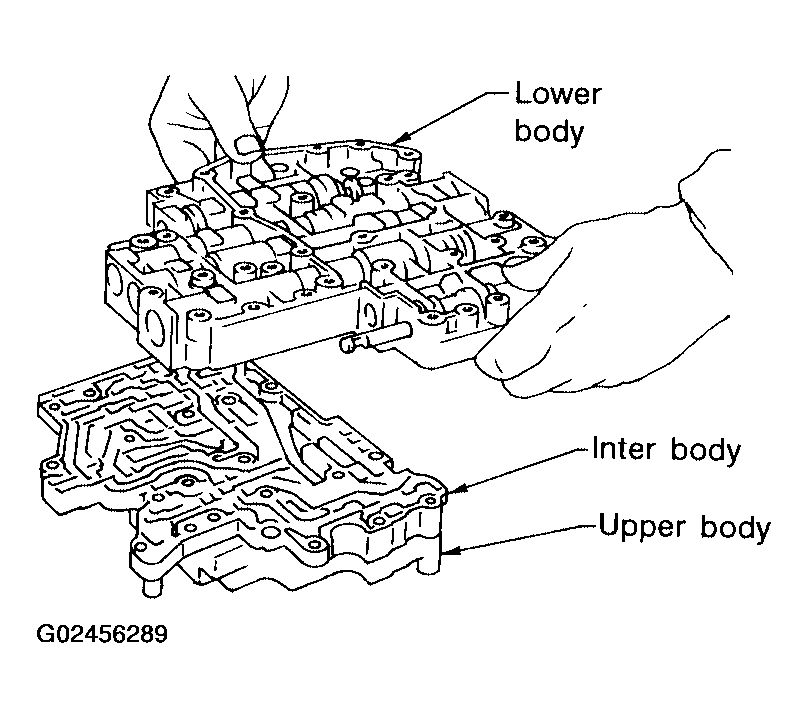 Courtesy of NISSAN MOTOR CO., U.S.A.
- Turn over lower body, and remove accumulator support plate.
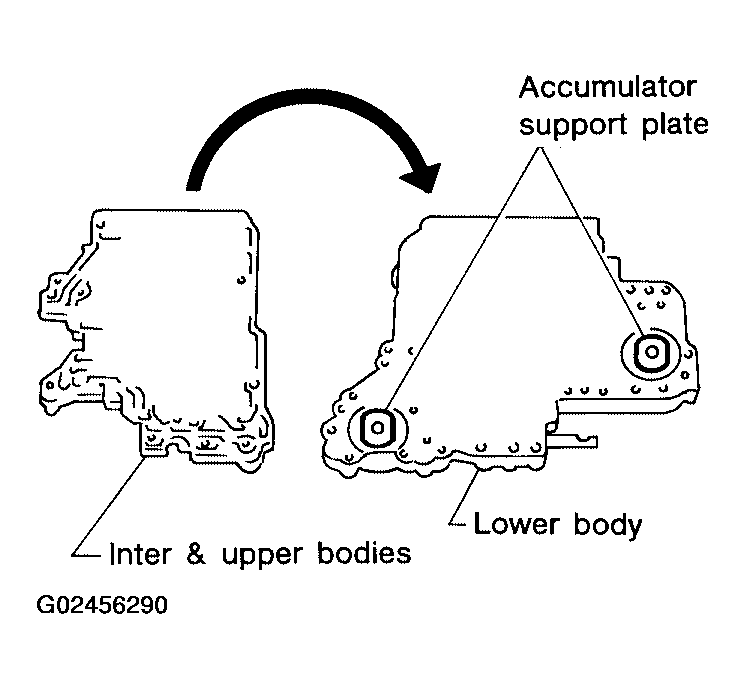 Courtesy of NISSAN MOTOR CO., U.S.A.
- Remove bolts e
, separating plate and separating gasket from lower body.
- Remove check balls and oil cooler relief valve springs from lower body.
- Be careful not to lose check balls and oil cooler relief valve springs.
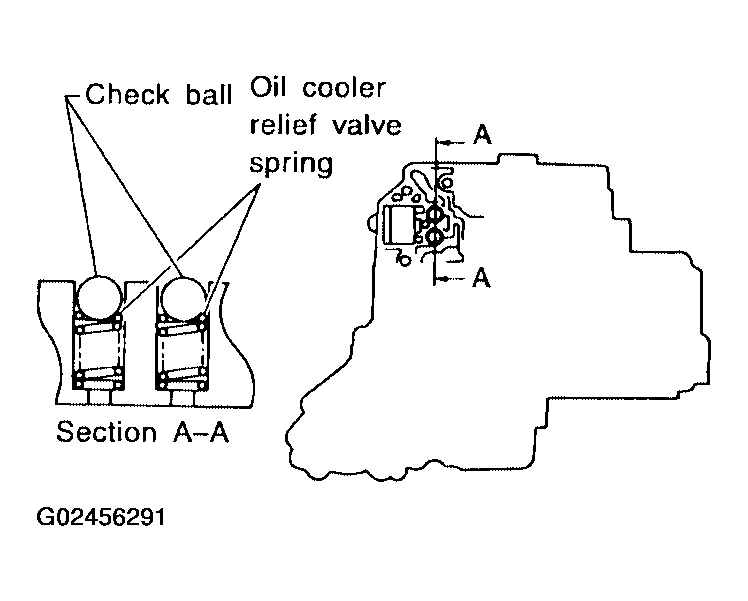 Courtesy of NISSAN MOTOR CO., U.S.A.
- Remove inter body from upper body.
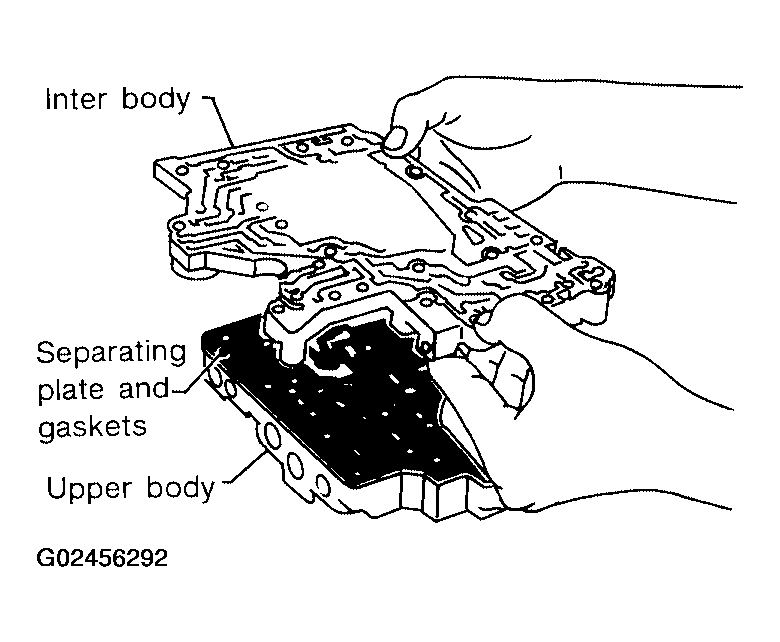 Courtesy of NISSAN MOTOR CO., U.S.A.
- Check to see that steel balls are properly positioned in inter body and then remove them.
- Be careful not to lose steel balls.
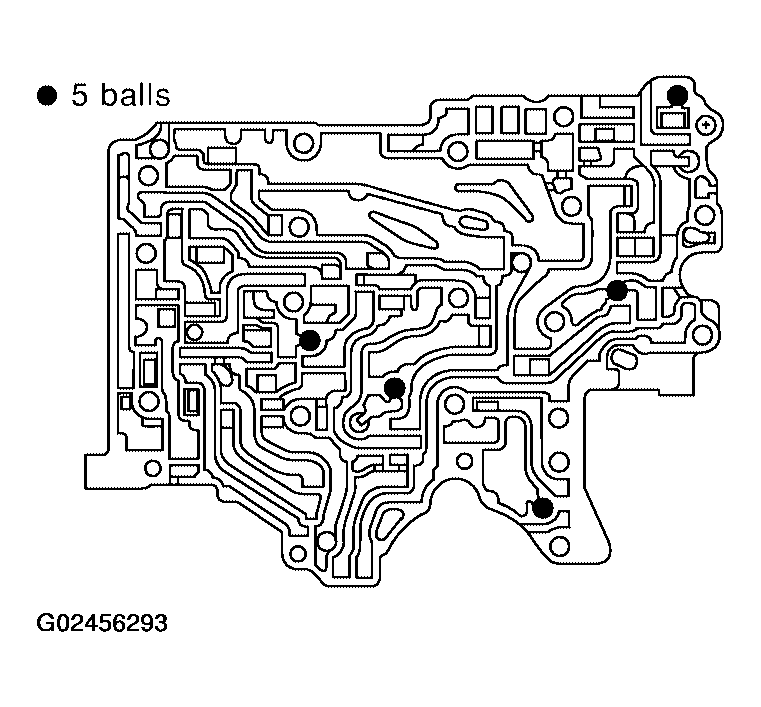 Courtesy of NISSAN MOTOR CO., U.S.A.
- Check to see that the steel balls are properly positioned in upper body and then remove them.
- Be careful not to lose steel balls.
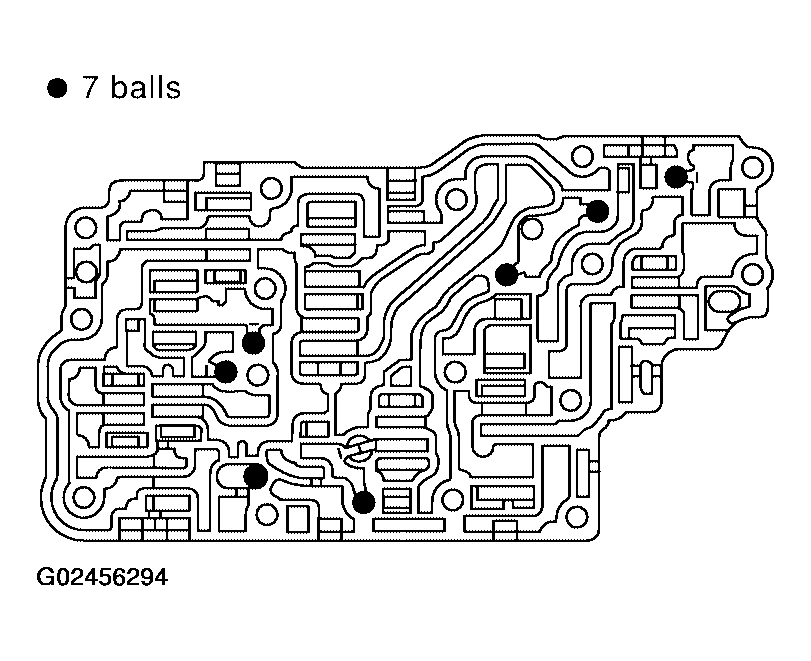 Courtesy of NISSAN MOTOR CO., U.S.A.