- Remove paper rolled around bearing retainer.
- Install thrust washer on bearing retainer.
CAUTION:
Align pawls of thrust washer with holes of bearing retainer.
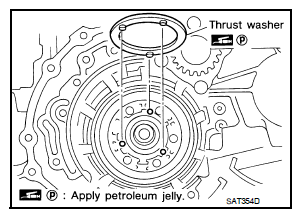 Courtesy of NISSAN MOTOR CO., U.S.A.
- Install forward clutch assembly and overrun clutch assembly (1) into transaxle case.
CAUTION:
- Align teeth of low & reverse brake drive plates before installing.
- Make sure that bearing retainer seal rings are not spread.
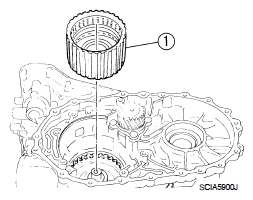 Courtesy of NISSAN MOTOR CO., U.S.A.
- Install needle bearing (1) on bearing retainer.
CAUTION:
Be careful with the direction of needle bearing.
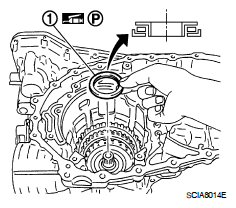 Courtesy of NISSAN MOTOR CO., U.S.A.
- Install thrust washer (1) on overrun clutch hub (2).
CAUTION:
Align pawls of thrust washer (1) with holes of overrun clutch hub (2).
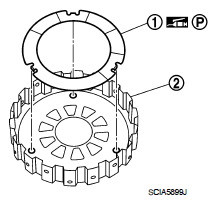 Courtesy of NISSAN MOTOR CO., U.S.A.
- Install overrun clutch hub (1) into forward clutch drum.
CAUTION:
Align teeth of overrun clutch drive plates before installing.
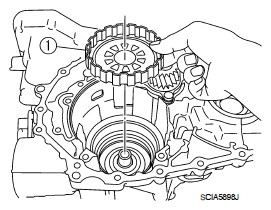 Courtesy of NISSAN MOTOR CO., U.S.A.
- Hold forward clutch hub, and check that rear internal gear locks when tried to rotate counterclockwise.
CAUTION:
If rear internal gear rotates counterclockwise, check installation direction of forward one-way clutch.
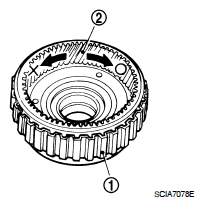 Courtesy of NISSAN MOTOR CO., U.S.A.
- Install needle bearing (1) on rear internal gear (2).
CAUTION:
Be careful with the direction of needle bearing (1).
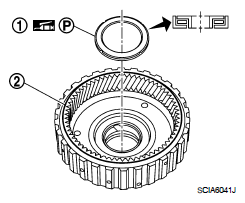 Courtesy of NISSAN MOTOR CO., U.S.A.
- Install rear internal gear (1) and forward clutch hub (2) as a set into forward clutch drum.
CAUTION:
Align teeth of forward clutch drive plates before installing.
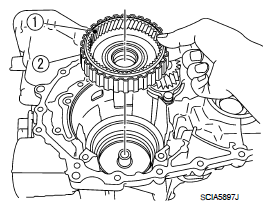 Courtesy of NISSAN MOTOR CO., U.S.A.
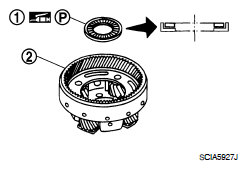
- Install needle bearing (1) on rear planetary carrier (2).
CAUTION:
Be careful with the direction of needle bearing (1).
 Courtesy of NISSAN MOTOR CO., U.S.A.
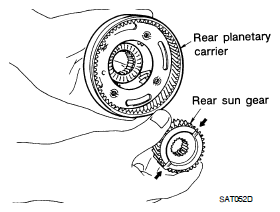
- Install rear sun gear on rear planetary carrier.
CAUTION:
Be careful with the direction of rear sun gear.
 Courtesy of NISSAN MOTOR CO., U.S.A.
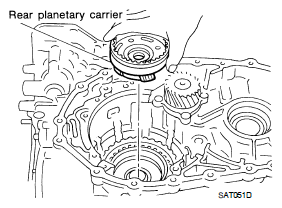
- Install rear planetary carrier in transaxle case.
 Courtesy of NISSAN MOTOR CO., U.S.A.
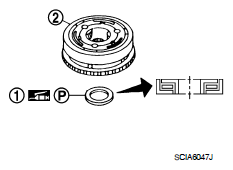
- Install needle bearing (1) on front planetary carrier (2).
CAUTION:
Be careful with the direction of needle bearing (1).
 Courtesy of NISSAN MOTOR CO., U.S.A.
- Install low one-way clutch to front planetary carrier by turning it in the direction of unlock.
- Check that low one-way clutch rotates counterclockwise around front planetary carrier. Then try to turn it clockwise and check that it is locked.
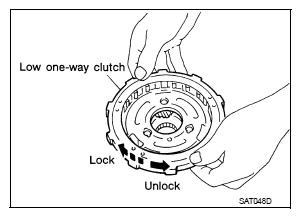 Courtesy of NISSAN MOTOR CO., U.S.A.
- Install front planetary carrier (2) and low one-way clutch (1) as a set into transaxle case.
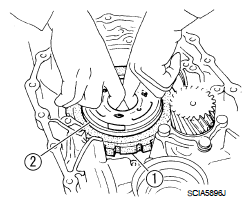 Courtesy of NISSAN MOTOR CO., U.S.A.
- Install snap ring into transaxle case using a flat-bladed screwdriver.
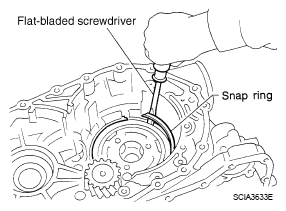 Courtesy of NISSAN MOTOR CO., U.S.A.
- Install needle bearing (1) on front sun gear (2).
CAUTION:
Be careful with the direction of needle bearing (1).
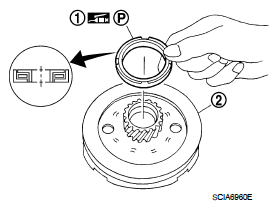 Courtesy of NISSAN MOTOR CO., U.S.A.
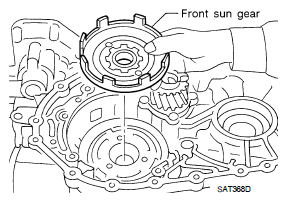
- Install front sun gear on front planetary carrier.
 Courtesy of NISSAN MOTOR CO., U.S.A.
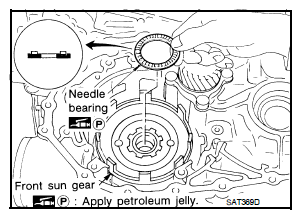
- Install needle bearing on front sun gear.
CAUTION:
Be careful with the direction of needle bearing.
 Courtesy of NISSAN MOTOR CO., U.S.A.
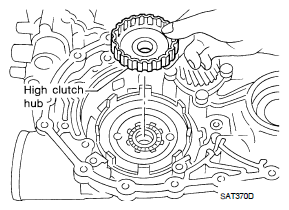
- Install high clutch hub on front sun gear.
 Courtesy of NISSAN MOTOR CO., U.S.A.
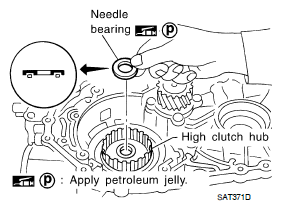
- Install needle bearing on high clutch hub.
CAUTION:
Be careful with the direction of needle bearing.
- Remove paper rolled around input shaft assembly (high clutch drum).
 Courtesy of NISSAN MOTOR CO., U.S.A.
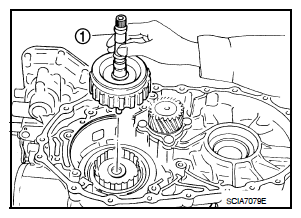
- Install input shaft assembly (high clutch assembly) (1).
CAUTION:
Align teeth of high clutch drive plates before installing.
 Courtesy of NISSAN MOTOR CO., U.S.A.
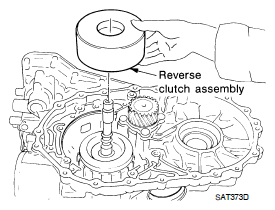
- Install reverse clutch assembly.
CAUTION:
Align teeth of reverse clutch drive plates before installing.
 Courtesy of NISSAN MOTOR CO., U.S.A.