Transaxle Case Components
- Remove driven sprocket-to-driven sprocket support thrust washer (if necessary). Remove driven sprocket support assembly. See Figure
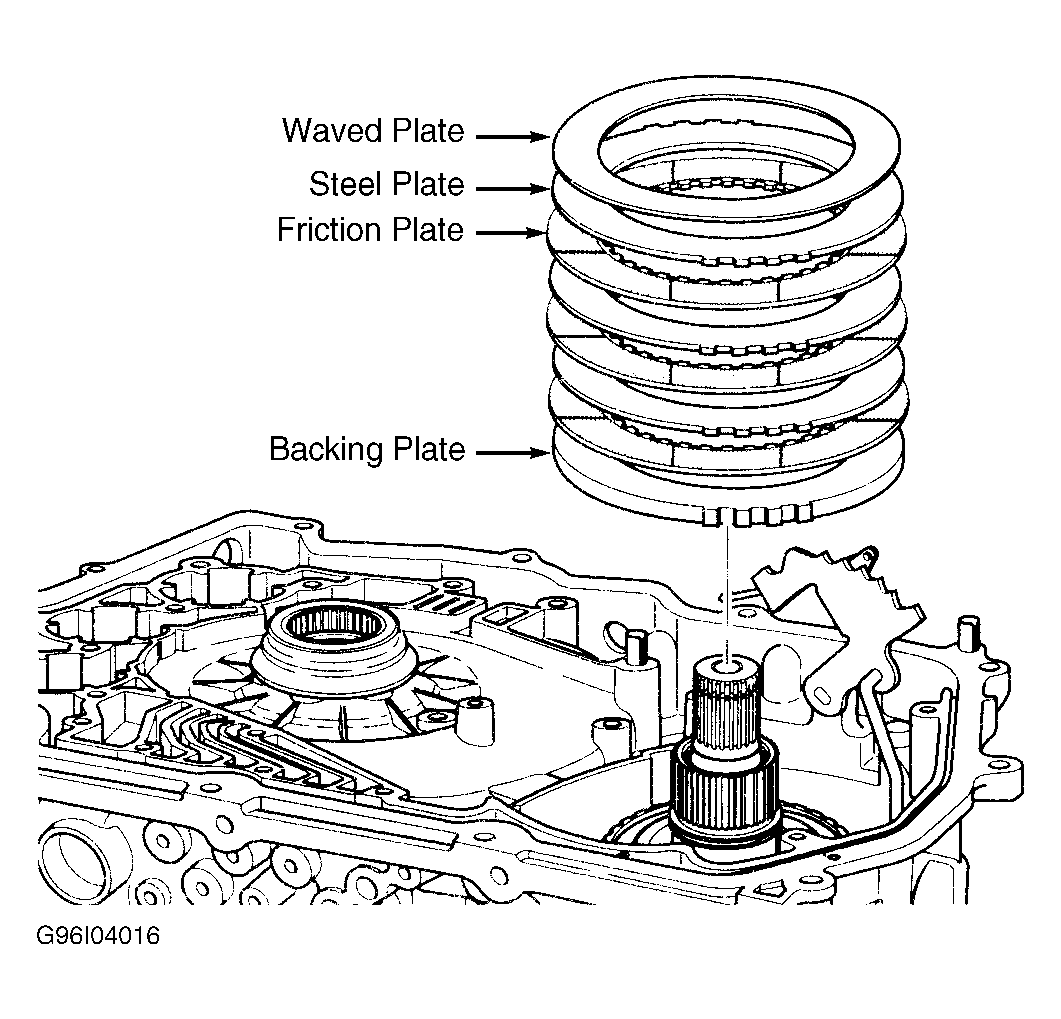
. Remove 2nd clutch plates. Plates consist of one waved plate, 3 steel plates, 3 friction plates and one backing plate. See Fig 1
. Remove driven sprocket support-to-reverse input clutch housing thrust washer. Remove reverse input clutch housing and 2nd roller clutch assembly.
- Remove intermediate/4th band. See Figure
. Remove coast and direct clutch and reaction carrier assembly. Keep bearing assembly and selective thrust washer located on top of assembly. Remove input carrier and reaction internal gear assembly. Bearing assembly is permanently located in input carrier. Remove input carrier-to-forward clutch hub thrust bearing. Thrust bearing may have remained with input carrier. See Figure
.
- Remove input flange and forward clutch hub assembly. Remove forward clutch hub-to-race thrust washer. Thrust washer may be attached to forward clutch hub. Remove forward clutch assembly and low and reverse band. Using a screwdriver, remove forward clutch support snap ring from transaxle case.
- Remove forward clutch support and low roller clutch assembly. Keep forward clutch housing-to-forward clutch support thrust bearing with forward clutch support assembly. Parking pawl may need to be depressed to allow forward clutch support to be removed.
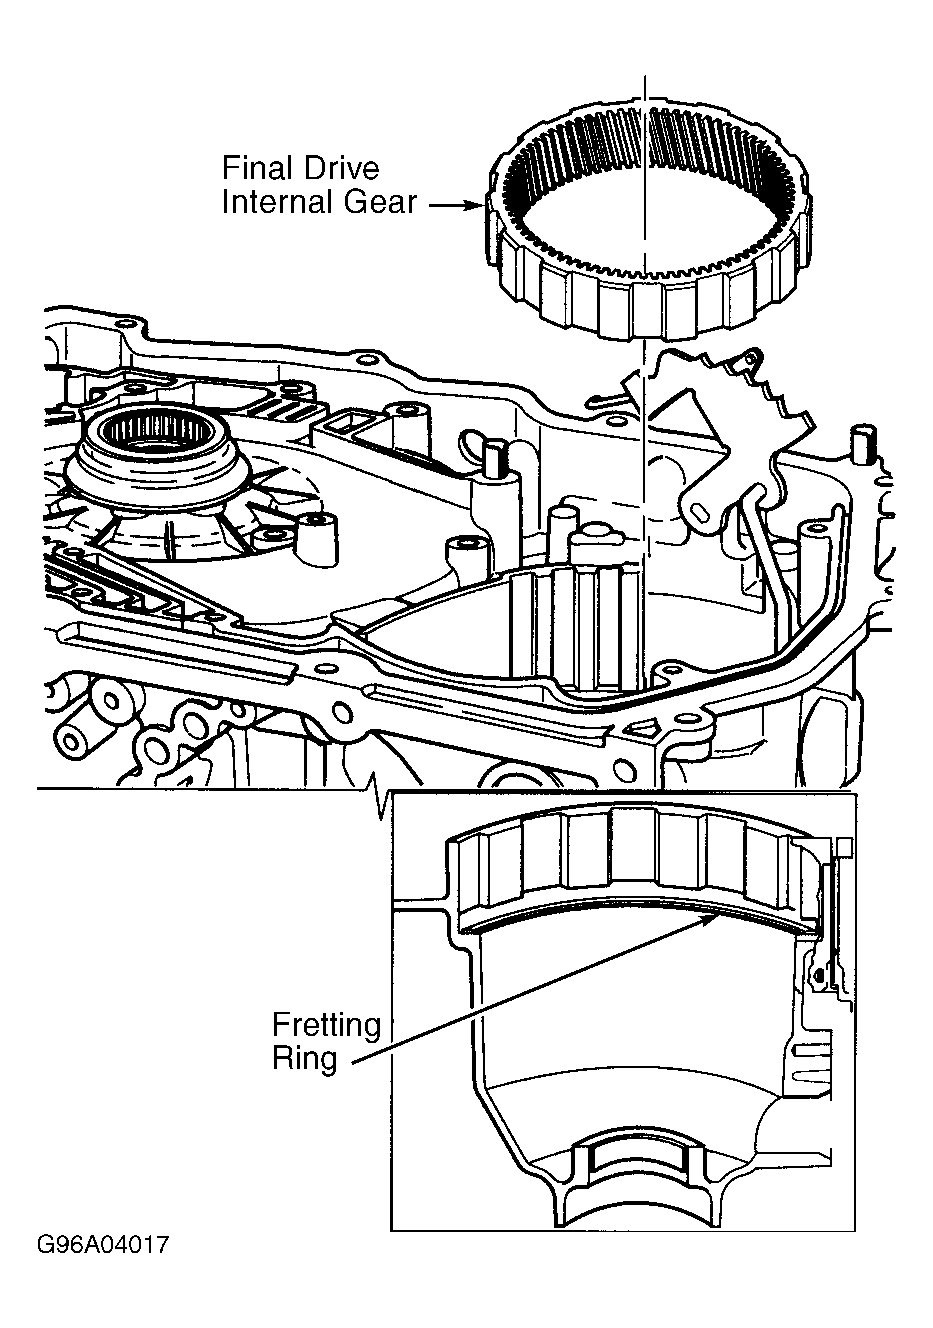
- Remove output shaft, final drive assembly and final drive sun gear as an assembly. Remove differential carrier-to-case thrust bearing. Thrust bearing may be removed with final drive assembly. Remove final drive internal gear.
NOTE:
Fretting ring is located in case ring groove. See Fig 2
. Fretting ring does not need to be removed unless it appears to be damaged.
 Courtesy of GENERAL MOTORS CORP.
 Courtesy of GENERAL MOTORS CORP.
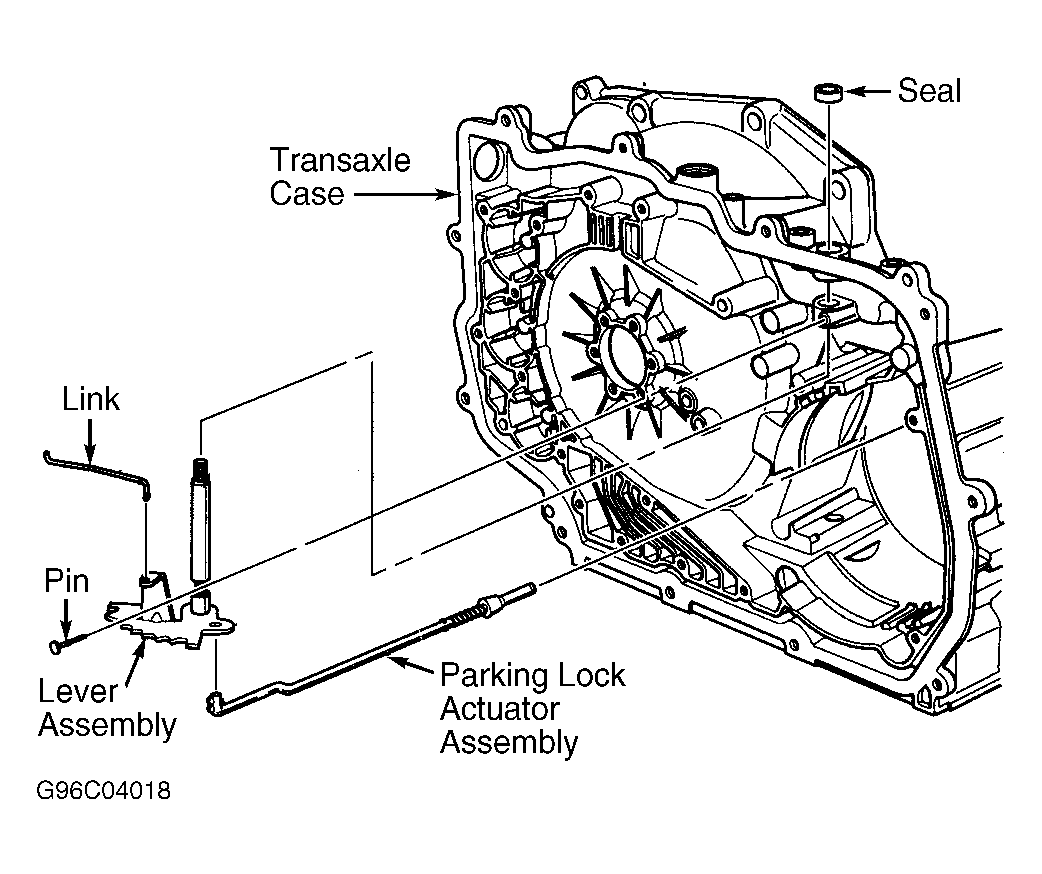
- Remove manual shaft-to-transaxle case pin. Remove manual shaft and detent lever assembly by pushing manual shaft into case. Parking lock actuator assembly will remain attached to detent lever until assembly is removed. Remove manual shaft seal from case. See Fig 3
. Be careful not to damage case bore during removal.
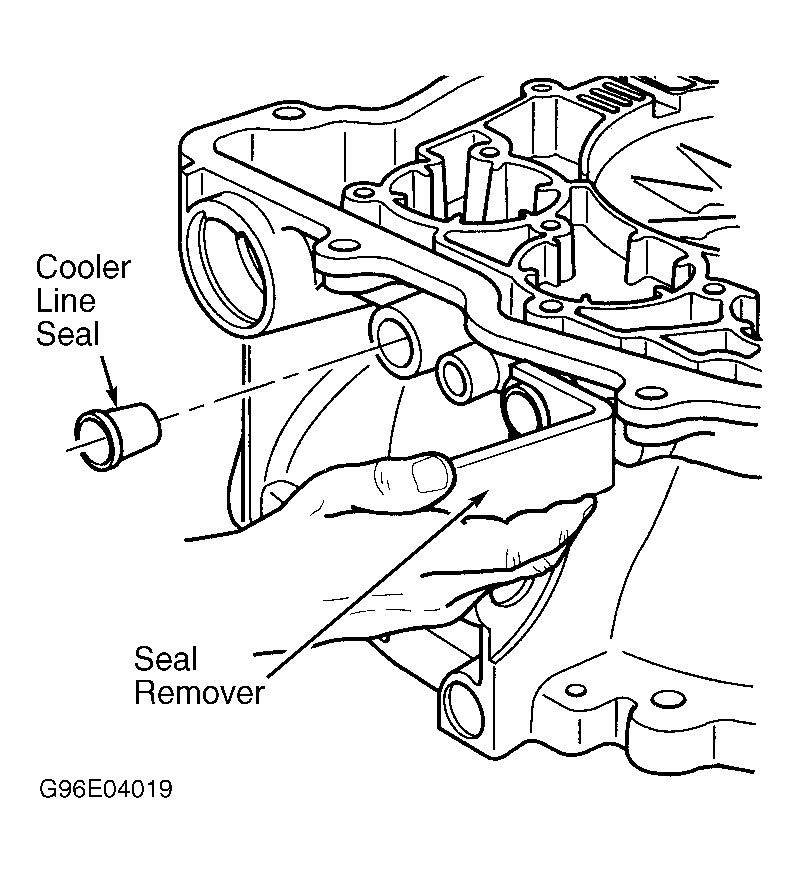
- Remove transaxle cooler line seals. Using Seal Remover (J-41239-2) and hammer, wedge seal remover into seal on outside of transaxle case bore. Pry seals out of transaxle case. See Fig 4
.
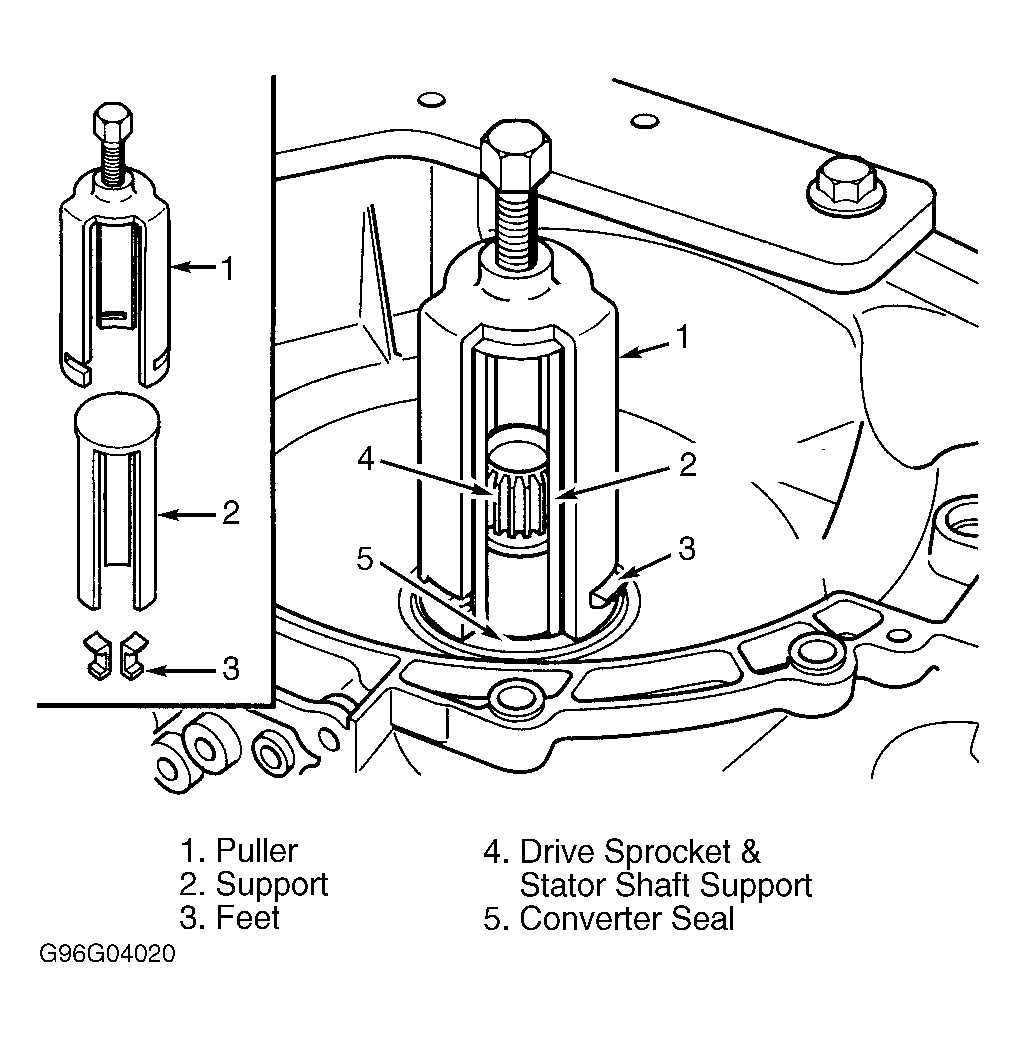
- Remove torque converter seal using Seal Remover (J-41103). Insert 3 puller feet under converter seal. Insert support body over stator shaft. Insert puller bridge over support body and connect puller feet into slots on puller bridge. Tighten forcing screw on puller until puller feet remove converter seal. Discard seal after removal. See Fig 5
.
- Remove 6 bolts from drive sprocket support. Remove drive sprocket support from case. See Figure
. Using screwdriver, remove right side axle oil seal from transaxle case. DO NOT
damage case bore.
 Courtesy of GENERAL MOTORS CORP.
 Courtesy of GENERAL MOTORS CORP.
 Courtesy of GENERAL MOTORS CORP.