Frame Replacement: Removal
- Install appropriate engine support fixture.
- Raise and support the vehicle.
- Remove the front tires and wheels.
- Disconnect the fog lamp electrical connectors, and position the connectors aside.
- Remove the radiator lower air deflector.
- Remove the positive battery cable and retainers from the frame and position the cable aside.
- Disconnect the power steering cooler pipe from the frame.
- Secure the power steering cooler.
- Remove the stabilizer shaft links and rotate the stabilizer shaft up to gain access to the mounting bolts on the power steering gear.
- Remove the steering gear mounting bolts.
- Secure the power steering gear.
- Remove the nuts which secure the engine mount to the frame. See ENGINE MOUNT STRUT BRACKET
.
- Remove the nuts which secure the transaxle mount to the frame.
- Disconnect both front wheel speed sensor connectors (1). See Fig 1
.
- Remove both front wheel speed harness retainers (2) from the frame and the lower control arms. See Fig 1
.
- Separate both of the lower ball joints from the steering knuckle.
- Lower the vehicle until the frame contacts engine support table.
- Remove and DISCARD the bolts which secure the front frame to the body. See Fig 2
.
- Remove and DISCARD the bolts which secure the rear frame to the body. See Fig 3
.
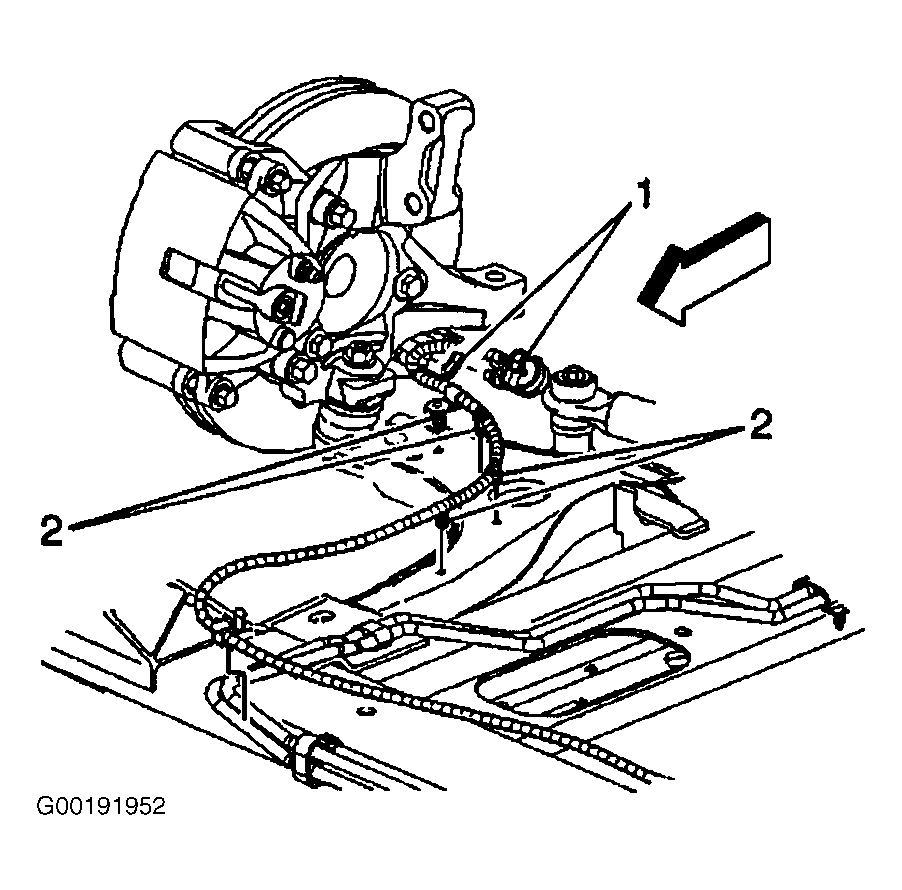 Courtesy of GENERAL MOTORS CORP.
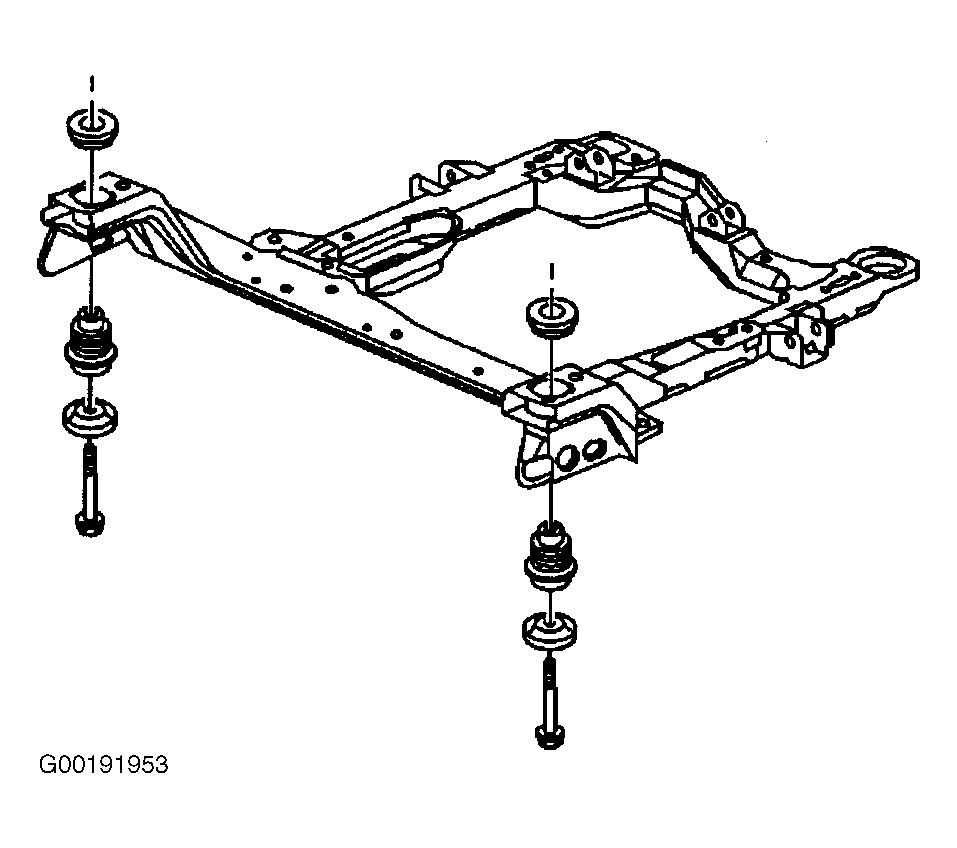 Courtesy of GENERAL MOTORS CORP.
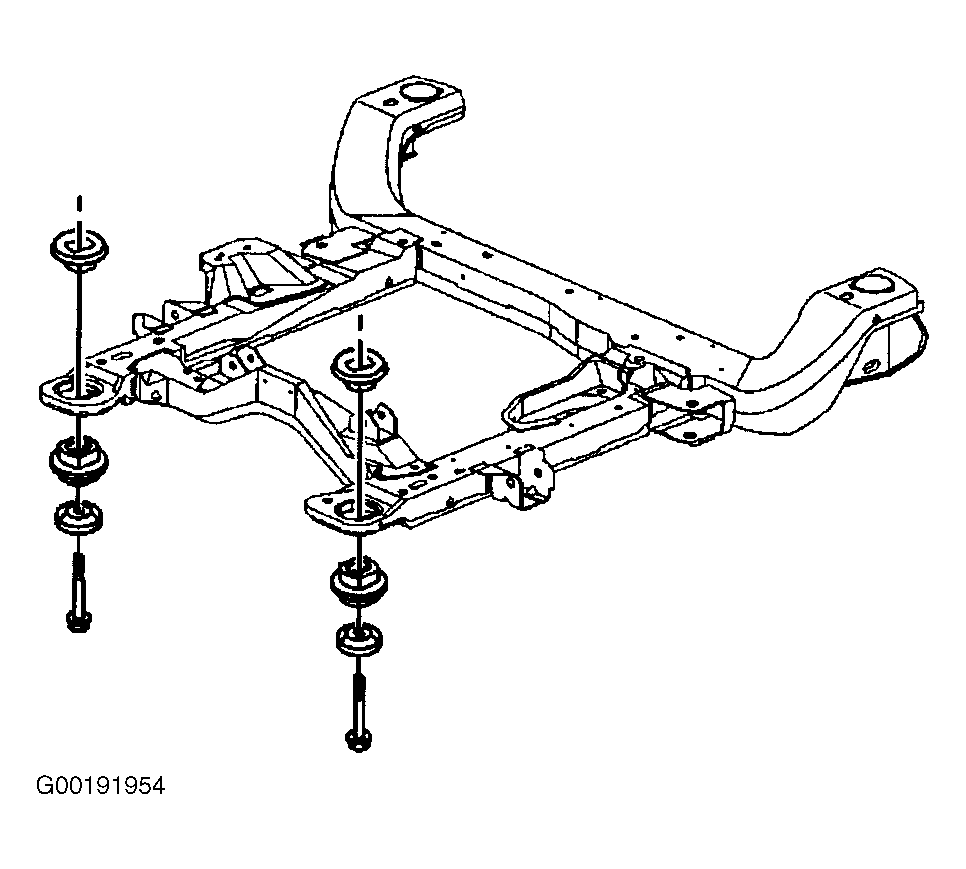 Courtesy of GENERAL MOTORS CORP.
- Raise the vehicle in order to separate the frame from the body.
- If you are replacing the frame, remove the following components:
- Both of the lower control arms.
- The stabilizer shaft.
- The spacers, the upper insulator, the lower insulator, and the retainers.