Installation Procedure
- Install the following components to the strut:
 Courtesy of GENERAL MOTORS CORP.
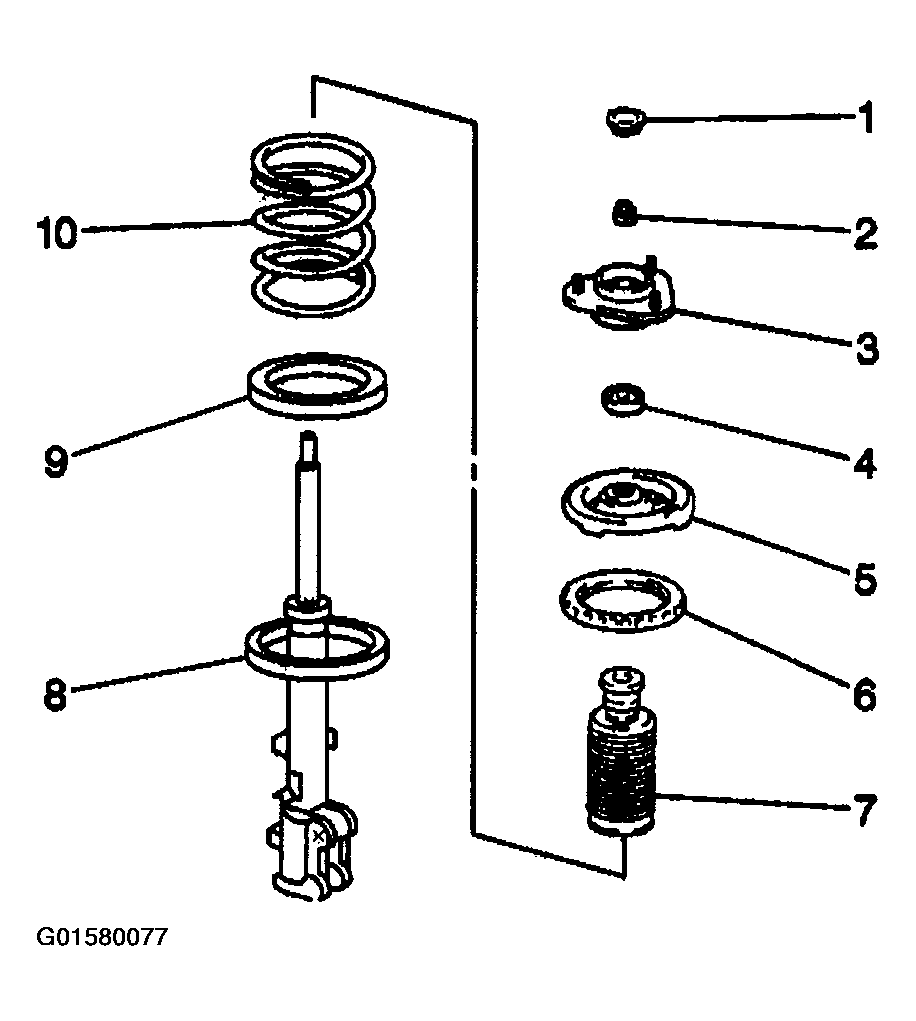
- 1.1. The lower insulator (9)
- 1.2. The spring bumper (7)
- 1.3. The coil spring (10)
- 1.4. The upper insulator (6)
- 1.5. The spring seat (5)
- 1.6. The dust seal (4)
- 1.7. The strut support (3)
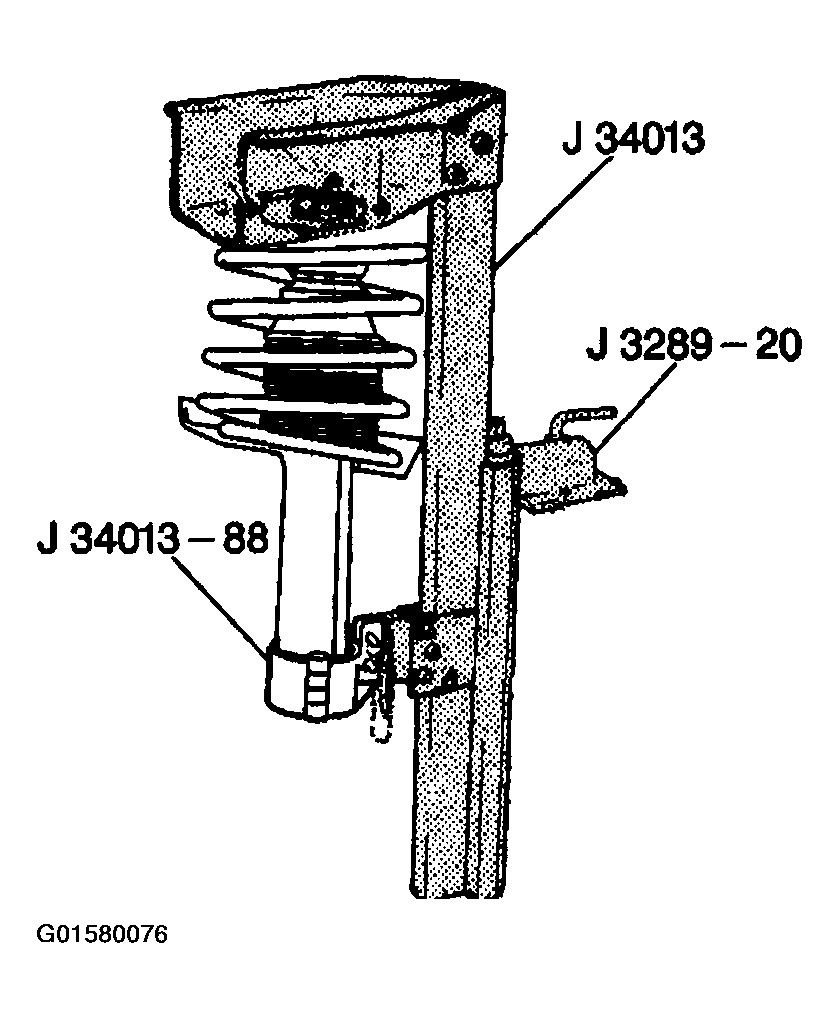
- Mount the strut assembly into the J 34013-B using the J 34013-88.
 Courtesy of GENERAL MOTORS CORP.
- Compress the coil spring (10).
 Courtesy of GENERAL MOTORS CORP.
- Install the strut rod piston nut and hold the strut rod, at the top, from turning. Tighten the strut rod piston nut (2) to 75 N.m (55 lb ft).
- Install the dust cap (1).
- Release the compressed coil spring (10).
- Remove the strut from the J 34013-B
 Courtesy of GENERAL MOTORS CORP.
- Install the strut assembly. Refer to Strut Assembly Replacement .