EVAP Canister Inspection
- Remove the EVAP canister.
- Visually inspect the EVAP canister, especially at the arrows, for any cracks or damage. See Fig 1
.
- Plug the vent port (4). The vent port will remain plugged for all tests. See Fig 2
.
- Block the purge port (3) closed. See Fig 2
.
- Blow air with a pressure of 0.25 psi (1.7 kPa) into the EVAP vapor port (2). See Fig 2
.
- Verify that air flows out of drain hose (1). See Fig 2
.
- Block the purge port (3) and the drain hose (1) closed. See Fig 3
.
- Blow air with a pressure of 0.25 psi (1.7 kPa) into the EVAP vapor port (4).
- Verify that air does not flow out of the air inlet port (2). See Fig 3
.
- Block the air inlet port (2) closed. See Fig 4
.
- Connect Hand Vacuum Pump (J 23738-A), or equivalent, to the purge port (1). See Fig 4
.
- Apply 1.0 in. Hg of vacuum to purge port (1) with the hand vacuum pump. See Fig 4
.
- Verify that the vacuum holds while the air inlet port (2) is closed. See Fig 4
.
- Open the air inlet port (2) and verify that the vacuum is released. See Fig 4
.
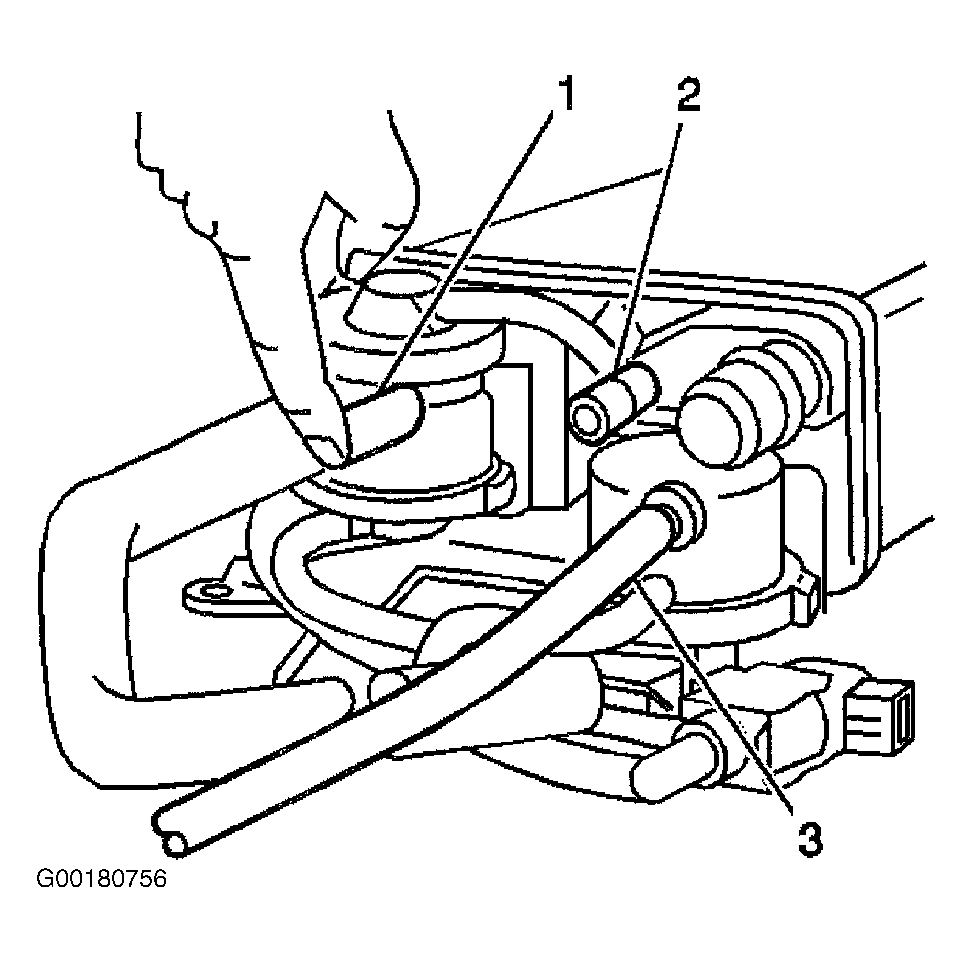
- Block the air inlet port (1) closed. See Fig 5
.
- Connect the hand vacuum pump to the EVAP vapor port (3). See Fig 5
.
- Apply 1.0 in. Hg of vacuum to the EVAP port (3) using the hand vacuum pump. See Fig 5
.
- Verify that there is vacuum pressure at the purge port (2). See Fig 5
.
- Replace the EVAP canister if the canister failed any of the inspections or tests.
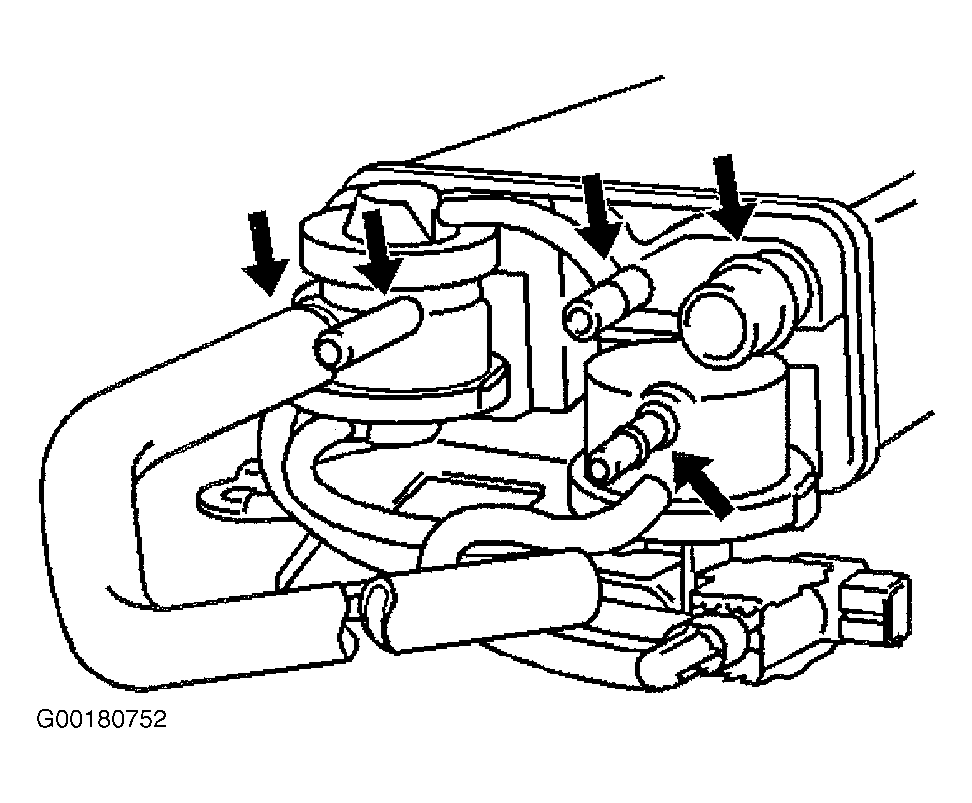 Courtesy of GENERAL MOTORS CORP.
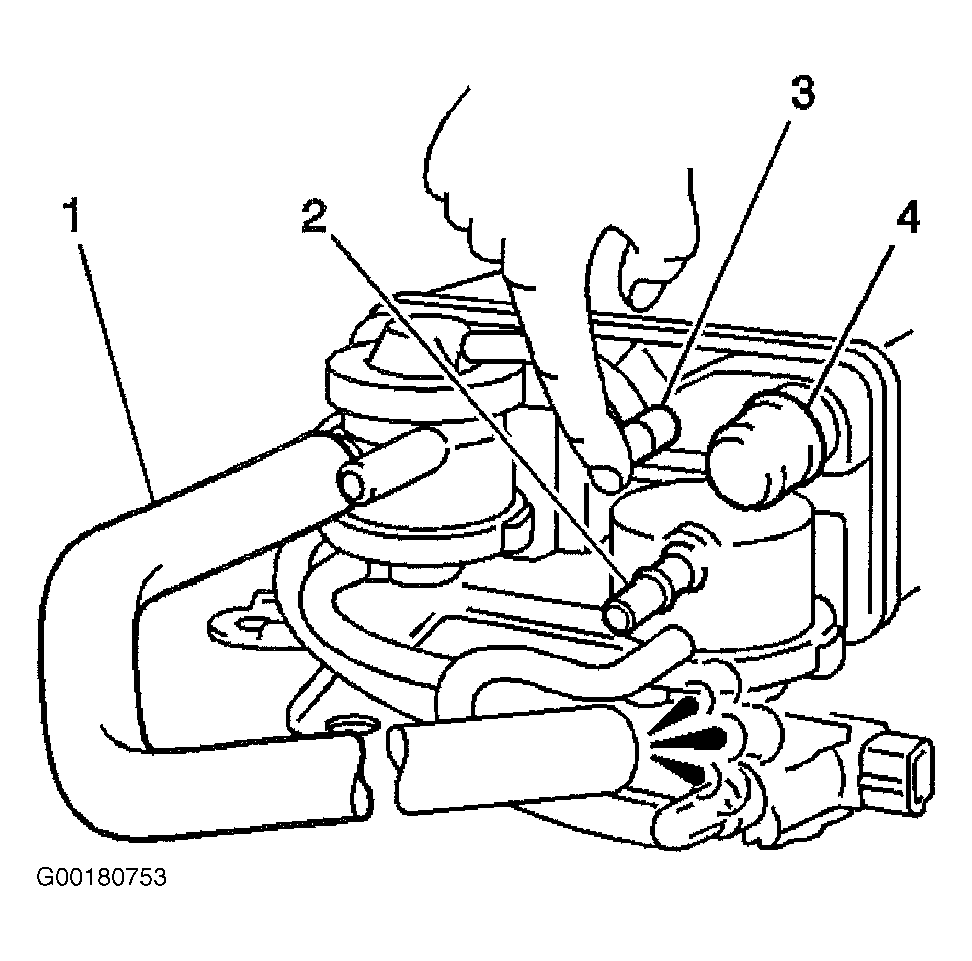 Courtesy of GENERAL MOTORS CORP.
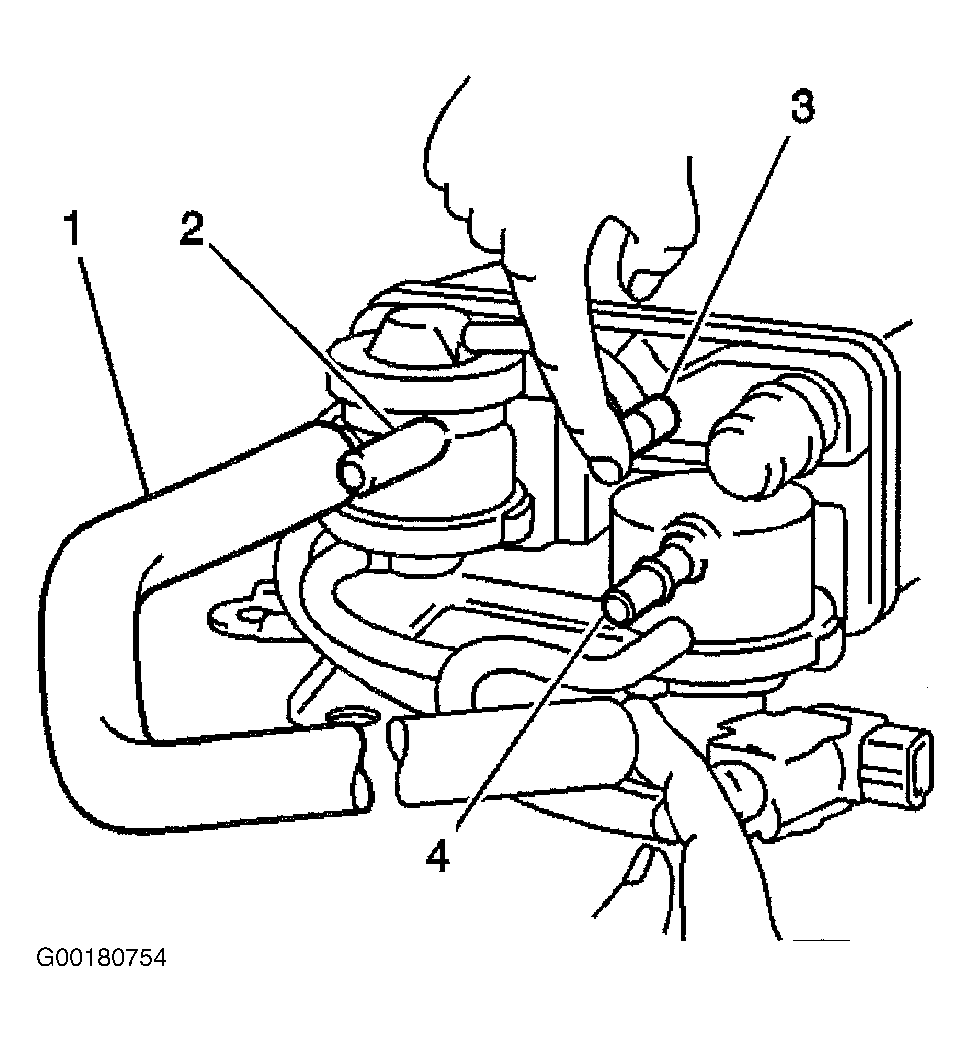 Courtesy of GENERAL MOTORS CORP.
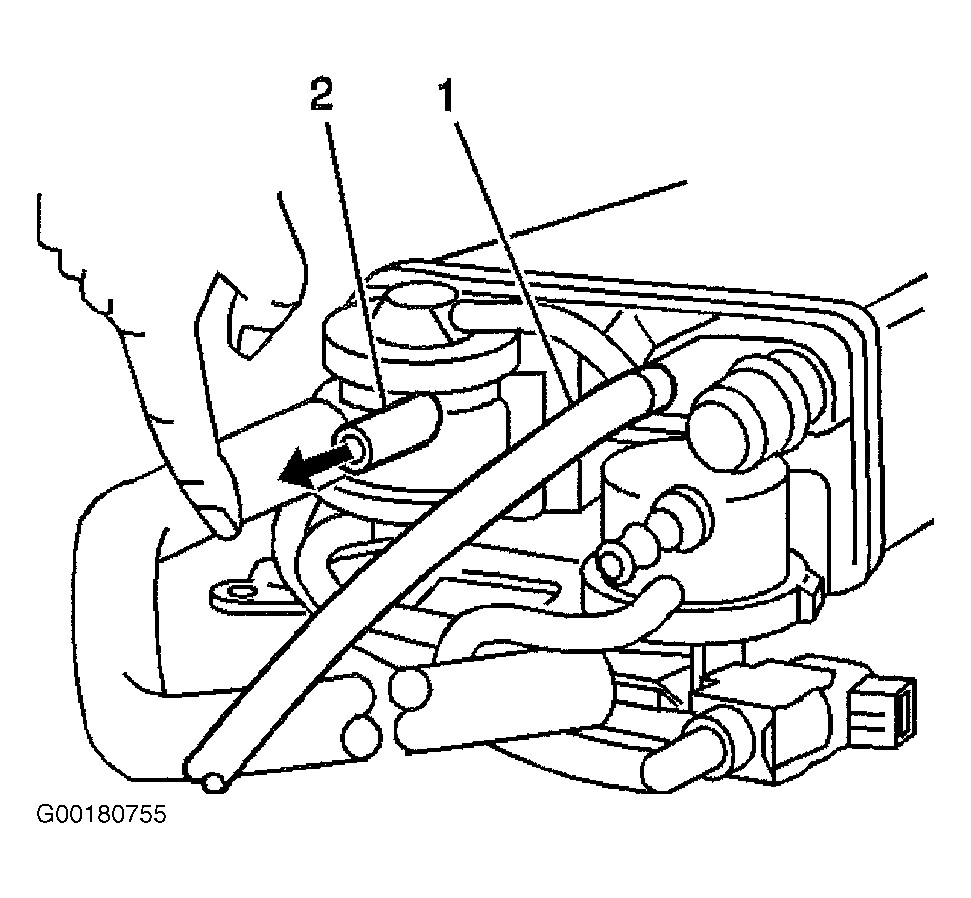 Courtesy of GENERAL MOTORS CORP.
 Courtesy of GENERAL MOTORS CORP.