- Lubricate all rotating parts and bearings with Saturn Transaxle Fluid during assembly.
NOTE:
Soak new blocker rings in Saturn Transaxle Fluid for 15 minutes prior to installation.
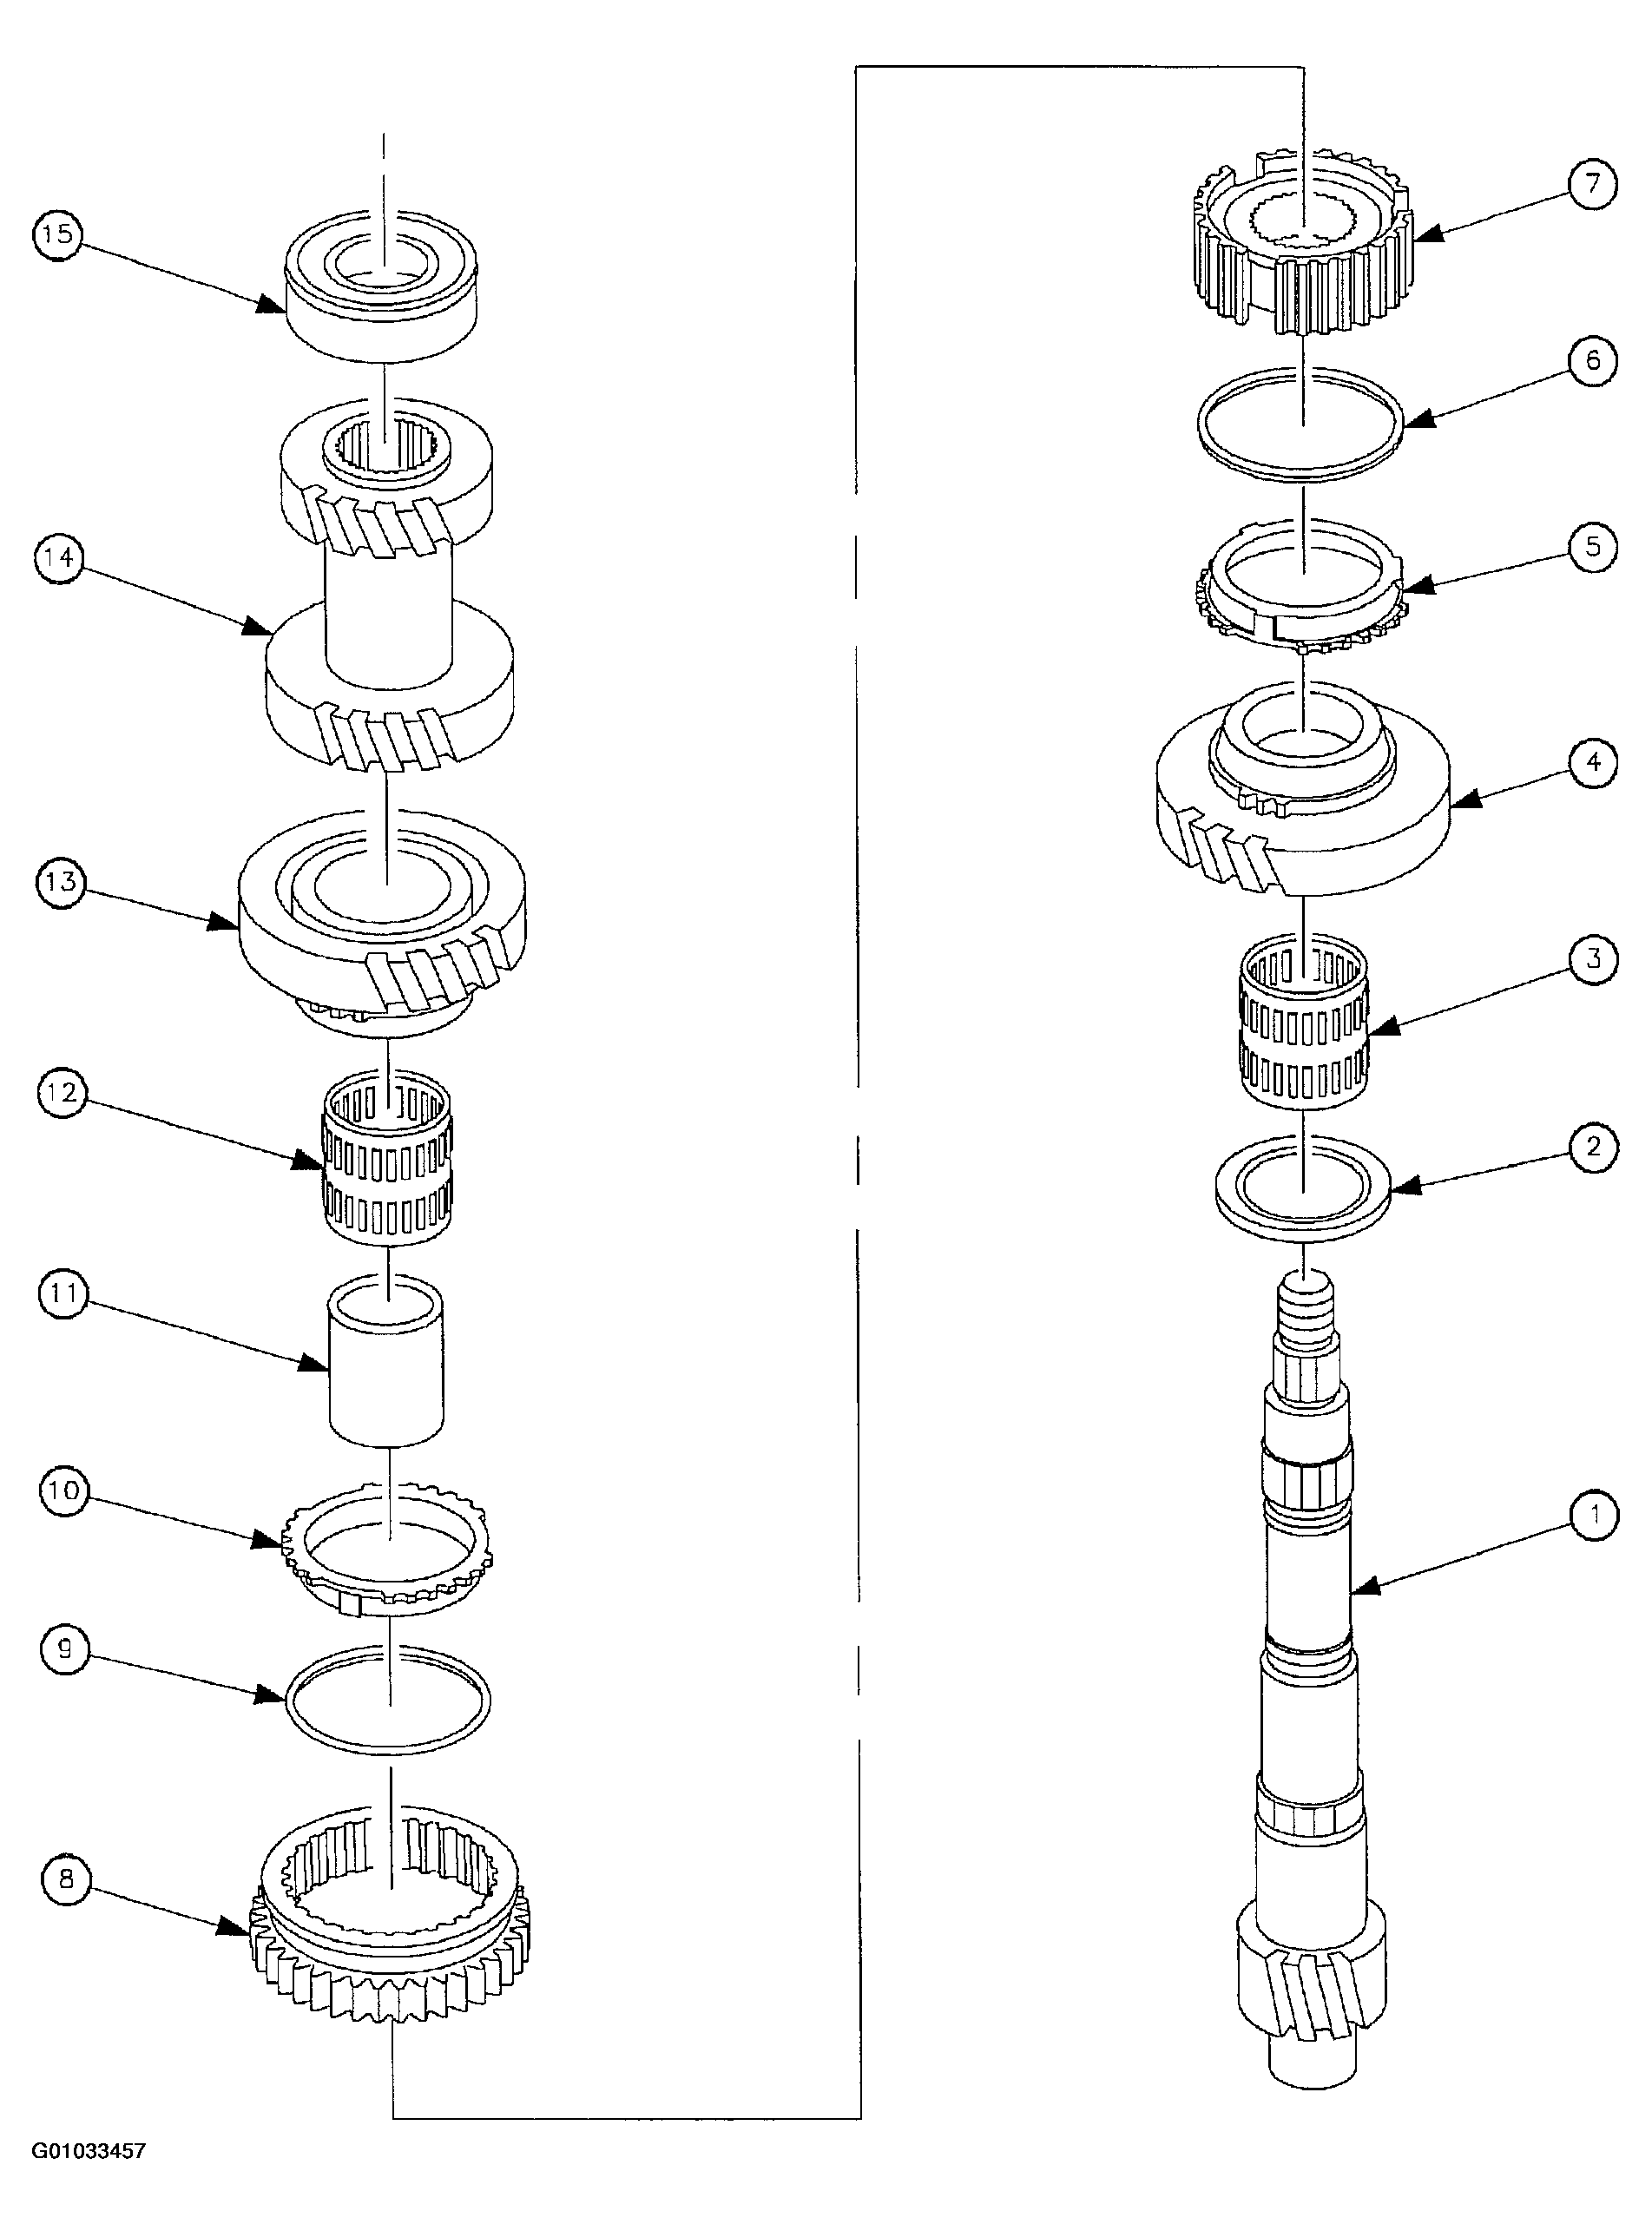
- Install 1st driven gear thrust washer (2).
- Install 1st driven gear bearing (3).
- Install 1st driven gear (4).
 Courtesy of GENERAL MOTORS CORP.
- Install 1st gear synchronizer blocker ring (5) and synchronizer spring (6).
NOTE:
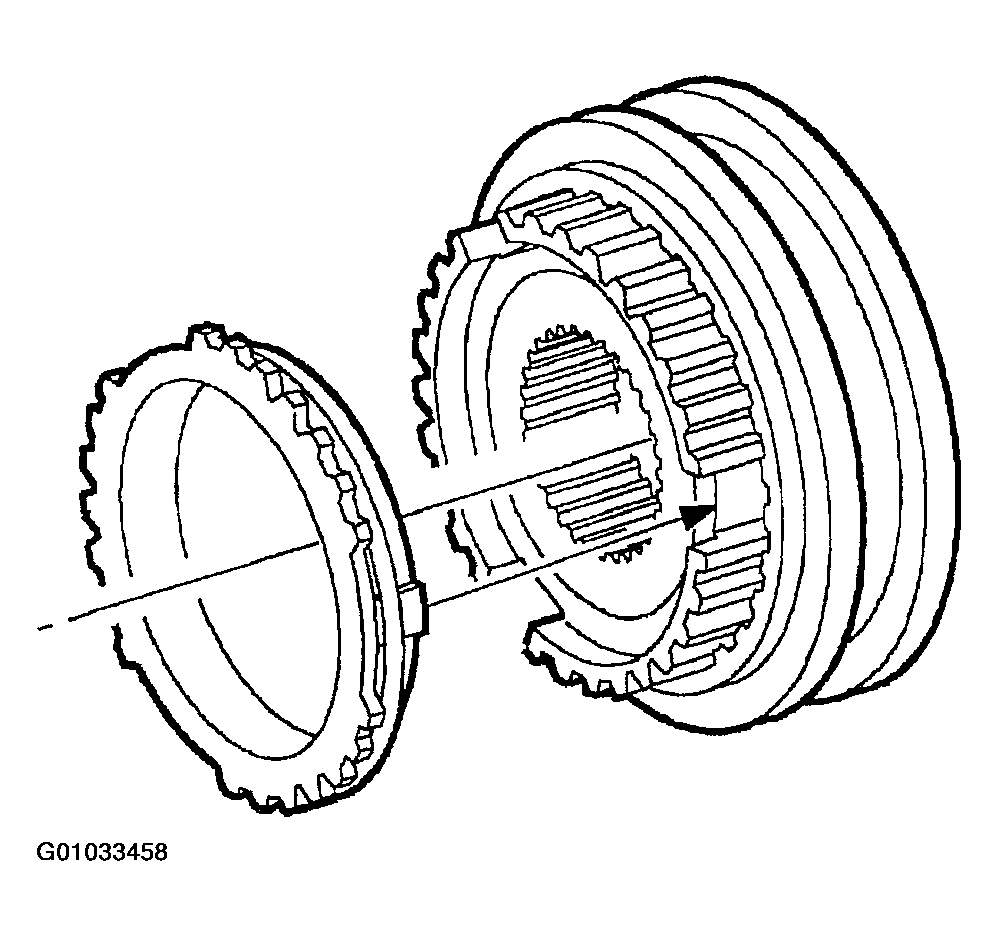
Be sure tabs on blocker ring are aligned with slots on hub.
 Courtesy of GENERAL MOTORS CORP.
- Press 1st/2nd synchronizer hub (7) onto shaft making sure to align the tangs on blocker ring (5) with the slots in the hub (7). See Fig 1
.
NOTE:
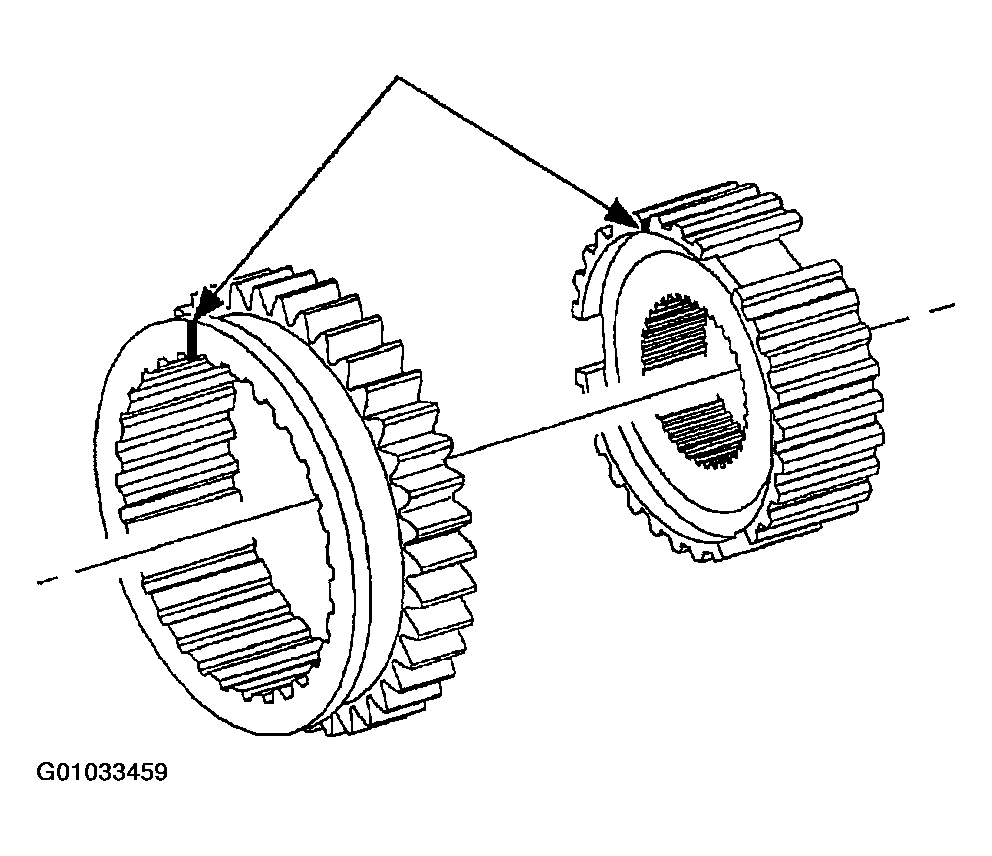
Be sure to align the mark on the sleeve to the mark on the hub as indicated by the arrows. Make sure alignment marks are facing up.
 Courtesy of GENERAL MOTORS CORP.
- Install 1st/2nd synchronizer sleeve (8) with the reverse driven gear side facing down toward 1st gear (4). See Fig 1
.
- Install 2nd gear bearing race (11). To ease installation, warm bearing race with your hands or heat gun before installing.
- Install the 2nd gear synchronizer spring (9) on the 2nd gear synchronizer blocker ring (10) and install assembly. Make sure to align the tangs on blocker ring (10) with the slots in the hub (7). See Fig 1
.
- Install the 2nd gear bearing (12).
- Install the 2nd driven gear (13).
- Install 3rd/4th driven gear (14), with the larger gear (3rd) on the bottom. See Fig 1
.
- Use Quill Bearing Replacer SA9118T to press output shaft (ball) bearing (15) onto shaft with the snap ring groove up (away from the gears).