Automatic Transaxle Assembly: Removal: Removal
- REMOVE ENGINE ASSEMBLY WITH TRANSAXLE
- Remove the engine assembly with transaxle. Refer to REMOVAL
.
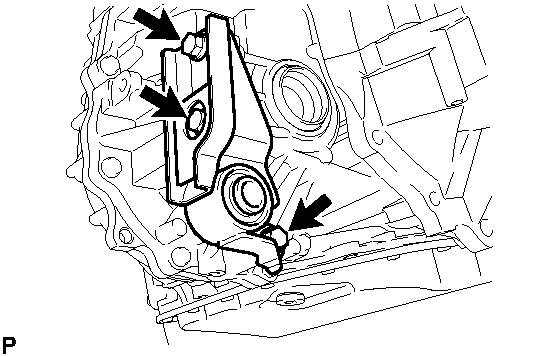
- REMOVE ENGINE LATERAL CONTROL ROD
- Remove the 3 bolts and remove the engine lateral control rod from the automatic transaxle.
 Courtesy of © TOYOTA, LICENSE AGREEMENT TMS1002
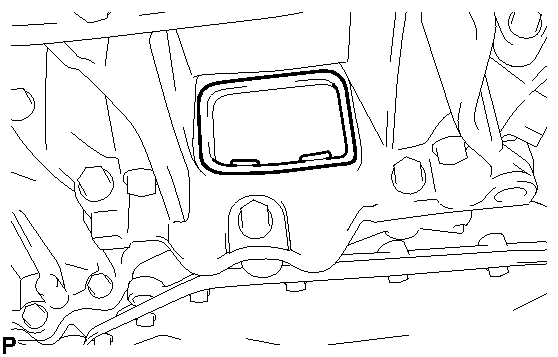
- REMOVE FLYWHEEL HOUSING UNDER COVER
- Remove the flywheel housing under cover.
 Courtesy of © TOYOTA, LICENSE AGREEMENT TMS1002
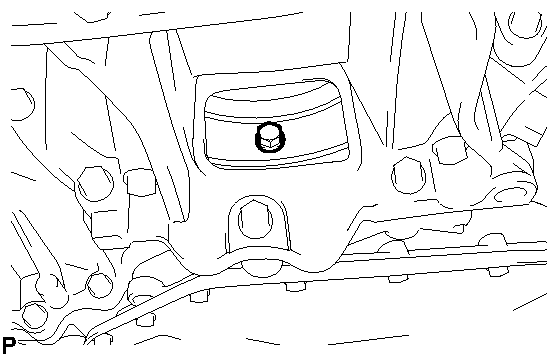
- REMOVE DRIVE PLATE AND TORQUE CONVERTER CLUTCH SETTING BOLT
- Remove the 6 torque converter set bolts while holding the crankshaft pulley bolt with a wrench.
 Courtesy of © TOYOTA, LICENSE AGREEMENT TMS1002
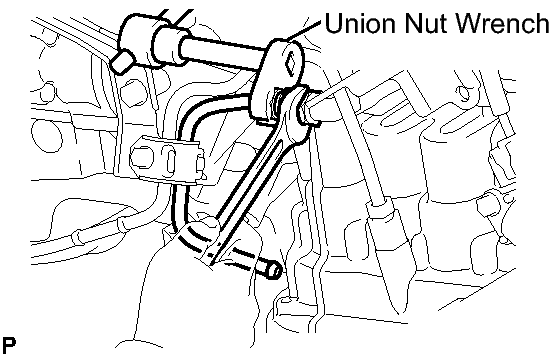
- SEPARATE INLET NO. 1 OIL COOLER TUBE
- Using union nut wrench, separate the inlet No. 1 oil cooler tube while holding the oil cooler tube union with a wrench.
 Courtesy of © TOYOTA, LICENSE AGREEMENT TMS1002
- SEPARATE OUTLET NO. 1 OIL COOLER TUBE
- Using union nut wrench, separate the outlet No. 1 oil cooler tube while holding the oil cooler tube union with a spanner.
 Courtesy of © TOYOTA, LICENSE AGREEMENT TMS1002
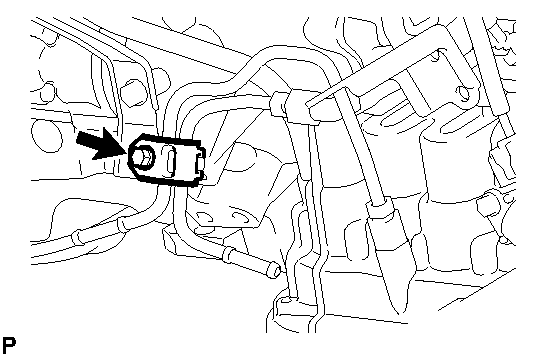
- REMOVE NO. 2 OIL COOLER TUBE CLAMP
- Remove the bolt and remove No. 2 oil cooler tube clamp from the oil filler tube.
 Courtesy of © TOYOTA, LICENSE AGREEMENT TMS1002
- Remove the inlet No. 1 oil cooler tube and the No. 1 outlet oil cooler tube from the automatic transaxle.
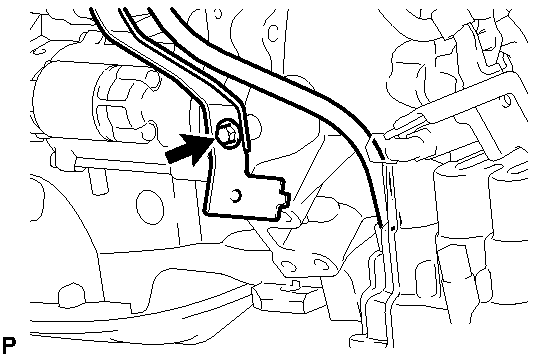
- REMOVE TRANSMISSION OIL FILLER TUBE SUB-ASSEMBLY
- Remove the bolt and remove the oil filler tube subassembly.
 Courtesy of © TOYOTA, LICENSE AGREEMENT TMS1002
- Remove the O-ring from the oil filler tube subassembly.
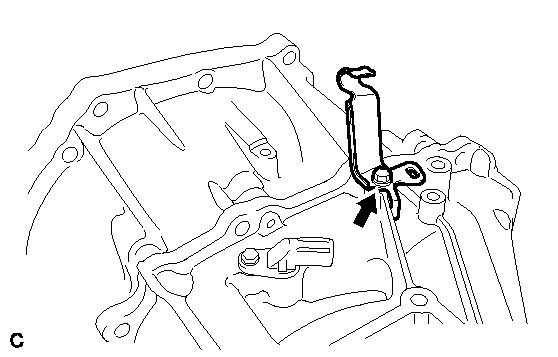
- REMOVE TRANSMISSION CONTROL CABLE SUPPORT
- Remove the bolt and remove the transmission control cable bracket from the automatic transaxle.
 Courtesy of © TOYOTA, LICENSE AGREEMENT TMS1002
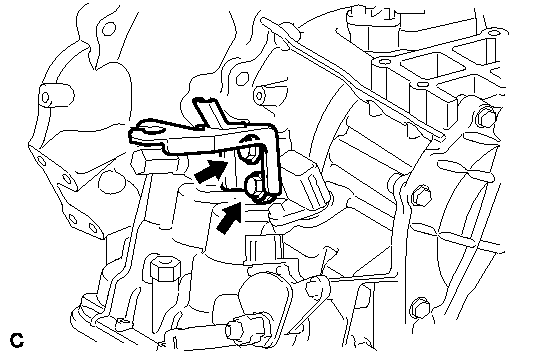
- REMOVE NO. 1 TRANSMISSION CONTROL CABLE BRACKET
- Remove the 2 bolts and remove the No. 1 transmission control cable bracket from the automatic transaxle.
 Courtesy of © TOYOTA, LICENSE AGREEMENT TMS1002
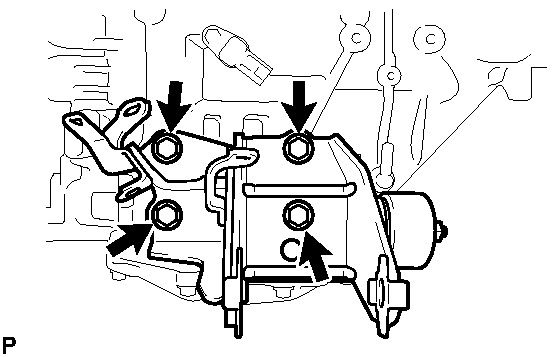
- REMOVE ENGINE MOUNTING BRACKET LH
- Remove the 4 bolts and remove the engine mounting bracket LH from the automatic transaxle.
 Courtesy of © TOYOTA, LICENSE AGREEMENT TMS1002
- REMOVE FLYWHEEL HOUSING SIDE COVER
. Refer to REMOVAL - Step 4
- REMOVE STARTER ASSEMBLY
. Refer to REMOVAL - Step 5
- REMOVE AUTOMATIC TRANSAXLE ASSEMBLY
- Remove the 7 bolts and remove the automatic transaxle from the engine.
 Courtesy of © TOYOTA, LICENSE AGREEMENT TMS1002
- REMOVE TORQUE CONVERTER CLUTCH ASSEMBLY
- Remove the torque converter clutch from the automatic transaxle.