- Position the windshield on the vehicle for a dry fit.
NOTE:
Adjust the net pads, if needed.
NOTE:
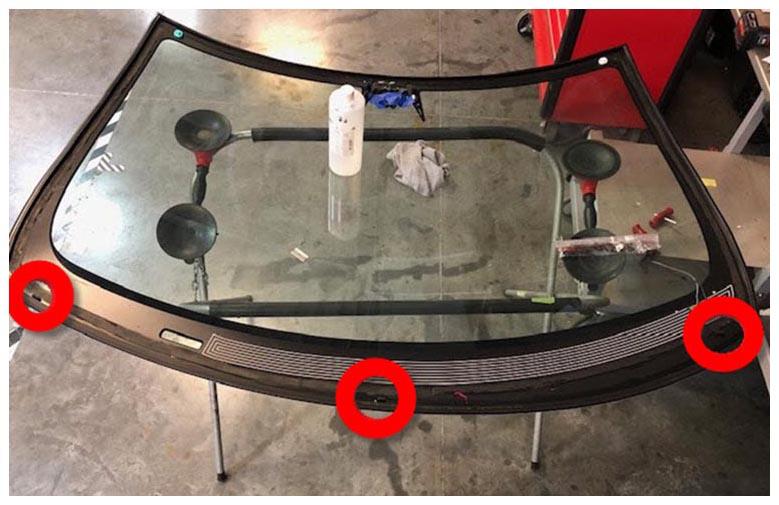
Verify that the locator pins align properly.
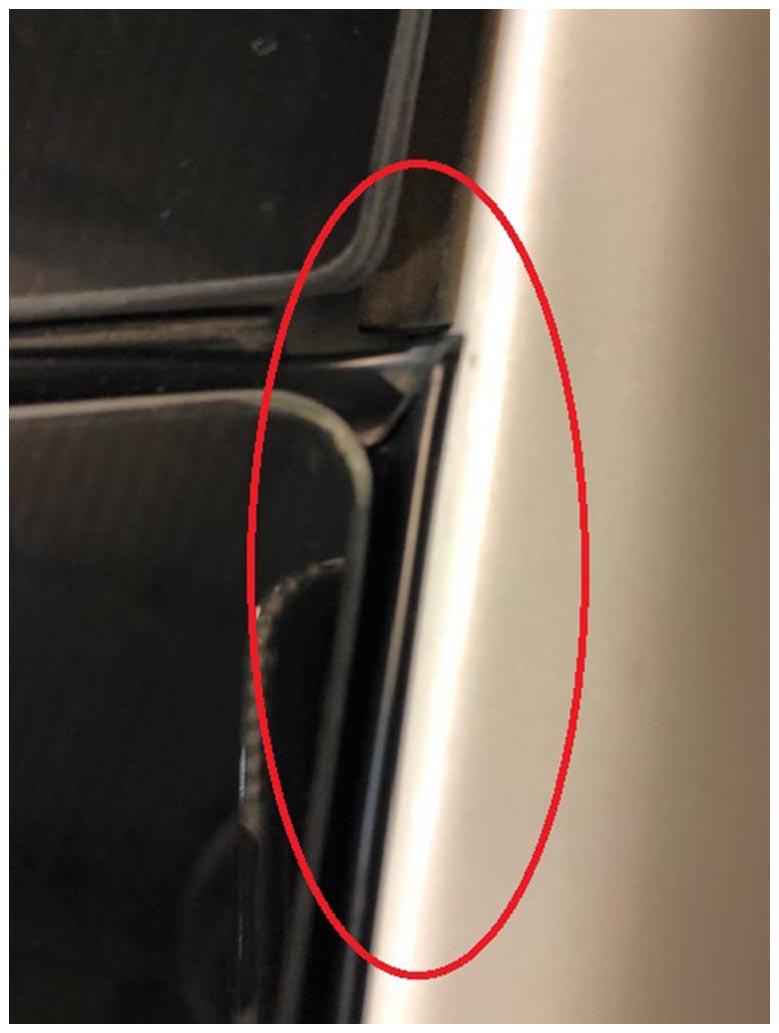
- Visually inspect the windshield lip and edge seals.
NOTE:
The seals should be sitting against the vehicle and look even all the way through.
 Courtesy of TESLA, INC. Courtesy of TESLA, INC.
|
- With an assistant, remove the windshield from the vehicle using the suction handles.
- Perform any net pad adjustments on the windshield, if needed.
 Courtesy of TESLA, INC. Courtesy of TESLA, INC.
|
- Wipe clean the urethane path on the vehicle with IPA.
NOTE:
Make sure that the inside of the glass is clean and free of smudges on the VIN plate see-through portion of the windshield as it won't be accessible for cleaning once the windshield has been installed on the vehicle.
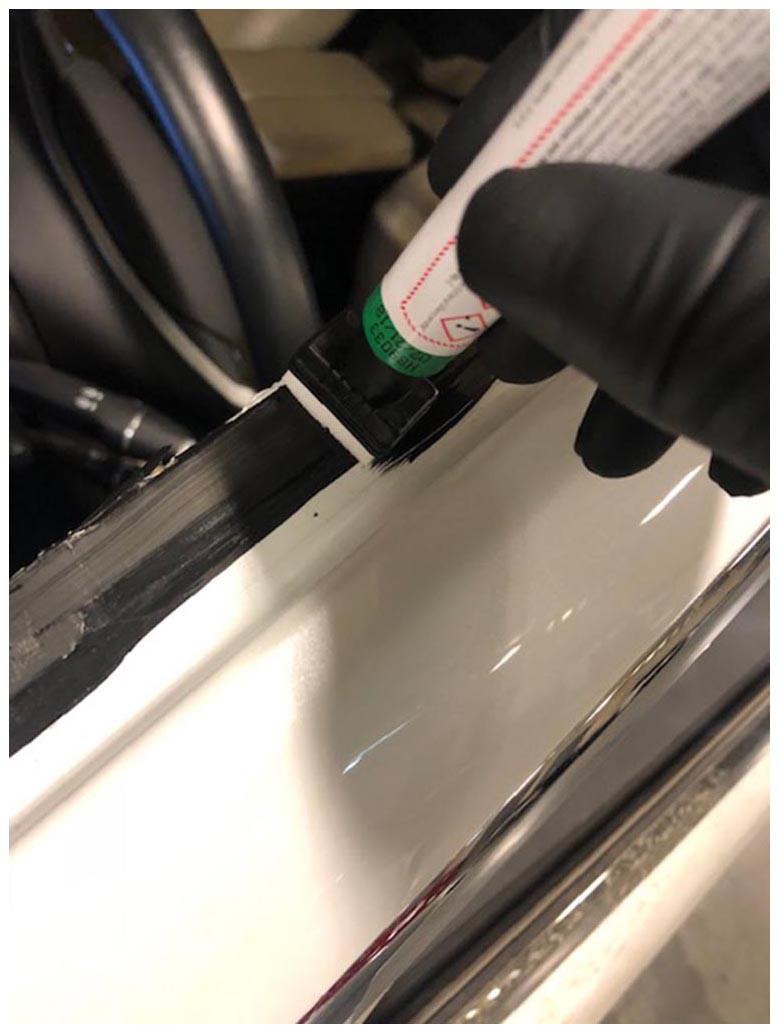
- Apply the urethane primer to the windshield and the vehicle body right along the old urethane path.
 Courtesy of TESLA, INC. Courtesy of TESLA, INC.
|
NOTE:
Make sure to add urethane primer over any areas that were scratched during windshield removal.
NOTE:
Allow the urethane primer to dry before applying urethane.
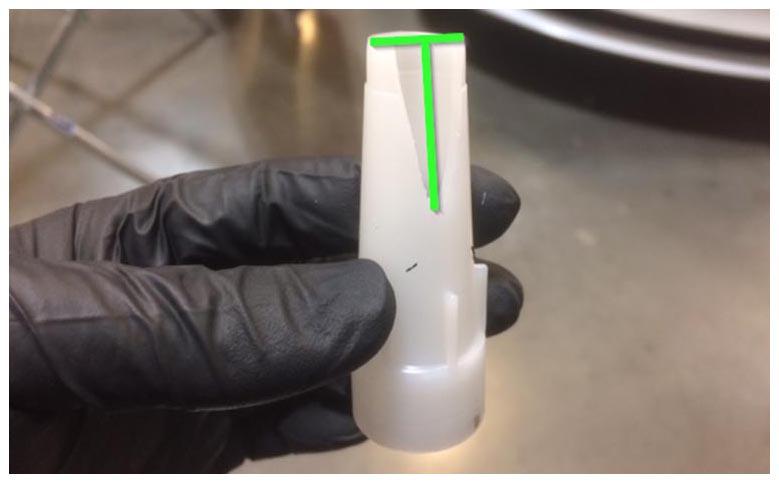
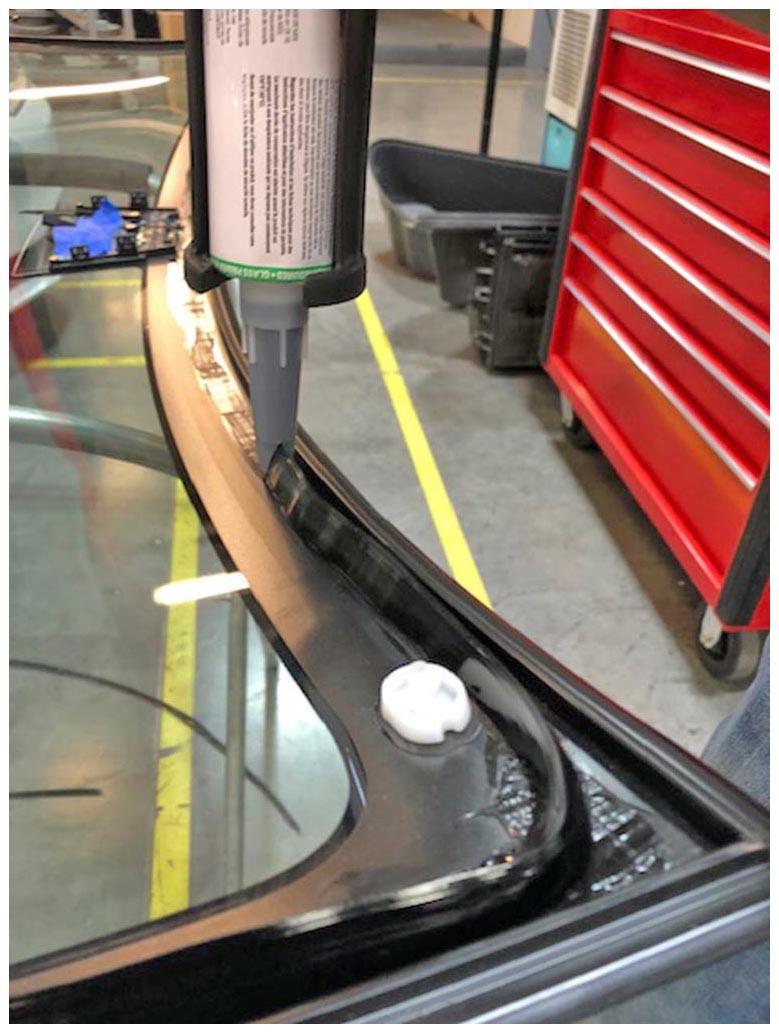
- Prepare the caulking gun and urethane. Opening of the urethane applicator must be 8 mm wide and 14 mm tall.
 Courtesy of TESLA, INC. Courtesy of TESLA, INC.
|
- Apply urethane to the windshield following the path of the urethane primer.
NOTE:
Fill any gaps with urethane to ensure a consistent bead.
 Courtesy of TESLA, INC. Courtesy of TESLA, INC.
|
- With an assistant, install the windshield on the vehicle using the suction handles.
NOTE:
Make sure to align the locator pins on top of the windshield while installing the windshield.
- Measure the gap and flush of the windshield to the body with a gap and flush tool. Make adjustment to the windshield, if needed.
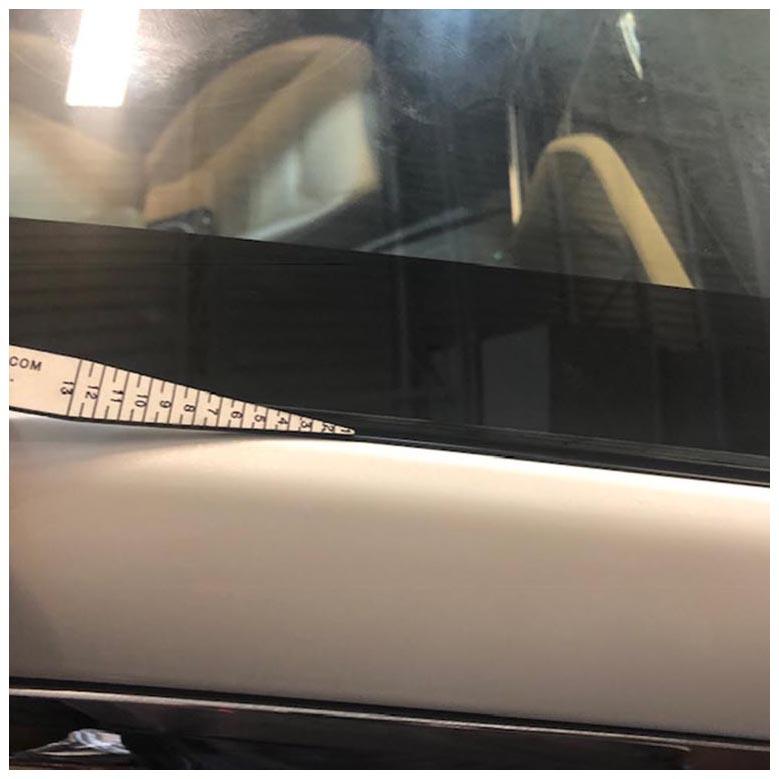 Courtesy of TESLA, INC. Courtesy of TESLA, INC.
|
- Press the windshield into position and check its gap and flush measurements to make sure that the windshield is within specifications.
NOTE:
Use a ballast bag to hold down the windshield, if needed.
- Put masking tape to secure the windshield to be body while the urethane cures.
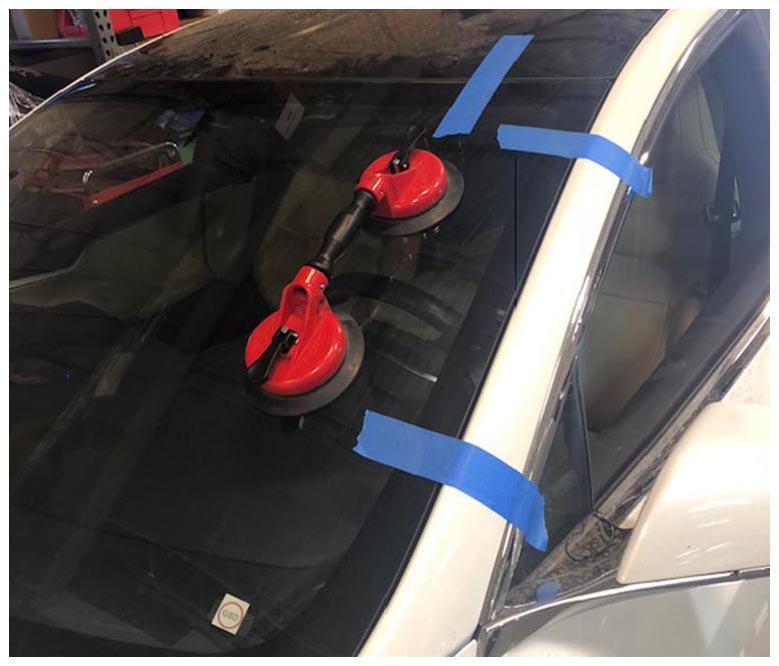 Courtesy of TESLA, INC. Courtesy of TESLA, INC.
|
- Install the cowl screen panel. See Panel - Cowl Screen (Remove and Replace)
- Vehicles without Autopilot or with 1st Generation Autopilot:
Install the particulate filter. See Filter - Particulate (Remove and Replace)
- Install the LH and RH wiper arms. See Wiper Arm - LH (Remove and Replace)
- Vehicles with 2nd Generation Autopilot:
Install the inlet HEPA filter duct. See Duct - HEPA Filter - Inlet (Remove and Replace)
- Install the LH and RH underhood aprons. See Underhood Apron - LH (Remove and Replace)
- Install the rear underhood apron. See Underhood Apron - Rear (Remove and Replace)
- Close the hood.
- Verify that the wipers operate as designed.
- Reinstall the front portion of the headliner into position. Make sure that all dual lock connections (x4) are secured.
NOTE:
Move the front seats forward to assist with the aligning of the front section of the headliner.
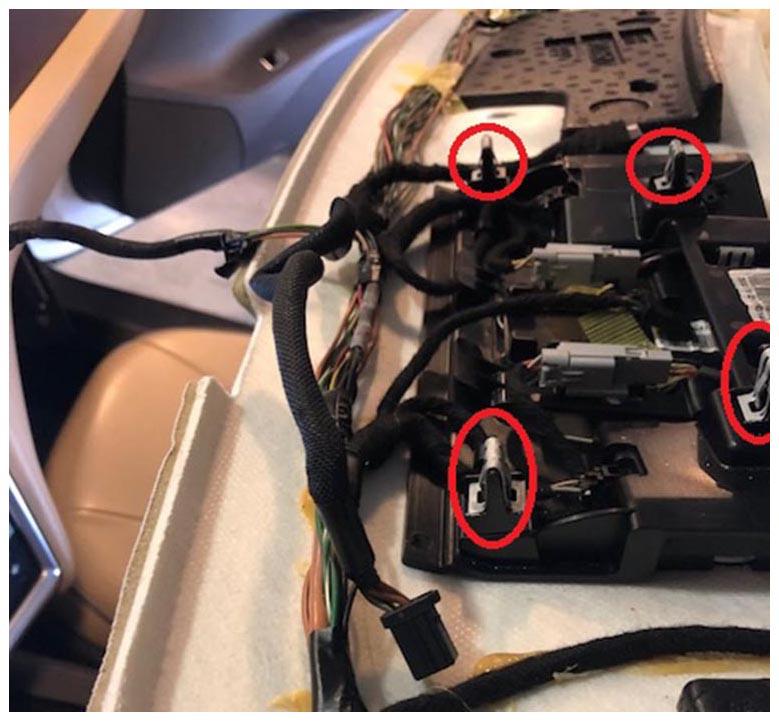 Courtesy of TESLA, INC. Courtesy of TESLA, INC.
|
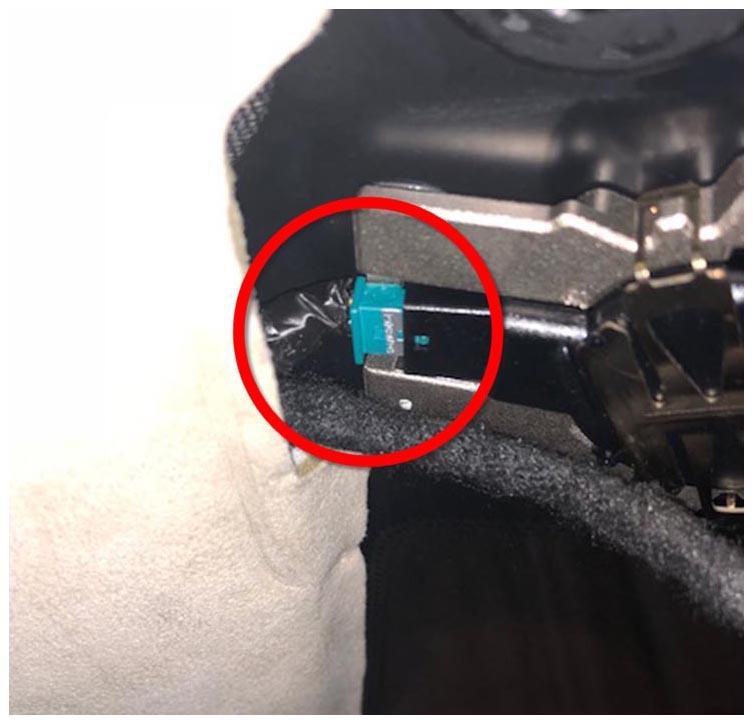
- Vehicles without Autopilot or with 1st Generation Autopilot:
- Connect the light/rain sensor electrical connector.
 Courtesy of TESLA, INC. Courtesy of TESLA, INC.
|
- Connect the rear view mirror:
- Install the rear view mirror trim. See Trim - Rear View Mirror (Remove and Replace)
- Vehicles with 1st or 2nd Generation Autopilot:
- Clean the inner windshield camera viewing area with a clean microfiber cloth and glass cleaner. Let the windshield fully dry before continuing.
NOTE:
Verify that the windshield has no stains or leftover residue. Otherwise, Autopilot features may be hindered.
- Install the forward facing camera. See Camera - Forward Facing (Remove and Replace)
- Install the rear view mirror. See Rear View Mirror - 2nd Generation (Remove and Replace)
- Install the RH middle A-pillar trim panel. See Panel - A Pillar Trim - Middle - LH (Remove and Replace)
- Install the RH instrument panel side cover assembly. See Assembly - Instrument Panel Side Cover - LH (Remove and Replace)
- Install the RH A-pillar trim. See Trim - A-Pillar - LH (Remove and Install)
- Install the LH middle A-pillar trim panel. See Panel - A Pillar Trim - Middle - LH (Remove and Replace)
- Install the LH instrument panel side cover assembly. See Assembly - Instrument Panel Side Cover - LH (Remove and Replace)
- Install the LH A-pillar trim. See Trim - A-Pillar - LH (Remove and Install)
- Remove the driver sun visor center support. See Center Support - Sun Visor - LH (Remove and Replace)
- Remove the driver sun visor. See Sun Visor - LH (Remove and Replace)
- Remove the front passenger sun visor center support. See Center Support - Sun Visor - LH (Remove and Replace)
- Remove the front passenger sun visor. See Sun Visor - LH (Remove and Replace)
- Perform the forward facing camera pitch verification or target calibration:
CAUTION:
Autopilot features might be reduced if camera pitch is not verified.
- Wait for the urethane has cured before driving the vehicle, and then remove the tape securing the windshield to the body.
WARNING:
Do not drive the vehicle until the adhesive manufacturer's recommended minimum drive-away time has passed. Dow Betaseal Express has a drive-away time of 1 hour minimum in temperatures of 0°F (-18°C) or warmer. If necessary, leave the tape applying pressure to the glass on the vehicle and advise the customer that they can remove it after 24 hours. Additionally, advise the customer that they should avoid high driving speeds and speed bumps for the next 24 hours.
- 2nd Generation Autopilot:
Vehicle might need to the driven in order to complete the forward facing camera calibration.
NOTE:
Notify the customer that camera calibration might take up to 100 miles of driving before Autopilot becomes operational.