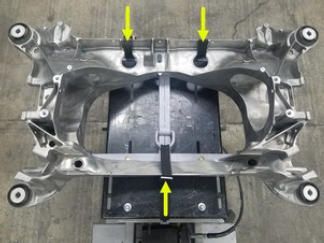
- With the help of an assistant, install a new rear subframe onto the subframe lift and then attach one strap at the front, and two straps at the rear of the subframe lift to secure the subframe to the subframe lift.
 Courtesy of TESLA, INC. Courtesy of TESLA, INC.
|
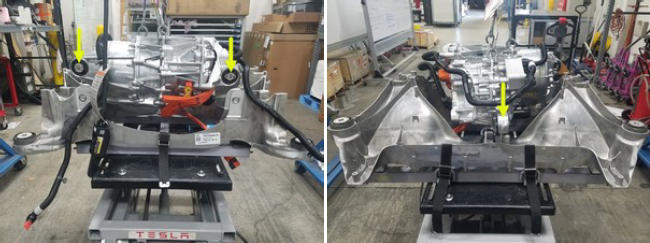
- Use the gantry to lower the drive unit sling tool and carefully set the rear drive unit into the rear subframe, routing the HV harness and coolant hoses as needed.
 Courtesy of TESLA, INC. Courtesy of TESLA, INC.
|
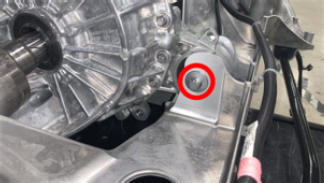
- Lower the rear drive unit sling tool so as to install and hand tighten the bolt that attaches the rear drive unit to the rear of the rear subframe.
 Courtesy of TESLA, INC. Courtesy of TESLA, INC.
|
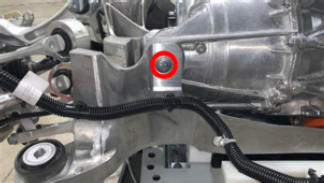
- Install and hand tighten the bolt that attaches the rear drive unit to the RH side of the rear subframe.
 Courtesy of TESLA, INC. Courtesy of TESLA, INC.
|
- Install and hand tighten the bolt that attaches the rear drive unit to the LH side of the rear subframe.
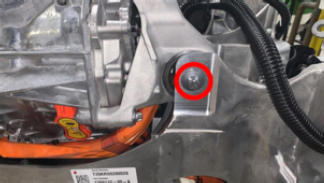 Courtesy of TESLA, INC. Courtesy of TESLA, INC.
|
- Lower the drive unit sling tool to release tension in the cables, and then remove the sling tool from the gantry.
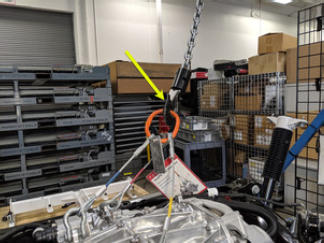 Courtesy of TESLA, INC. Courtesy of TESLA, INC.
|
- Remove the shackles (x3), and then remove the drive unit sling tool from the rear drive unit.
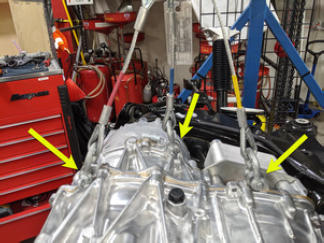 Courtesy of TESLA, INC. Courtesy of TESLA, INC.
|
- Move the subframe lift out from underneath the gantry.
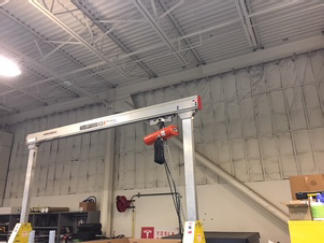 Courtesy of TESLA, INC. Courtesy of TESLA, INC.
|
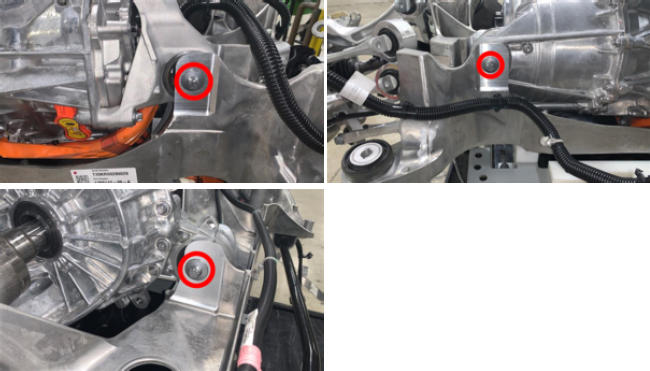
- Tighten the rear drive unit mount bolts (x3).
 120 N.m (88.5 ft-lbs)
 Courtesy of TESLA, INC. Courtesy of TESLA, INC.
|
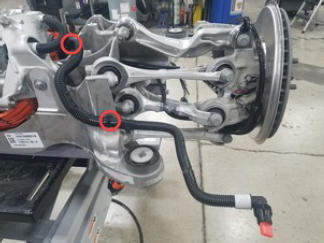
- Fasten the clips (x2) that attach the powertrain coolant supply hose to the rear subframe.
 Courtesy of TESLA, INC. Courtesy of TESLA, INC.
|
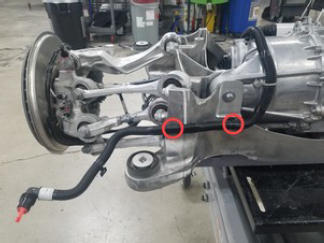
- Fasten the clips (x2) that attach the powertrain coolant return hose to the rear subframe.
 Courtesy of TESLA, INC. Courtesy of TESLA, INC.
|
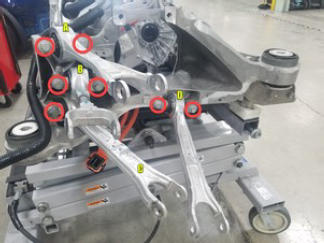
- Install the LH upper fore link, the LH toe link, the LH lower fore link, and the LH lower aft link to the rear subframe, and then install the bolts (x8) that attach the links to the subframe.
85 N.m (62.7 ft-lbs)
 Courtesy of TESLA, INC. Courtesy of TESLA, INC.
|
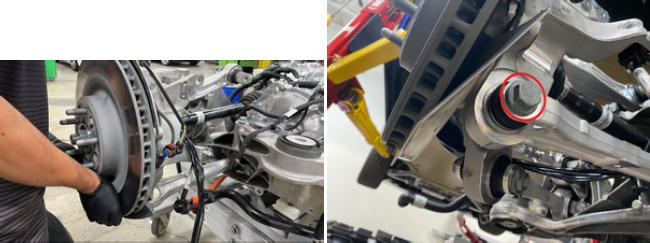
- With the help of an assistant to support the weight of the LH rear knuckle in subsequent steps, install the LH rear lower aft link to the knuckle, and then install the bolt that attaches the link to the knuckle.
NOTE:
Torque the bolt in a later step.
 Courtesy of TESLA, INC. Courtesy of TESLA, INC.
|
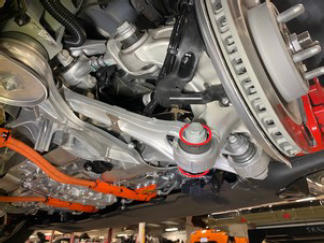
- Install the LH rear lower fore link to the LH rear knuckle, and then install the bolt that attaches the link to the knuckle.
NOTE:
Torque the bolt in a later step.
 Courtesy of TESLA, INC. Courtesy of TESLA, INC.
|
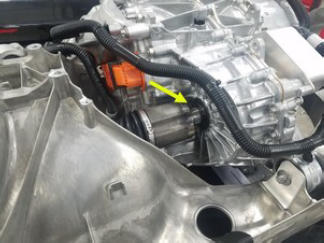
- Install the LH rear halfshaft into the rear drive unit, and then firmly press the halfshaft into the drive unit so that the halfshaft is fully seated.
NOTE:
An audible click is heard when the halfshaft is fully seated and the C-clip is fully engaged.
 Courtesy of TESLA, INC. Courtesy of TESLA, INC.
|
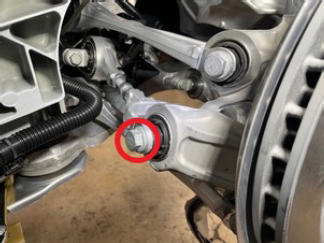
- Install the LH rear toe link to the LH rear knuckle, and then install the bolt that attaches the link to the knuckle.
NOTE:
Torque the bolt in a later step.
 Courtesy of TESLA, INC. Courtesy of TESLA, INC.
|
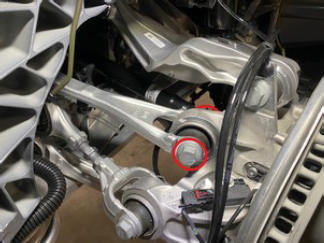
- Install the LH rear upper fore link to the LH rear knuckle, and then install the bolt that attaches the link to the knuckle.
NOTE:
Torque the bolt in a later step.
 Courtesy of TESLA, INC. Courtesy of TESLA, INC.
|
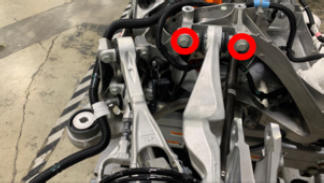
- Install the LH upper aft link to the rear subframe, and then install the bolts (x2) that attach the link to the subframe.
85 N.m (62.7 ft-lbs)
 Courtesy of TESLA, INC. Courtesy of TESLA, INC.
|
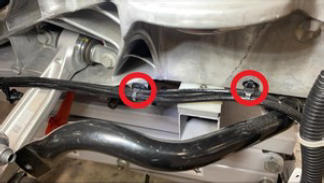
- Fasten the clips (x2) that attach the LH rear caliper electrical harness to the LH side of the rear subframe.
 Courtesy of TESLA, INC. Courtesy of TESLA, INC.
|
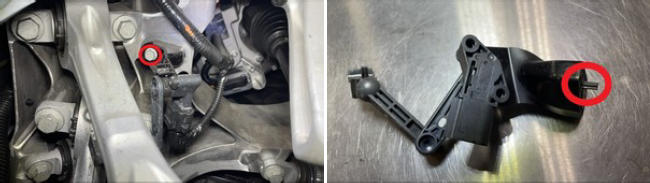
- Install the LH ride height sensor to the rear subframe, and then install the bolt that attaches the sensor to the subframe.
5 N.m (3.7 ft-lbs)
 Courtesy of TESLA, INC. Courtesy of TESLA, INC.
|
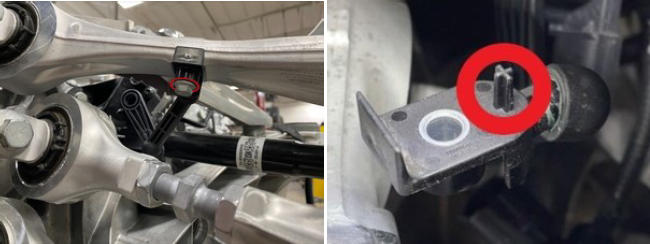
- Install the LH ride height sensor arm to the LH upper fore link, and then install the bolt that attaches the sensor arm to the link.
5 N.m (3.7 ft-lbs)
 Courtesy of TESLA, INC. Courtesy of TESLA, INC.
|
- Repeat step 12 through step 21 for the RH side of the rear subframe.
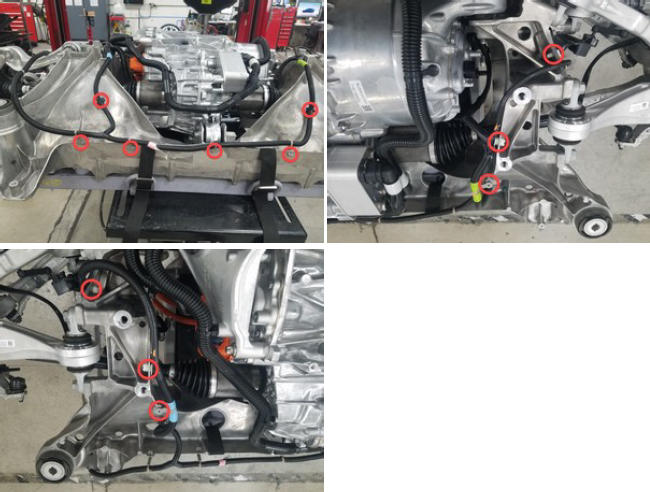
- Install the rear subframe electrical harness to the rear subframe, and then fasten the clips (x12) that attach the electrical harness to the subframe.
 Courtesy of TESLA, INC. Courtesy of TESLA, INC.
|
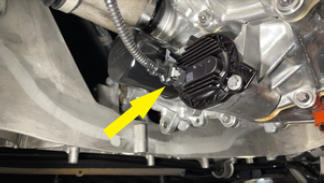
- Connect the rear subframe electrical harness to the rear drive unit oil pump connector, and then fasten the gray tab.
 Courtesy of TESLA, INC. Courtesy of TESLA, INC.
|
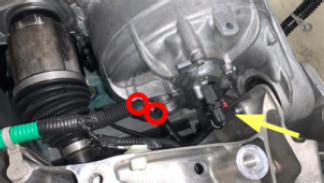
- Connect the rear subframe electrical harness to the rear drive unit resolver connector, fasten the locking tab, and then fasten the clips (x2) that attach the electrical harness to the rear drive unit motor.
 Courtesy of TESLA, INC. Courtesy of TESLA, INC.
|
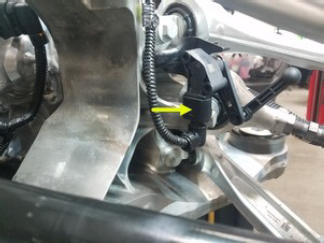
- Connect the rear subframe electrical harness to the RH ride height sensor connector.
 Courtesy of TESLA, INC. Courtesy of TESLA, INC.
|
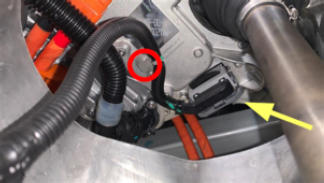
- Connect the rear subframe electrical harness to the rear drive unit inverter LV connector, fasten the locking tab, and then fasten the clip that attaches the electrical harness to the rear drive unit inverter.
 Courtesy of TESLA, INC. Courtesy of TESLA, INC.
|
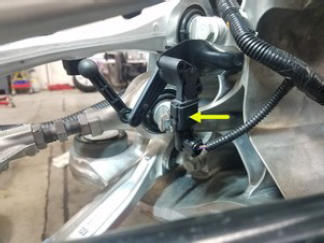
- Connect the rear subframe electrical harness to the LH ride height sensor connector.
 Courtesy of TESLA, INC. Courtesy of TESLA, INC.
|
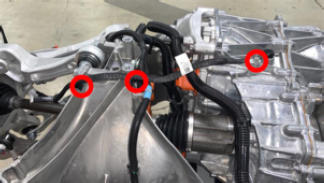
- Install the ground strap to the rear subframe, and then install the bolt and fasten the clips (x2) that attach the ground strap to the subframe.
10 N.m (7.4 ft-lbs)
 Courtesy of TESLA, INC. Courtesy of TESLA, INC.
|
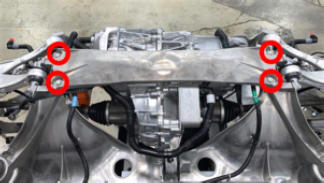
- Install the rear subframe brace to the rear subframe, and then install the bolts (x4) that attach the brace to the subframe.
120 N.m (88.5 ft-lbs)
 Courtesy of TESLA, INC. Courtesy of TESLA, INC.
|
- Install the rear subframe. See SUBFRAME ASSEMBLY - REAR (REMOVE AND INSTALL) .
- Install the rear fascia diffuser. See Diffuser - Rear Fascia (Remove and Replace)
.
- Install the mid aero shield panel. See Panel - Aero Shield - Mid (Remove and Replace)
.
- Install the rear wheels. See Wheel (Remove and Install)
.
- Connect LV power. See LV Power (Disconnect and Connect)
.
- Engage the electronic parking brake. See Park Brake Caliper - Release - Toolbox
.
- Connect a laptop with Toolbox 3 to the vehicle. See Toolbox 3 (Connect and Disconnect)
.
- Perform a cooling system air purge. See Cooling System (Partial Refill and Bleed)
.
- Disconnect the laptop with Toolbox 3 from the vehicle. See Toolbox 3 (Connect and Disconnect)
.
- Install the underhood storage unit. See Underhood Storage Unit (Remove and Install)
.
- Install the rear underhood apron. See Underhood Apron - Rear (Remove and Replace)
.
- Hold the LH and RH B-pillar upper buttons in the close position to manually calibrate the LH and RH falcon wing doors.
- Remove the vehicle from the 2 post lift. See Raise Vehicle - 2 Post Lift
.
- Refer to the Alignment Requirement tables to determine if an alignment check (AC) or full adjustment (FA) is necessary. See Alignment Requirement - Suspension
.