- Open LH front door
- Lower LH and RH front windows
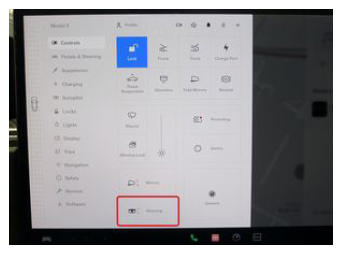
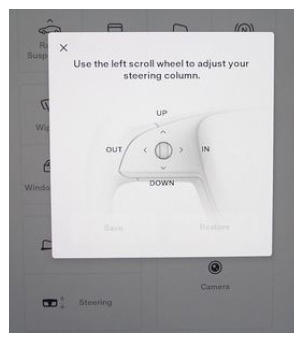
- Adjust steering column fully rearward and fully down
NOTE:
Via UI > Controls > Steering, Use left steering wheel scroll wheel to adjust steering column
 Courtesy of TESLA, INC. Courtesy of TESLA, INC.
|
 Courtesy of TESLA, INC. Courtesy of TESLA, INC.
|
 Courtesy of TESLA, INC. Courtesy of TESLA, INC.
|
- Move LH front seat backward
 Courtesy of TESLA, INC. Courtesy of TESLA, INC.
|
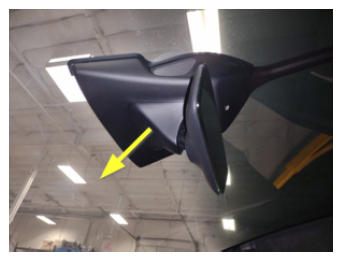
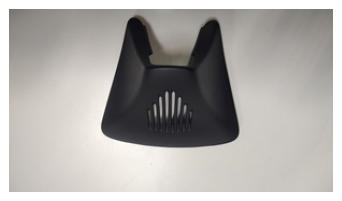
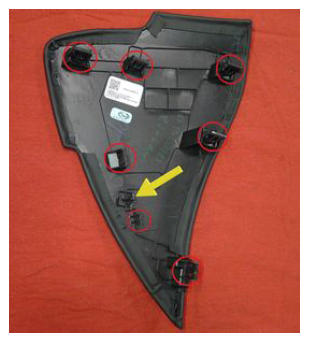
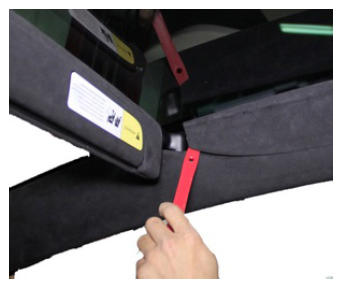
- Release rear view mirror lower cover
NOTE:
6x tabs, Press inward on the sides of the cover and pull the bottom edge downward to release
 Courtesy of TESLA, INC. Courtesy of TESLA, INC.
|
 Courtesy of TESLA, INC. Courtesy of TESLA, INC.
|
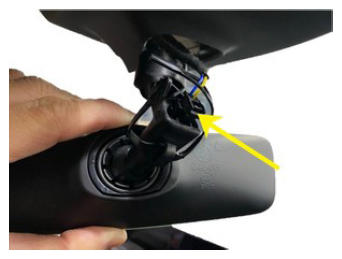
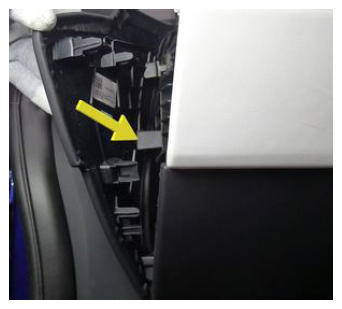
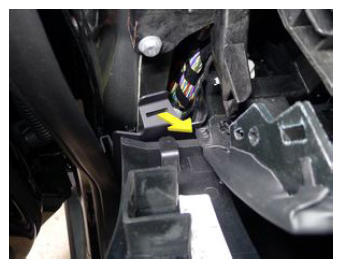
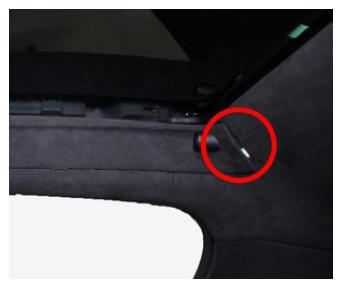
- Disconnect rear view mirror connector
NOTE:
1x connector
 Courtesy of TESLA, INC. Courtesy of TESLA, INC.
|
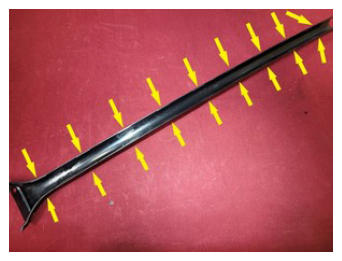
- Remove rear view mirror
NOTE:
Turn mirror counterclockwise to remove, do not twist by holding the mirror itself, it will separate from the stalk, twist from the stalk connecting the mirror to the mount
 Courtesy of TESLA, INC. Courtesy of TESLA, INC.
|
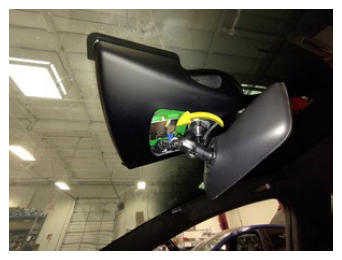
- Lower upper rear view mirror cover
NOTE:
4x clips, Carefully pull down on upper rear view mirror cover to release from clips, Lower overhead console plastic/harness to gain access to interior camera connector
 Courtesy of TESLA, INC. Courtesy of TESLA, INC.
|
 Courtesy of TESLA, INC. Courtesy of TESLA, INC.
|
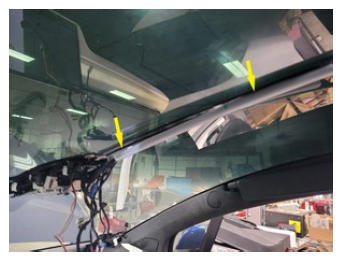
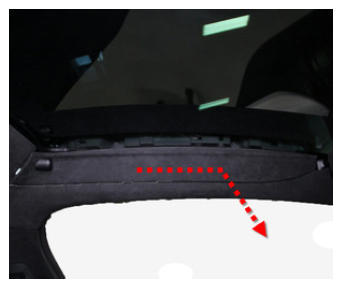
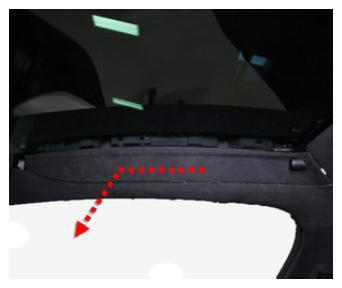
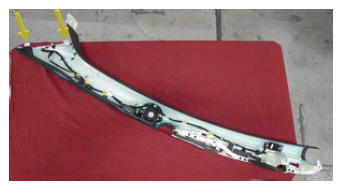
- Remove umbilical wire harness cover
NOTE:
16x retaining tabs, Release tabs from windshield bracket and slide cover forward from headliner
 Courtesy of TESLA, INC. Courtesy of TESLA, INC.
|
 Courtesy of TESLA, INC. Courtesy of TESLA, INC.
|
- Release harness connector for fan
NOTE:
1x connector
 Courtesy of TESLA, INC. Courtesy of TESLA, INC.
|
- Release heater grid harness
NOTE:
2x hooks, 1x connector retainer
 Courtesy of TESLA, INC. Courtesy of TESLA, INC.
|
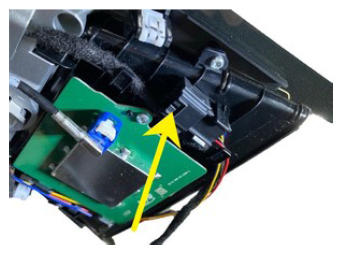
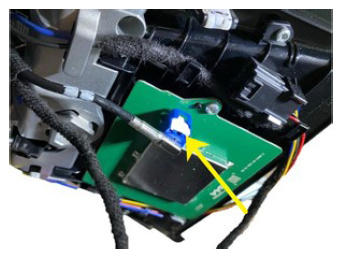
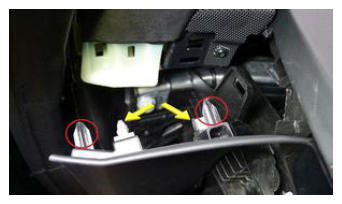
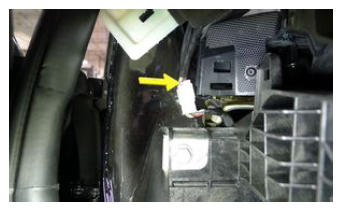
- Disconnect harness connector for GNSS antenna
NOTE:
1x connector
 Courtesy of TESLA, INC. Courtesy of TESLA, INC.
|
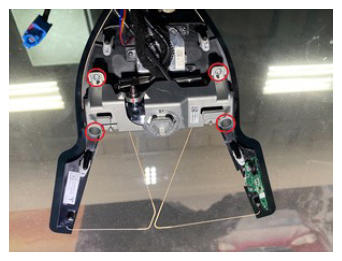
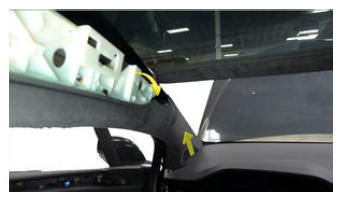
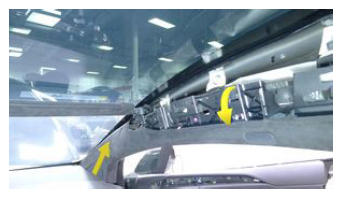
- Remove glare shield
NOTE:
2x bolts, T10, 1 N.m, 2x datums, 2x tabs, Tilt shield down and slide tabs forward
 Courtesy of TESLA, INC. Courtesy of TESLA, INC.
|
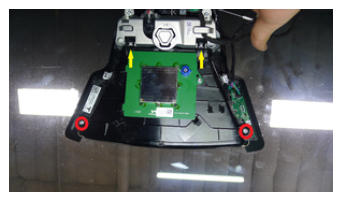
- Remove screws securing mounting plate to windshield
NOTE:
4x screws, T10, 0.8 N.m, Allow camera to hang by harness
 Courtesy of TESLA, INC. Courtesy of TESLA, INC.
|
- Release harness from windshield
NOTE:
Release harness guide from windshield retainer, Fully lower overhead console harness from windshield
 Courtesy of TESLA, INC. Courtesy of TESLA, INC.
|
- Remove LH IP end cap
NOTE:
7x clips, 1x datum, Ensure clip at IP carrier is released fully before removal
 Courtesy of TESLA, INC. Courtesy of TESLA, INC.
|
 Courtesy of TESLA, INC. Courtesy of TESLA, INC.
|
 Courtesy of TESLA, INC. Courtesy of TESLA, INC.
|
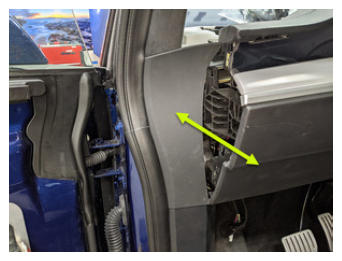
- Remove LH mid A-pillar trim
NOTE:
2x clips, 3x datums, Release clips from upper A-pillar and IP sub assembly, Lift mid A-pillar trim out of lower A-pillar trim
 Courtesy of TESLA, INC. Courtesy of TESLA, INC.
|
 Courtesy of TESLA, INC. Courtesy of TESLA, INC.
|
 Courtesy of TESLA, INC. Courtesy of TESLA, INC.
|
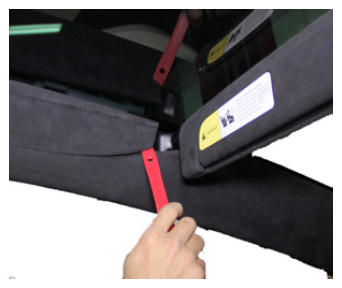
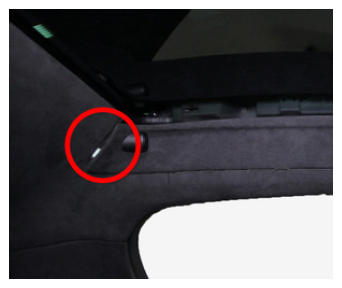
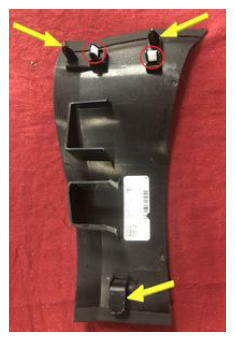
- Remove LH sunvisor bezel
NOTE:
6x clips, 5x tabs, Release clips, then slide bezel towards front of vehicle to release
 Courtesy of TESLA, INC. Courtesy of TESLA, INC.
|
 Courtesy of TESLA, INC. Courtesy of TESLA, INC.
|
 Courtesy of TESLA, INC. Courtesy of TESLA, INC.
|
 Courtesy of TESLA, INC. Courtesy of TESLA, INC.
|
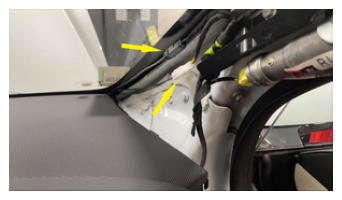
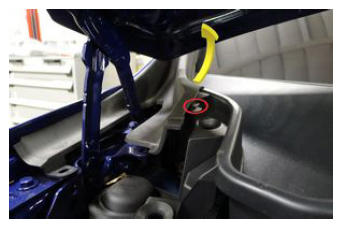
- Remove bolts securing LH upper A-pillar to body
NOTE:
2x bolts, 10 mm, 5 N.m, 1x screw, T20, 2.5 N.m, 1x nyloc nut, 13 mm, 5 N.m, Discard nut after removal
 Courtesy of TESLA, INC. Courtesy of TESLA, INC.
|
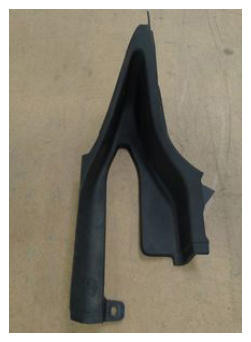
- Remove LH upper A-pillar from vehicle
NOTE:
1x connector, 2x datums, 6x clips, Release clips and rotate pillar inboard to access connector, Release datums upward out of IP sub assembly
 Courtesy of TESLA, INC. Courtesy of TESLA, INC.
|
 Courtesy of TESLA, INC. Courtesy of TESLA, INC.
|
 Courtesy of TESLA, INC. Courtesy of TESLA, INC.
|
- Open RH front door
 Courtesy of TESLA, INC. Courtesy of TESLA, INC.
|
- Move RH front seat backward
 Courtesy of TESLA, INC. Courtesy of TESLA, INC.
|
- Remove RH IP end cap
NOTE:
3x clips
 Courtesy of TESLA, INC. Courtesy of TESLA, INC.
|
- Remove RH mid A-pillar trim
NOTE:
2x clips, 3x datums, Release clips from upper A-pillar and IP sub assembly, Lift mid A-pillar trim out of lower A-pillar trim
 Courtesy of TESLA, INC. Courtesy of TESLA, INC.
|
 Courtesy of TESLA, INC. Courtesy of TESLA, INC.
|
 Courtesy of TESLA, INC. Courtesy of TESLA, INC.
|
- Remove RH sunvisor bezel
NOTE:
6x clips, 1x tab, Release clips, then slide bezel towards front of vehicle to release
 Courtesy of TESLA, INC. Courtesy of TESLA, INC.
|
 Courtesy of TESLA, INC. Courtesy of TESLA, INC.
|
 Courtesy of TESLA, INC. Courtesy of TESLA, INC.
|
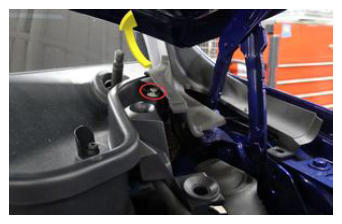
- Remove bolts securing RH upper A-pillar to body
NOTE:
2x bolts, 10 mm, 5 N.m, 1x screw, T20, 2.5 N.m, 1x nyloc nut, 13 mm, 5 N.m, Discard nut after removal
 Courtesy of TESLA, INC. Courtesy of TESLA, INC.
|
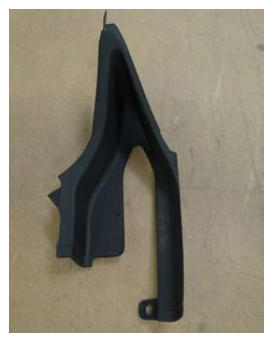
- Remove RH upper A-pillar from vehicle
NOTE:
1x connector, 2x datums, Rotate pillar inboard to access connector, Release datums upward out of IP sub assembly
 Courtesy of TESLA, INC. Courtesy of TESLA, INC.
|
 Courtesy of TESLA, INC. Courtesy of TESLA, INC.
|
 Courtesy of TESLA, INC. Courtesy of TESLA, INC.
|
- Disconnect windshield heater connectors
NOTE:
2x Connectors
 Courtesy of TESLA, INC. Courtesy of TESLA, INC.
|
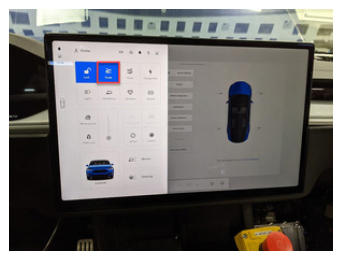
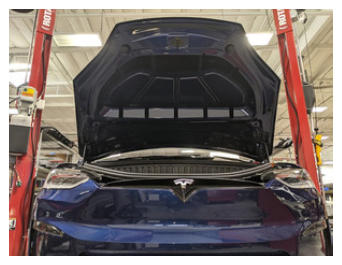
- Open hood
NOTE:
Via center display > Controls > Frunk Open
 Courtesy of TESLA, INC. Courtesy of TESLA, INC.
|
 Courtesy of TESLA, INC. Courtesy of TESLA, INC.
|
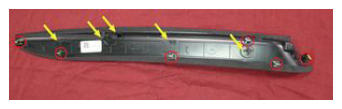
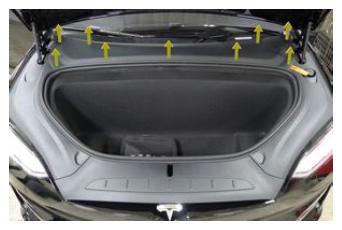
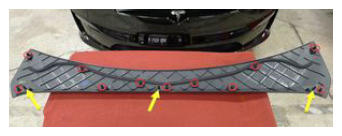
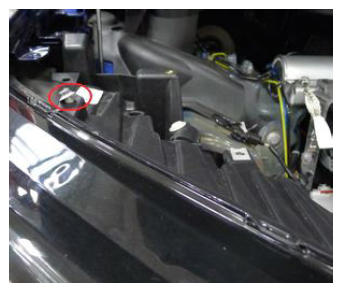
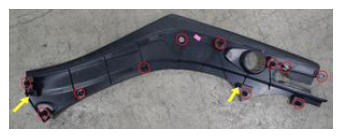
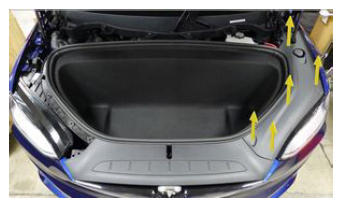
- Remove rear underhood apron
NOTE:
11x clips, 2x datums
 Courtesy of TESLA, INC. Courtesy of TESLA, INC.
|
 Courtesy of TESLA, INC. Courtesy of TESLA, INC.
|
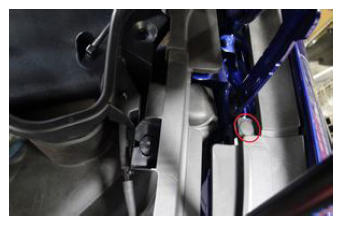
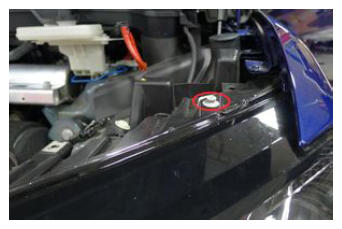
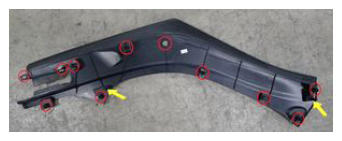
- Remove RH underhood apron
NOTE:
11x clips, 2x datums, Remove brush clip at hinge cover first, Take note of clip at headlamp
 Courtesy of TESLA, INC. Courtesy of TESLA, INC.
|
 Courtesy of TESLA, INC. Courtesy of TESLA, INC.
|
 Courtesy of TESLA, INC. Courtesy of TESLA, INC.
|
 Courtesy of TESLA, INC. Courtesy of TESLA, INC.
|
- Remove LH underhood apron
NOTE:
11x clips, 2x datums, Remove brush clip at hinge cover first, Take note of clip at headlamp
 Courtesy of TESLA, INC. Courtesy of TESLA, INC.
|
 Courtesy of TESLA, INC. Courtesy of TESLA, INC.
|
 Courtesy of TESLA, INC. Courtesy of TESLA, INC.
|
 Courtesy of TESLA, INC. Courtesy of TESLA, INC.
|
- Release RH wiper arm hose nozzle
NOTE:
1x hose
 Courtesy of TESLA, INC. Courtesy of TESLA, INC.
|
- Release LH wiper arm hose nozzle
NOTE:
1x hose
 Courtesy of TESLA, INC. Courtesy of TESLA, INC.
|
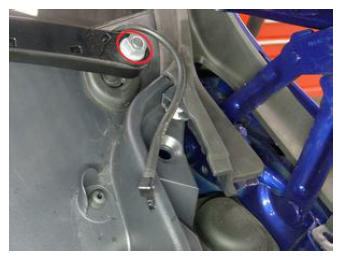
- Remove LH wiper arm nut cover
NOTE:
1x cover
 Courtesy of TESLA, INC. Courtesy of TESLA, INC.
|
- Remove RH wiper arm nut covers
NOTE:
2x cover
 Courtesy of TESLA, INC. Courtesy of TESLA, INC.
|
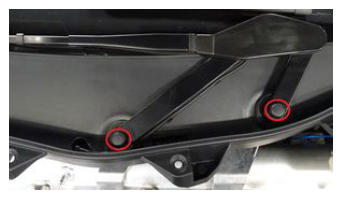
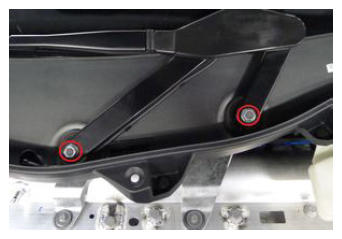
- Remove RH wiper arm nuts and release assembly
NOTE:
2x nuts, 15 mm, 32 N.m, Do not flex wiper arm to remove
 Courtesy of TESLA, INC. Courtesy of TESLA, INC.
|
 Courtesy of TESLA, INC. Courtesy of TESLA, INC.
|
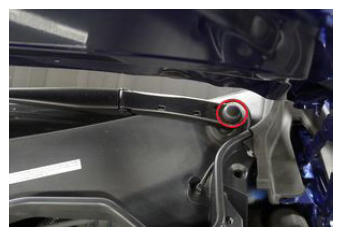
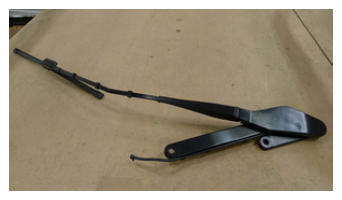
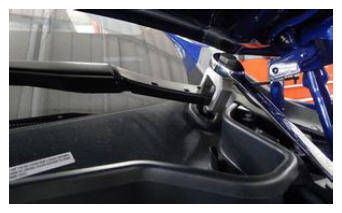
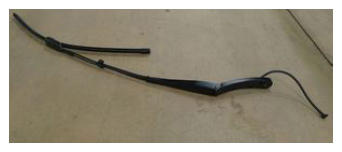
- Remove LH wiper arm nut and release assembly
NOTE:
1x nut, 15 mm, 32 N.m, Do not flex wiper arm to remove, Lower the hood slightly to fit wiper arm removal tool
 Courtesy of TESLA, INC. Courtesy of TESLA, INC.
|
 Courtesy of TESLA, INC. Courtesy of TESLA, INC.
|
 Courtesy of TESLA, INC. Courtesy of TESLA, INC.
|
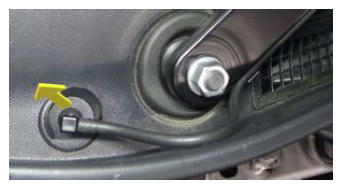
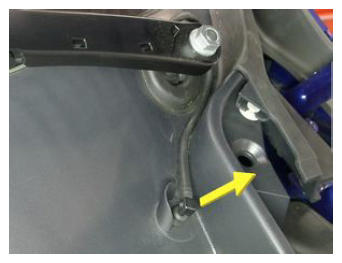
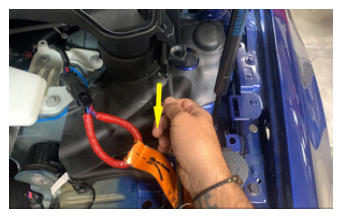
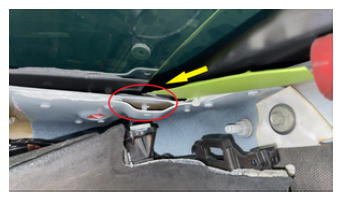
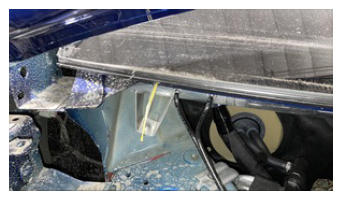
- Release cowl screen washer supply hose located above LH shock tower cover
NOTE:
1x hose
 Courtesy of TESLA, INC. Courtesy of TESLA, INC.
|
- Remove RH outer hood hinge cover
NOTE:
1x clips
 Courtesy of TESLA, INC. Courtesy of TESLA, INC.
|
 Courtesy of TESLA, INC. Courtesy of TESLA, INC.
|
- Remove LH outer hood hinge cover
NOTE:
1x clips
 Courtesy of TESLA, INC. Courtesy of TESLA, INC.
|
 Courtesy of TESLA, INC. Courtesy of TESLA, INC.
|
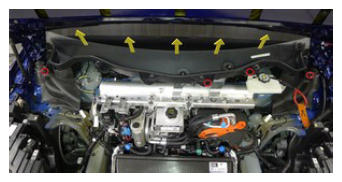
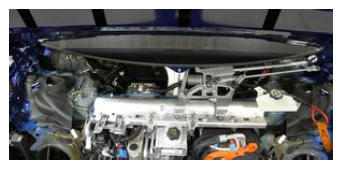
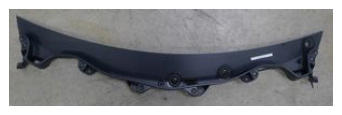
- Remove wiper cowl screen panel
NOTE:
4x push clips, Pull cowl up out of lower windshield channel
 Courtesy of TESLA, INC. Courtesy of TESLA, INC.
|
 Courtesy of TESLA, INC. Courtesy of TESLA, INC.
|
 Courtesy of TESLA, INC. Courtesy of TESLA, INC.
|
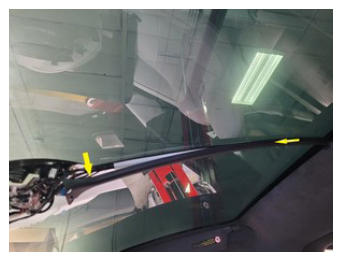
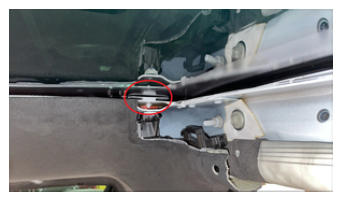
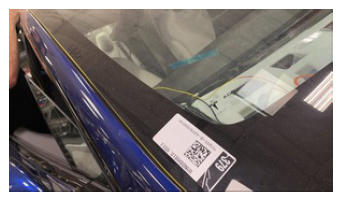
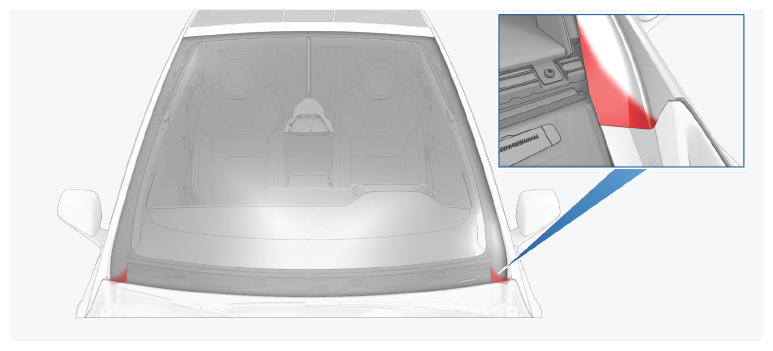
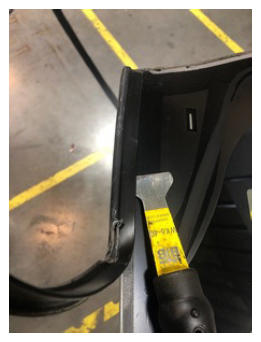
- Use equalizer to separate the two datums from the windshield
NOTE:
2x datums, One at each upper corner of windshield, Slide equalizer up against datums and carefully tap equalizer to separate from windshield
 Courtesy of TESLA, INC. Courtesy of TESLA, INC.
|
 Courtesy of TESLA, INC. Courtesy of TESLA, INC.
|
 Courtesy of TESLA, INC. Courtesy of TESLA, INC.
|
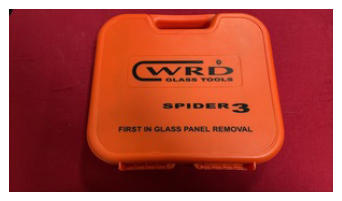
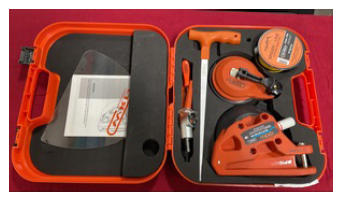
- Prepare WRD Spider 3 glass removal kit
 Courtesy of TESLA, INC. Courtesy of TESLA, INC.
|
 Courtesy of TESLA, INC. Courtesy of TESLA, INC.
|
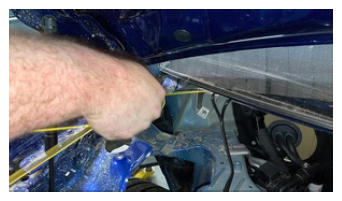
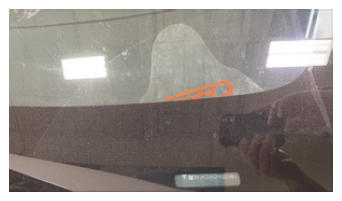
- Secure line to starter tool and push tool through urethane at lower RH side of windshield
NOTE:
Use the guard to prevent damage to dash pad while using starter tool
 Courtesy of TESLA, INC. Courtesy of TESLA, INC.
|
 Courtesy of TESLA, INC. Courtesy of TESLA, INC.
|
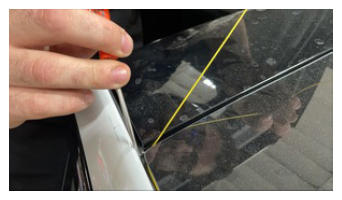
- Release line from starter tool and wrap line around exterior of windshield
NOTE:
Pull line away from starter tool, Ensure enough length is pulled through, Wrap spider line up and around the exterior of windshield, Verify the line sits underneath the glass
 Courtesy of TESLA, INC. Courtesy of TESLA, INC.
|
 Courtesy of TESLA, INC. Courtesy of TESLA, INC.
|
 Courtesy of TESLA, INC. Courtesy of TESLA, INC.
|
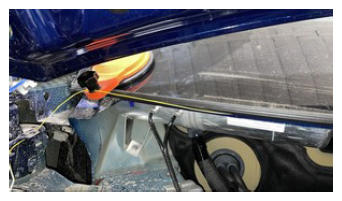
- Attach anchor point to exterior of windshield and secure line
NOTE:
Attach line to anchor once fully wrapped around windshield, Place anchor near starting point of the handle tool
 Courtesy of TESLA, INC. Courtesy of TESLA, INC.
|
- Secure interior side of line to the spider cutting tool
NOTE:
Follow instructions on spider tool, Feed line through opening of the cutting tool and tie a knot to secure in place, If spindle is not turned the proper direction the cutting tool will be damaged
 Courtesy of TESLA, INC. Courtesy of TESLA, INC.
|
 Courtesy of TESLA, INC. Courtesy of TESLA, INC.
|
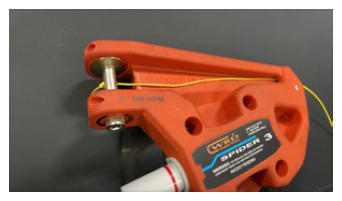
- Secure spider cutting tool to interior side of windshield
NOTE:
Note orientation of the cutting line, Make sure line warps over large pulley and holds at a 90 degree angle
 Courtesy of TESLA, INC. Courtesy of TESLA, INC.
|
 Courtesy of TESLA, INC. Courtesy of TESLA, INC.
|
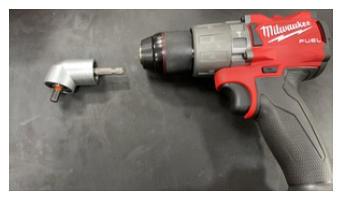
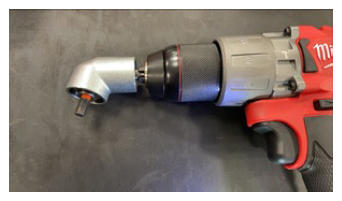
- Secure angle driver to electric drill
 Courtesy of TESLA, INC. Courtesy of TESLA, INC.
|
 Courtesy of TESLA, INC. Courtesy of TESLA, INC.
|
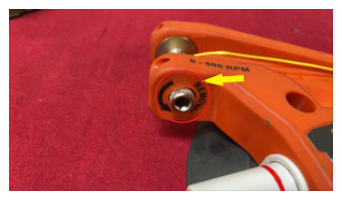
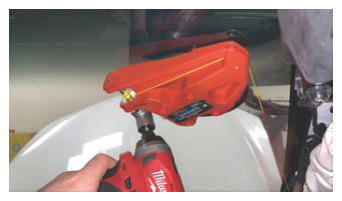
- Turn the spindle on the cutting tool with the drill to start removing the windshield.
NOTE:
Move the cutting tool as needed keeping the line close to a 90 degree angle, When passing VIN plate use guard to guide line over VIN to prevent damage.
CAUTION:
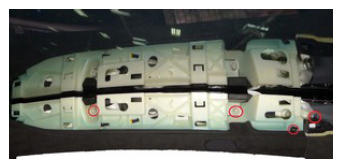
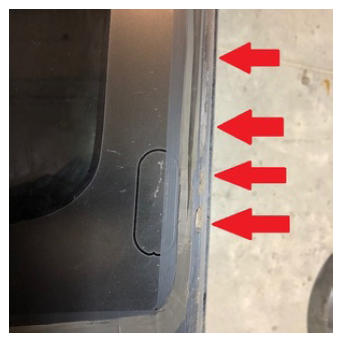
Take special care in the areas identified that have overlapping panels to prevent damage.
 Courtesy of TESLA, INC. Courtesy of TESLA, INC.
|
 Courtesy of TESLA, INC. Courtesy of TESLA, INC.
|
 Courtesy of TESLA, INC. Courtesy of TESLA, INC.
|
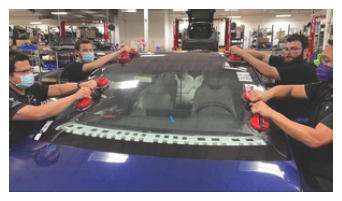
- Remove windshield from windshield frame
NOTE:
Recommend assistance, Have 3 others aid in removal of windshield
 Courtesy of TESLA, INC. Courtesy of TESLA, INC.
|
 Courtesy of TESLA, INC. Courtesy of TESLA, INC.
|
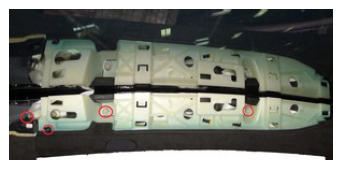
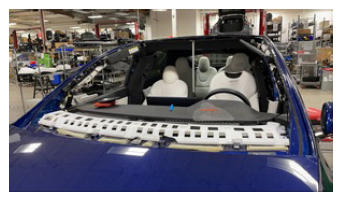
- Clean and remove old adhesive from the windshield frame
 Courtesy of TESLA, INC. Courtesy of TESLA, INC.
|
- Remove urethane bead and windshield seals from glass
 Courtesy of TESLA, INC. Courtesy of TESLA, INC.
|
 Courtesy of TESLA, INC. Courtesy of TESLA, INC.
|
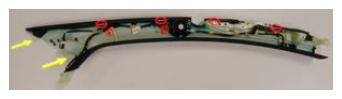
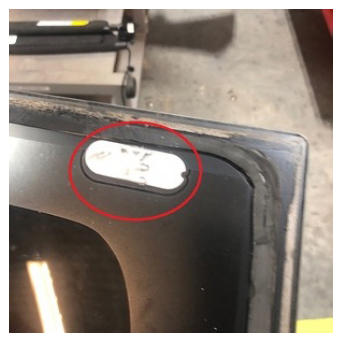
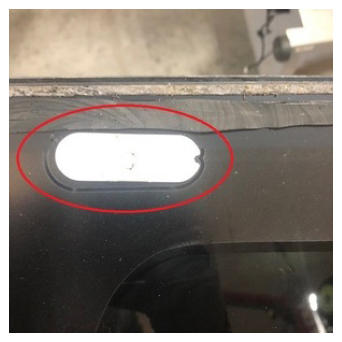
- Remove damaged datums
NOTE:
2x datums, inside of upper corners
 Courtesy of TESLA, INC. Courtesy of TESLA, INC.
|
 Courtesy of TESLA, INC. Courtesy of TESLA, INC.
|
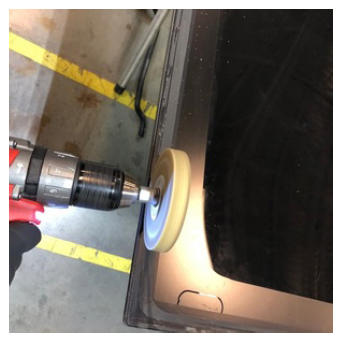
- Clean double sided tape residue
NOTE:
if needed, an eraser wheel can be used.
 Courtesy of TESLA, INC. Courtesy of TESLA, INC.
|
 Courtesy of TESLA, INC. Courtesy of TESLA, INC.
|
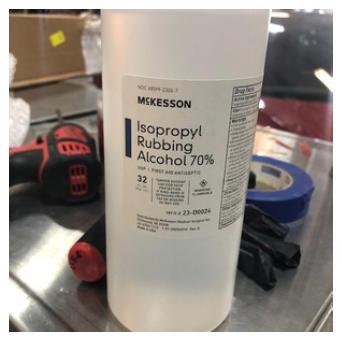
- Clean all mating surfaces with isopropyl alcohol
 Courtesy of TESLA, INC. Courtesy of TESLA, INC.
|