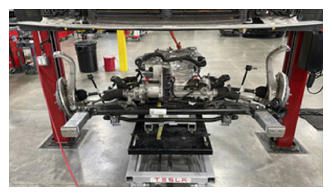
- With the help of an assistant, move the subframe lifting tool under the vehicle, and then raise the front subframe into position.
 Courtesy of TESLA, INC. Courtesy of TESLA, INC.
|
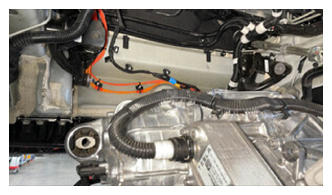
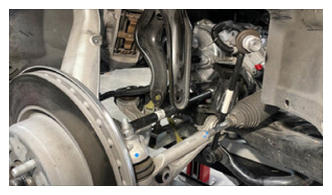
- As the subframe is raised, guide the motor mount bushings into the motor mount isolators, and make sure that the struts straddle the axles and lateral links.
 Courtesy of TESLA, INC. Courtesy of TESLA, INC.
|
 Courtesy of TESLA, INC. Courtesy of TESLA, INC.
|
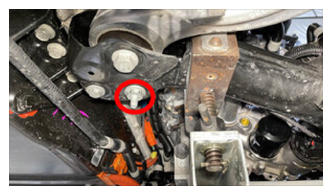
- Install and hand-tighten new larger bolts (x2) that attach the rear of the front subframe to the body.
 Courtesy of TESLA, INC. Courtesy of TESLA, INC.
|
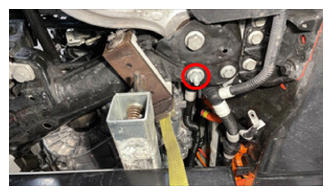 Courtesy of TESLA, INC. Courtesy of TESLA, INC.
|
- Install and hand-tighten new smaller bolts (x2) that attach the rear of the front subframe to the body.
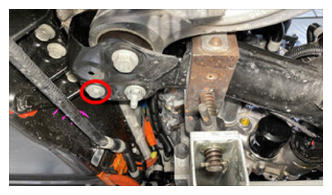 Courtesy of TESLA, INC. Courtesy of TESLA, INC.
|
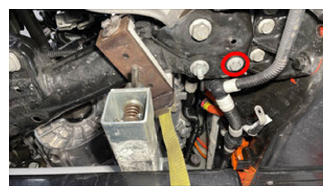 Courtesy of TESLA, INC. Courtesy of TESLA, INC.
|
- Install and hand-tighten new bolts (x2) that attach the front of the front subframe to the body.
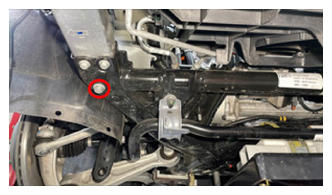 Courtesy of TESLA, INC. Courtesy of TESLA, INC.
|
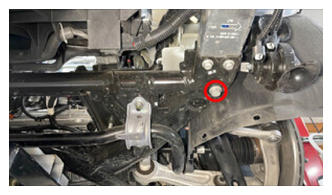 Courtesy of TESLA, INC. Courtesy of TESLA, INC.
|
- Install and hand-tighten new bolts (x2) that attach the front subframe LH and RH mid mounts to the body.
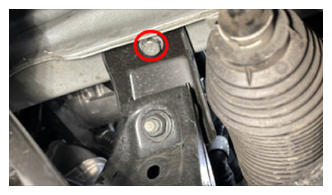 Courtesy of TESLA, INC. Courtesy of TESLA, INC.
|
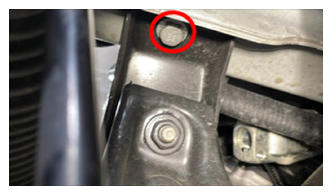 Courtesy of TESLA, INC. Courtesy of TESLA, INC.
|
- Install and hand-tighten the bolts (x4) that attach the front end carrier to the LH and RH front subframe crash cans.
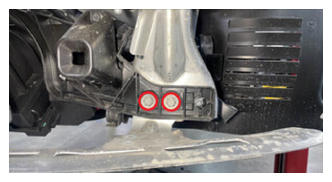 Courtesy of TESLA, INC. Courtesy of TESLA, INC.
|
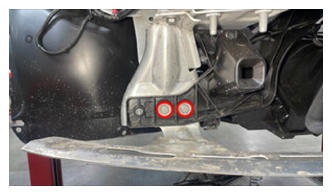 Courtesy of TESLA, INC. Courtesy of TESLA, INC.
|
- Torque the larger bolts (x2) that attach the rear of the front subframe to the body.
 125 N.m (92.2 ft-lbs)
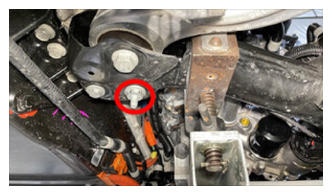 Courtesy of TESLA, INC. Courtesy of TESLA, INC.
|
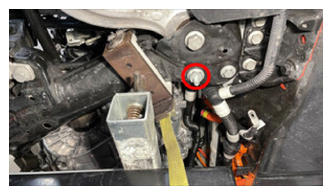 Courtesy of TESLA, INC. Courtesy of TESLA, INC.
|
- Torque the smaller bolts (x2) that attach the rear of the front subframe to the body.
50 N.m (36.9 ft-lbs)
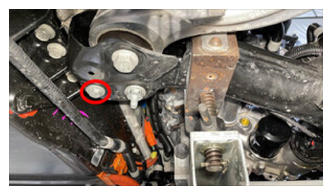 Courtesy of TESLA, INC. Courtesy of TESLA, INC.
|
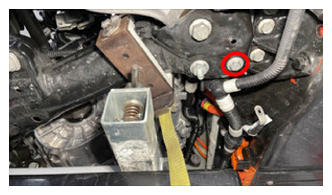 Courtesy of TESLA, INC. Courtesy of TESLA, INC.
|
- Torque the bolts (x2) that attach the front of the front subframe to the body.
72 N.m (53.1 ft-lbs)
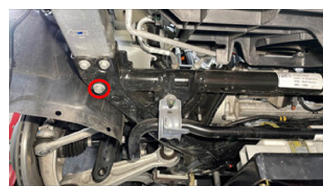 Courtesy of TESLA, INC. Courtesy of TESLA, INC.
|
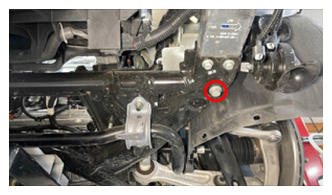 Courtesy of TESLA, INC. Courtesy of TESLA, INC.
|
- Torque the bolts (x2) that attach the front subframe LH and RH mid mounts to the body.
50 N.m (36.9 ft-lbs)
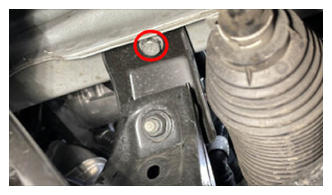 Courtesy of TESLA, INC. Courtesy of TESLA, INC.
|
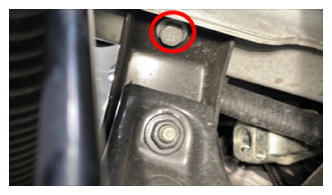 Courtesy of TESLA, INC. Courtesy of TESLA, INC.
|
- Torque the bolts (x4) that attach the front end carrier to the LH and RH front subframe crash cans.
16 N.m (11.8 ft-lbs)
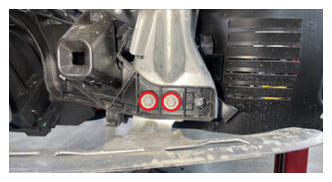 Courtesy of TESLA, INC. Courtesy of TESLA, INC.
|
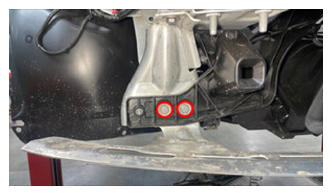 Courtesy of TESLA, INC. Courtesy of TESLA, INC.
|
- Install the bolt that attaches the RH motor mount to the RH motor mount bracket.
- For Legacy Pack Model Y vehicles, torque to 105 N.m
- For Structural Pack Model Y vehicles, torque to 142.5 N.m
NOTE:
It might be necessary to adjust the subframe jig to help align the bolt into the mount.
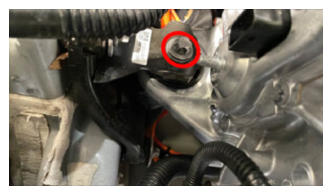 Courtesy of TESLA, INC. Courtesy of TESLA, INC.
|
- Connect the subframe electrical harness to the front drive unit motor resolver connector, and then press the red locking tab to secure the connector.
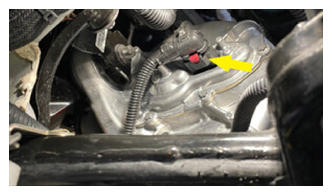 Courtesy of TESLA, INC. Courtesy of TESLA, INC.
|
- Install the bolt that attaches the LH motor mount to the LH motor mount bracket.
- For Legacy Pack Model Y vehicles, torque to 105 N.m
- For Structural Pack Model Y vehicles, torque to 142.5 N.m
NOTE:
It might be necessary to adjust the subframe jig to help align the bolt into the mount.
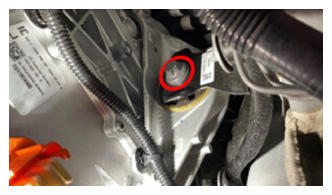 Courtesy of TESLA, INC. Courtesy of TESLA, INC.
|
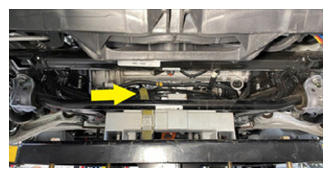
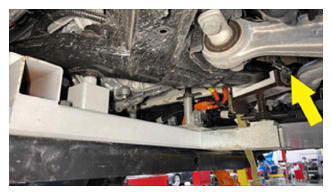
- Release the straps (x3) that attach the front subframe to the subframe lifting tool.
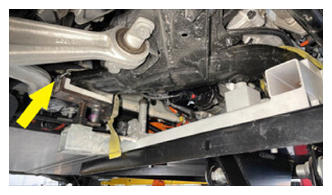 Courtesy of TESLA, INC. Courtesy of TESLA, INC.
|
 Courtesy of TESLA, INC. Courtesy of TESLA, INC.
|
 Courtesy of TESLA, INC. Courtesy of TESLA, INC.
|
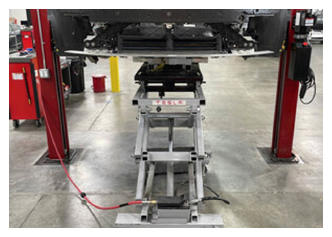
- Lower the subframe lifting tool, and move it out from under the front subframe.
 Courtesy of TESLA, INC. Courtesy of TESLA, INC.
|
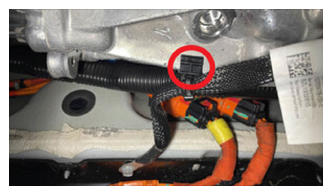
- Fasten the clip that attaches the front drive unit ground strap to the front drive unit.
 Courtesy of TESLA, INC. Courtesy of TESLA, INC.
|
- Torque the bolt that attaches the front drive unit ground strap to the HV battery.
10 N.m (7.4 ft-lbs)
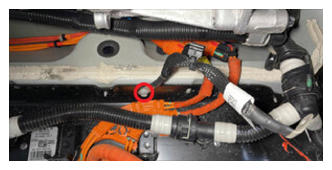 Courtesy of TESLA, INC. Courtesy of TESLA, INC.
|
- Install the bolt that attaches the front drive unit ground strap to the front drive unit.
6 N.m (4.4 ft-lbs)
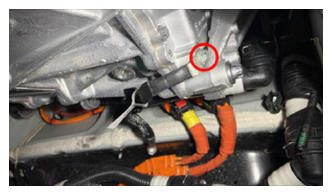 Courtesy of TESLA, INC. Courtesy of TESLA, INC.
|
- Install the front drive unit HV harness onto the casting.
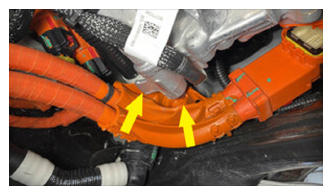 Courtesy of TESLA, INC. Courtesy of TESLA, INC.
|
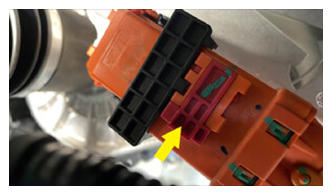
- Connect the front drive unit HV harness from the front drive unit inverter HV header squarely, lower the black handle, and then slide the red locking tab.
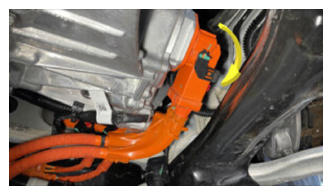 Courtesy of TESLA, INC. Courtesy of TESLA, INC.
|
 Courtesy of TESLA, INC. Courtesy of TESLA, INC.
|
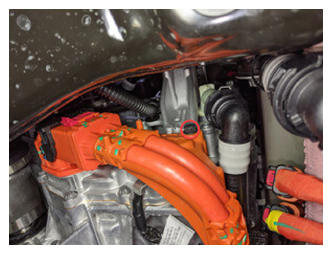
- Install the bolt that attaches the front drive unit HV harness to the front drive unit.
10 N.m (7.4 ft-lbs)
 Courtesy of TESLA, INC. Courtesy of TESLA, INC.
|
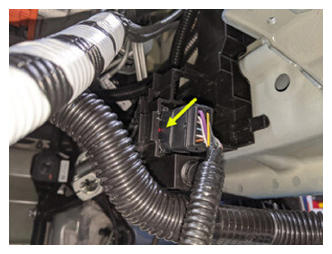
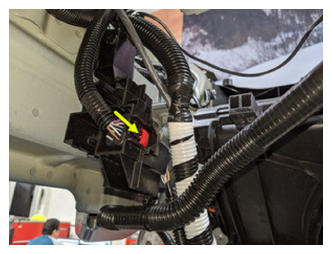
- Connect the electrical harness to the LH front rail bracket connector, and then fasten the red locking tab on the opposite side of the LH front rail bracket.
 Courtesy of TESLA, INC. Courtesy of TESLA, INC.
|
 Courtesy of TESLA, INC. Courtesy of TESLA, INC.
|
- Fasten the clip that attaches the electrical harness to the front subframe.
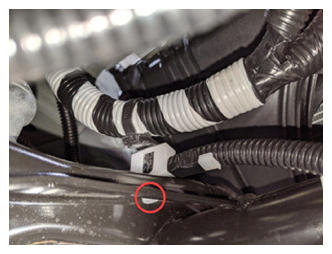 Courtesy of TESLA, INC. Courtesy of TESLA, INC.
|
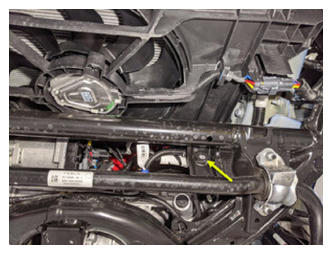 Courtesy of TESLA, INC. Courtesy of TESLA, INC.
|
- Fasten the clip that piggy-backs the electrical harness to the clip just fastened.
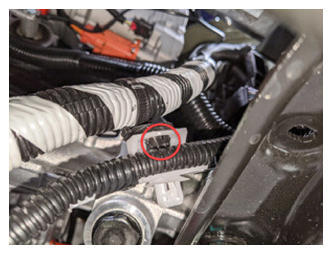 Courtesy of TESLA, INC. Courtesy of TESLA, INC.
|
- Connect the electrical harness to the LV logic connectors (x2) below the steering gear, and then push the red tabs to lock the connectors.
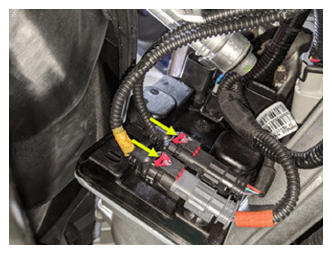 Courtesy of TESLA, INC. Courtesy of TESLA, INC.
|
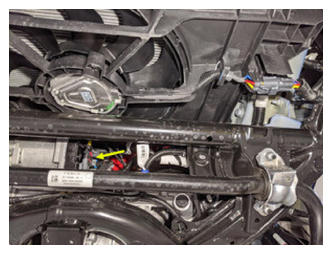 Courtesy of TESLA, INC. Courtesy of TESLA, INC.
|
- Move the coolant drain collector to underneath the RH front of the HV battery.
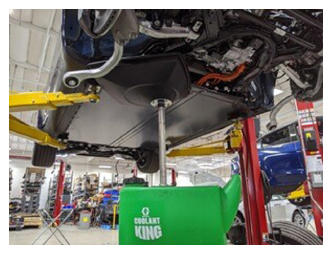 Courtesy of TESLA, INC. Courtesy of TESLA, INC.
|
- Remove the plugs, immediately connect the front drive unit heat exchanger to Supermanifold hose to the front drive unit heat exchanger, fasten the clip, and then perform a Push-Pull-Push check of the fittings.
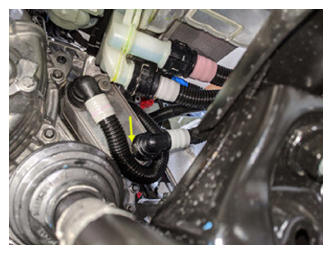 Courtesy of TESLA, INC. Courtesy of TESLA, INC.
|
- Remove the plugs, immediately connect the front drive unit inverter inlet hose to the powertrain return hose, fasten the clip, and then perform a Push-Pull-Push check of the fitting.
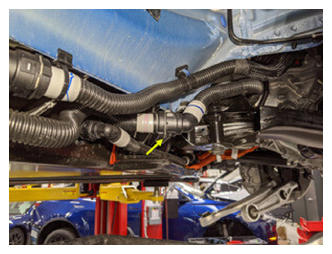 Courtesy of TESLA, INC. Courtesy of TESLA, INC.
|
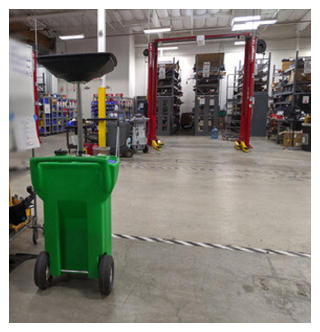
- Move the coolant drain collector out from underneath the vehicle.
 Courtesy of TESLA, INC. Courtesy of TESLA, INC.
|
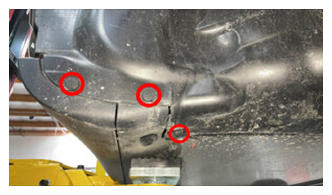
- Install the RH front wheel arch liner to the RH rocker cover, and then fasten the clips (x3) that attach the liner to the cover.
 Courtesy of TESLA, INC. Courtesy of TESLA, INC.
|
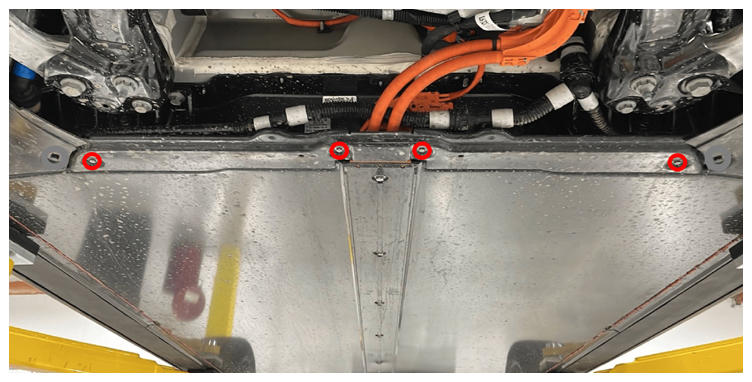
- Install the front skid plate to the HV battery, and then install the bolts (x4) that attach the skid plate to the HV battery.
13 N.m (9.6 ft-lbs)
NOTE:
Use of the following tool(s) is recommended:
 Courtesy of TESLA, INC. Courtesy of TESLA, INC.
|
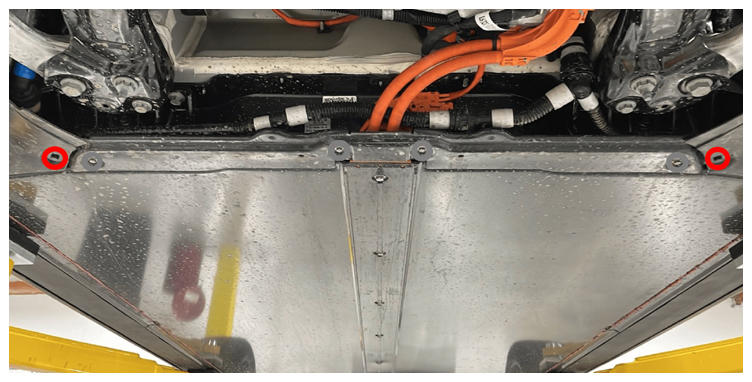
- Install the bolts (x2) that attach the skid plate to the HV battery.
5 N.m (3.7 ft-lbs)
NOTE:
Use of the following tool(s) is recommended:
 Courtesy of TESLA, INC. Courtesy of TESLA, INC.
|
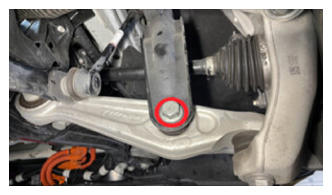
- Install and hand-tighten the bolt and nut that attach the LH front strut to the LH front lower lateral link.
NOTE:
Bolt and nut will be torqued later.
 Courtesy of TESLA, INC. Courtesy of TESLA, INC.
|
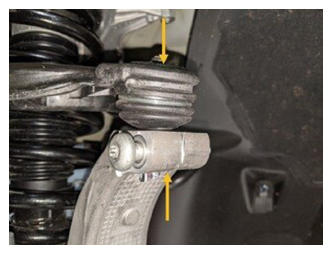
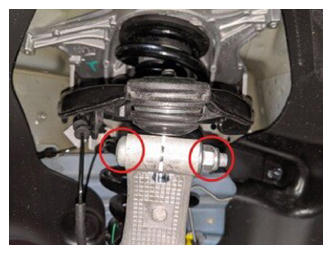
- With the help of an assistant, slide the LH front upper control arm into the LH front knuckle, and then install the bolt and a new nut to attach the control arm to the knuckle.
56 N.m (41.3 ft-lbs)
 Courtesy of TESLA, INC. Courtesy of TESLA, INC.
|
 Courtesy of TESLA, INC. Courtesy of TESLA, INC.
|
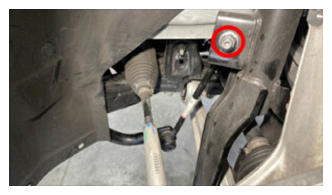
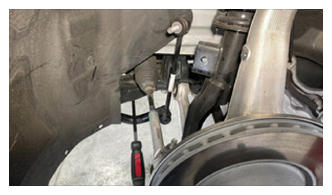
- Install the front stabilizer bar LH link to the front LH strut, and then install a new nut to attach the link to the strut.
98 N.m (72.3 ft-lbs)
NOTE:
To prevent damage to the link, use a T40 tool to prevent the link ball joint shaft from turning.
NOTE:
Use a prybar on the stabilizer bar to unload the link and ease installation onto the strut.
 Courtesy of TESLA, INC. Courtesy of TESLA, INC.
|
 Courtesy of TESLA, INC. Courtesy of TESLA, INC.
|
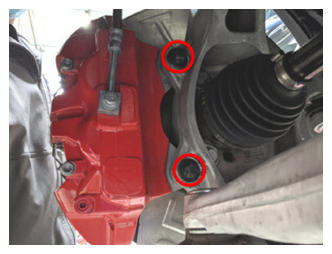
- Install the LH front brake caliper to LH front knuckle, and then install new bolts (x2) to attach the caliper to the knuckle.
94 N.m (69.3 ft-lbs)
 Courtesy of TESLA, INC. Courtesy of TESLA, INC.
|
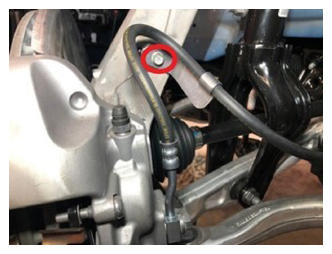
- Install the bolt that attaches the LH front brake caliper hose bracket to the LH front knuckle.
5 N.m (3.7 ft-lbs)
 Courtesy of TESLA, INC. Courtesy of TESLA, INC.
|
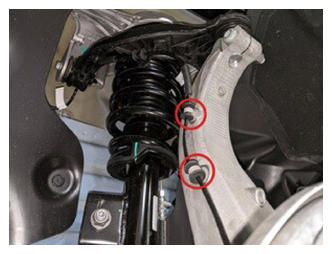
- Fasten the clips (x2) that attach the LH front wheel speed sensor harness to the LH front knuckle.
 Courtesy of TESLA, INC. Courtesy of TESLA, INC.
|
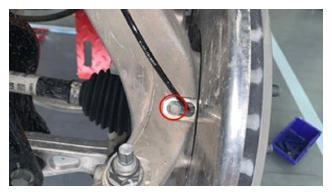
- Install the LH front wheel speed sensor to the LH front knuckle, and then install the bolt that attaches the sensor to the knuckle.
5 N.m (3.7 ft-lbs)
 Courtesy of TESLA, INC. Courtesy of TESLA, INC.
|
- Repeat step 35 through step 41 on the RH side of the vehicle.
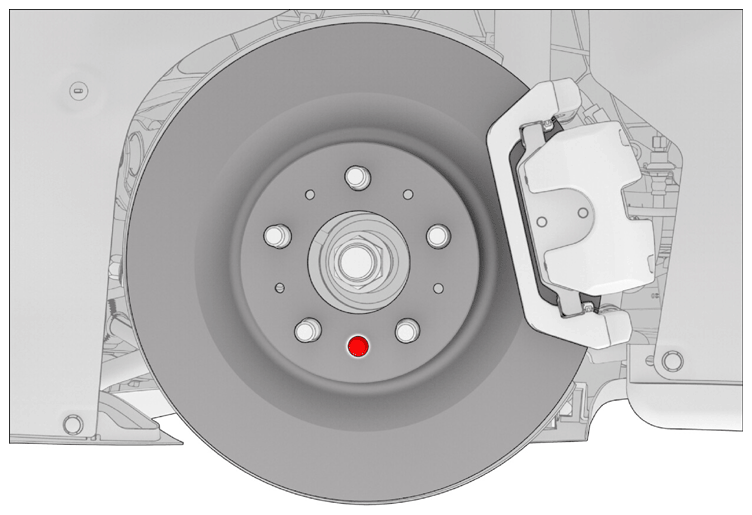
- Remove the bolt that attaches the LH front brake rotor to the hub.
 Courtesy of TESLA, INC. Courtesy of TESLA, INC.
|
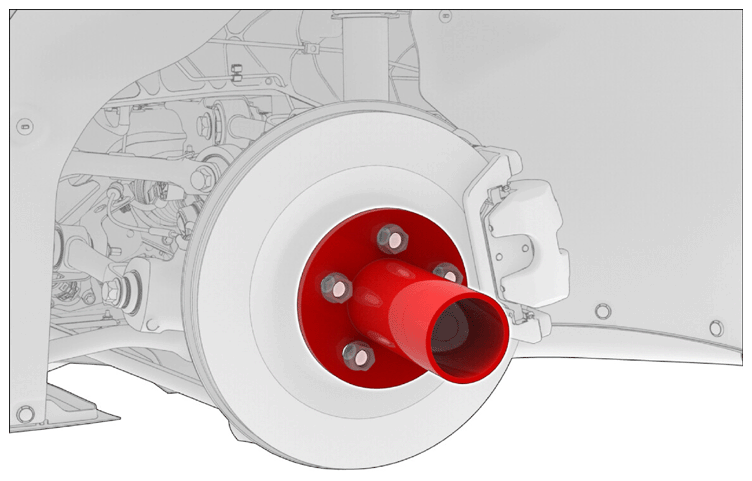
- Install the hub jack adapter onto the LH front hub and hand-tighten the lug nuts.
 Courtesy of TESLA, INC. Courtesy of TESLA, INC.
|
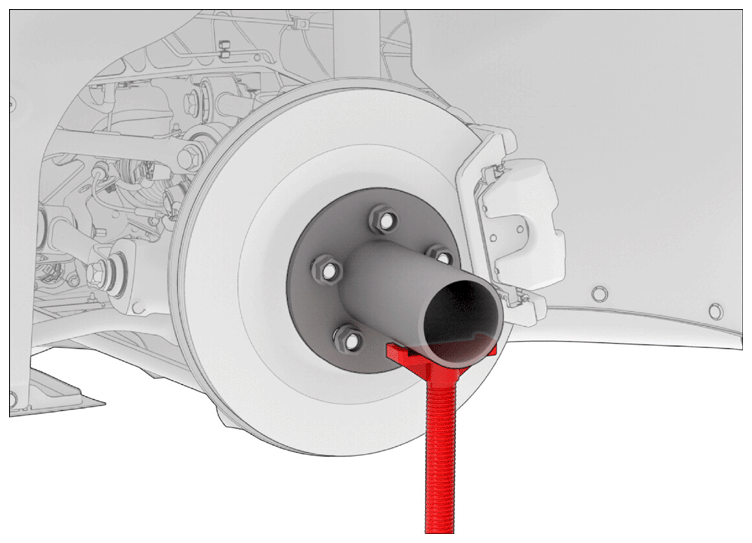
- Use an underhoist stand to support the hub jack adapter.
 Courtesy of TESLA, INC. Courtesy of TESLA, INC.
|
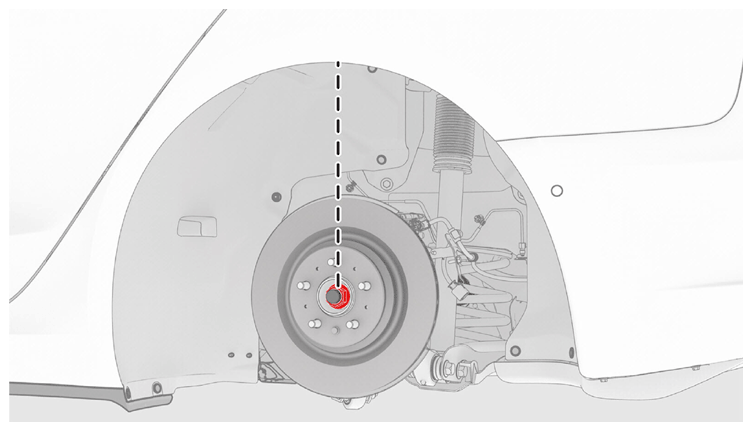
- Measure the distance between the bottom of the fender and the center of the front axle and adjust the underhoist stand so that the front suspension is set to ride height.
 Courtesy of TESLA, INC. Courtesy of TESLA, INC.
|
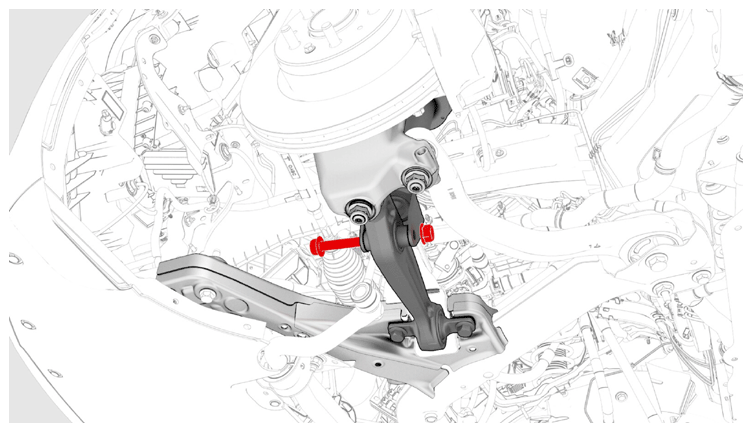
- Tighten the bolt and nut that attach the LH front damper to the lower control arm, and then mark the bolt and nut with a paint pen.
106 N.m (78.2 ft-lbs)
 Courtesy of TESLA, INC. Courtesy of TESLA, INC.
|
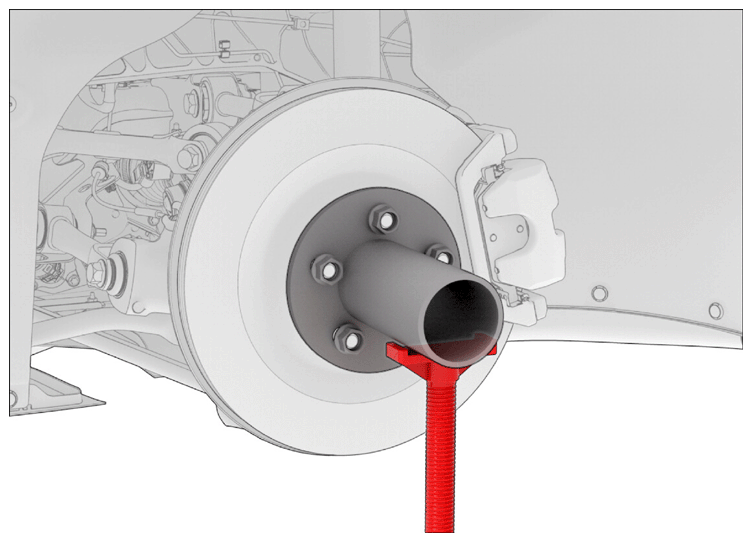
- Remove the underhoist stand from underneath the LH front suspension.
 Courtesy of TESLA, INC. Courtesy of TESLA, INC.
|
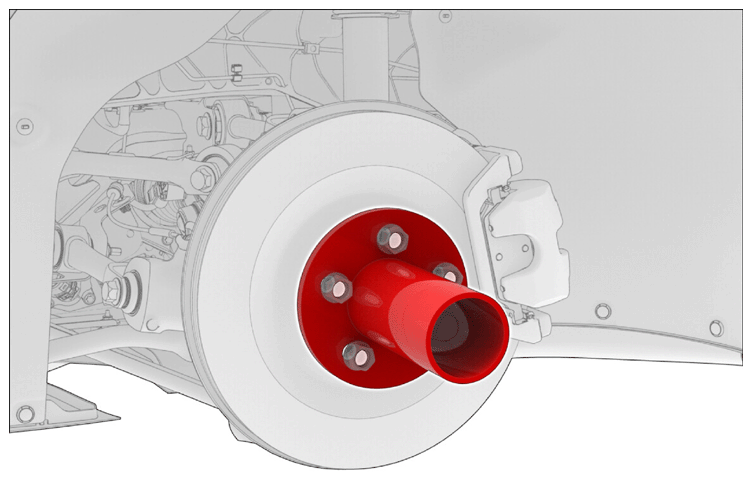
- Remove the lug nuts that attach the hub jack adapter, and then remove the hub jack adapter from the vehicle.
 Courtesy of TESLA, INC. Courtesy of TESLA, INC.
|
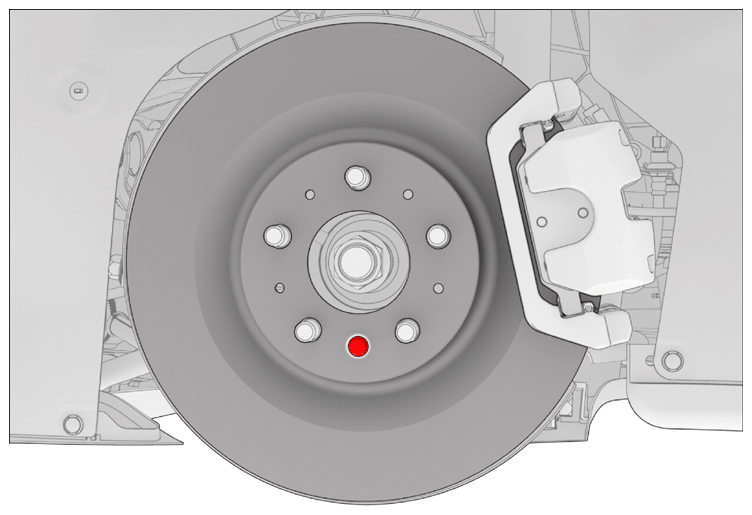
- Install the bolt that attaches the LH front brake rotor to the hub.
5 N.m (3.7 ft-lbs)
 Courtesy of TESLA, INC. Courtesy of TESLA, INC.
|
- Repeat step 43 through 50 for the RH side of the vehicle.
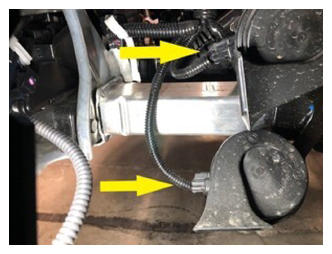
- Connect the electrical harness to the horn connectors (x2).
 Courtesy of TESLA, INC. Courtesy of TESLA, INC.
|
- Install the front fascia. See FASCIA - FRONT (REMOVE AND INSTALL)
.
- Install the front LH and RH fender garnishes. GARNISH - FENDER - FRONT - LH (REMOVE AND REPLACE)
.
- Install the front LH and RH wheels. See Wheel (Remove and Install)
.
- Install the front aero shield panel. See Panel - Aero Shield - Front (Non-Structural Pack) - Remove And Replace
.
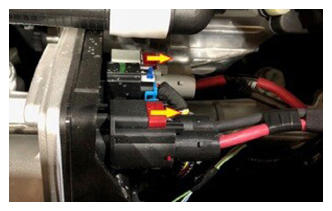
- Connect the electrical harness to the steering gear power connectors (x2), and then slide the red tab to lock the connectors.
 Courtesy of TESLA, INC. Courtesy of TESLA, INC.
|
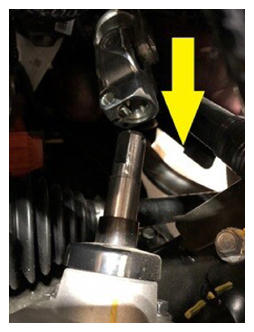
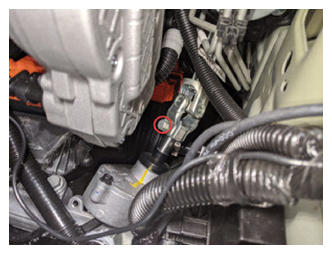
- Slide the intermediate shaft down onto the steering gear, and then install the bolt that attaches the intermediate shaft to the steering gear.
18 N.m (13.3 ft-lbs)
 Courtesy of TESLA, INC. Courtesy of TESLA, INC.
|
 Courtesy of TESLA, INC. Courtesy of TESLA, INC.
|
- Install the underhood storage unit. See Underhood Storage Unit (Remove and Replace)
.
- Perform a cooling system vacuum refill. See Cooling System (Vacuum Refill)
.
- Connect LV power. See 12 V/LV Power (Disconnect and Connect)
.
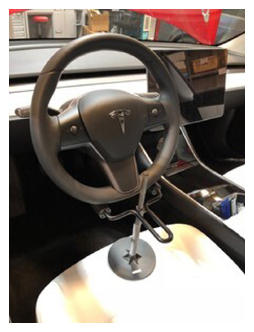
- Remove the steering wheel lock from the steering wheel.
 Courtesy of TESLA, INC. Courtesy of TESLA, INC.
|
- Connect the laptop with Toolbox 3.
- In Toolbox 3, click the Actions/Autodiag
tab, type 'Thermal' into the search field, click Stop Thermal Fluid Fill/Drain
, click Run
, click Submit
, and then allow the routine to complete.
- In Toolbox 3, click the Actions/Autodiag
tab, type 'Purge' into the search field, click Coolant Air Purge
, click Run
, and then allow the routine to complete.
- Inspect the coolant level and top up if necessary. See Cooling System - Partial Refill And Bleed
.
- In Toolbox 3, click the Actions/Autodiag
tab, type 'Thermal' into the search field, click Thermal System Performance Test
, click Run
, and then allow the routine to complete.
- Disconnect the laptop with Toolbox 3 from the vehicle.
- Install the rear underhood apron. See UNDERHOOD APRON - REAR (REMOVE AND REPLACE)
.
- Remove the vehicle from the 2 post lift. See RAISE VEHICLE - 2 POST LIFT
.
- Refer to the Alignment Requirement tables to determine whether an EPAS alignment check (EC) or four wheel alignment check (AC) is necessary. If performed, add the alignment check/adjust as a separate activity. See Alignment Requirement - Suspension
.