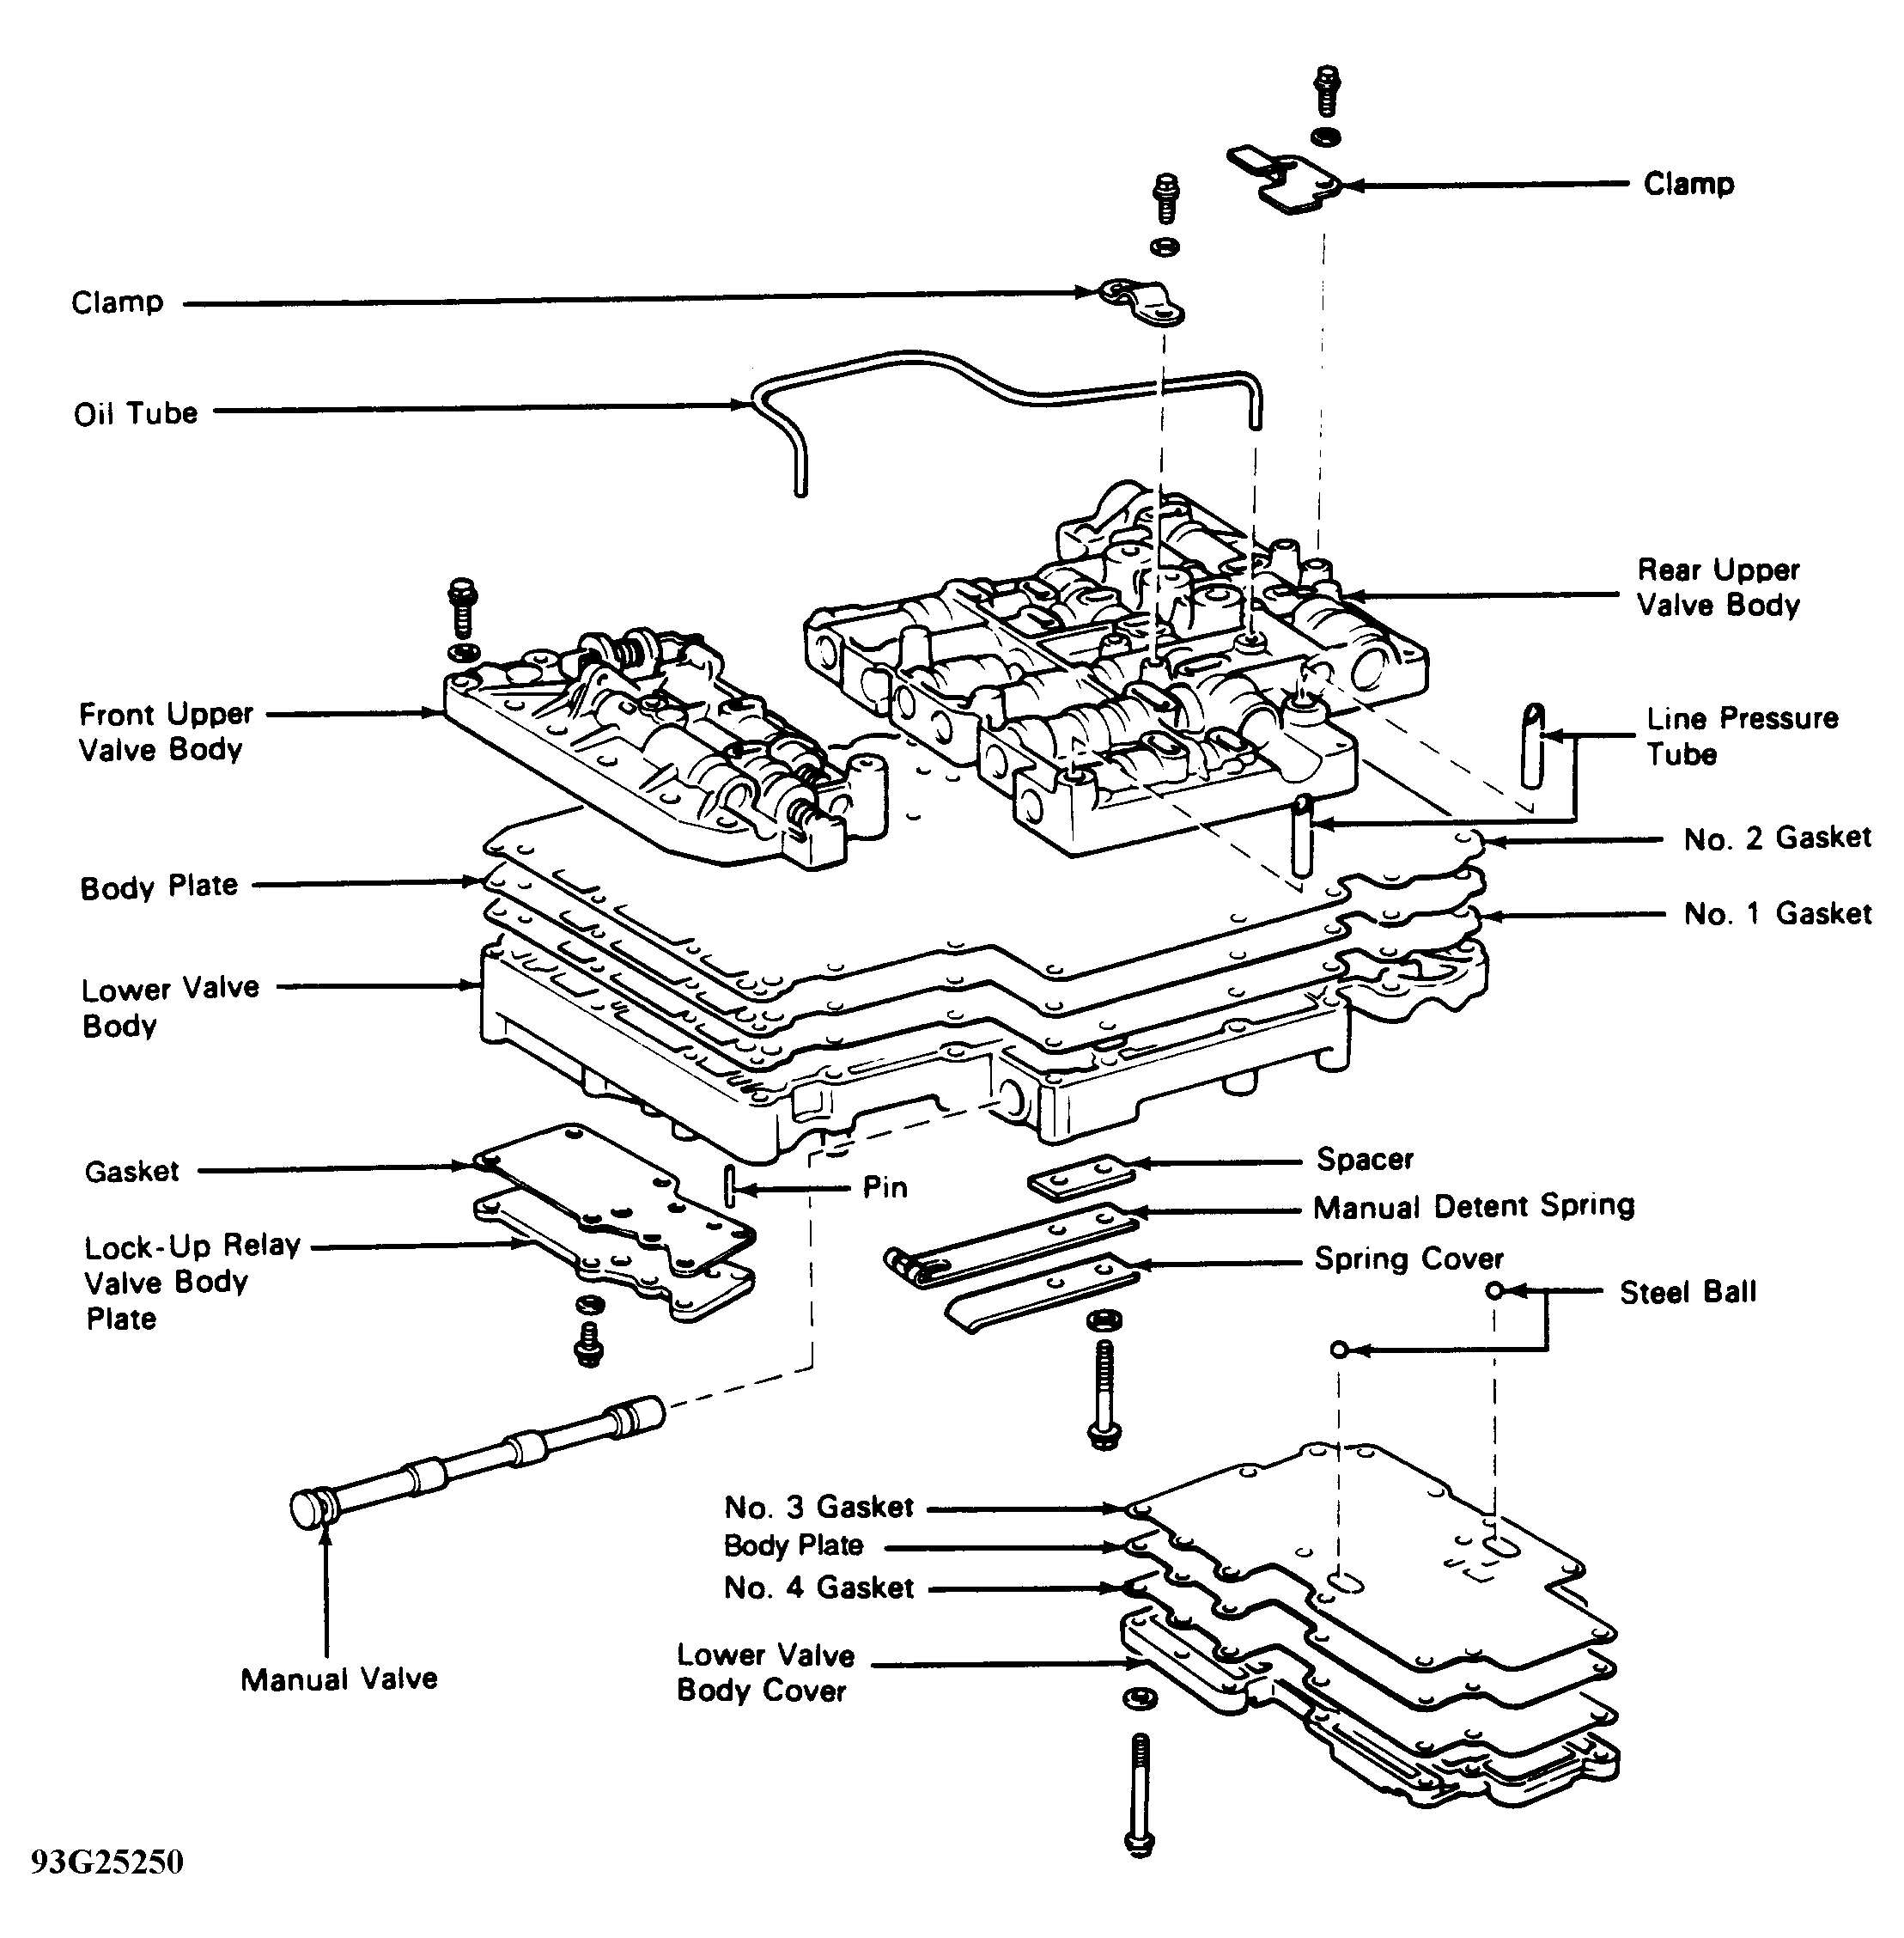
Disassembly (Control Valve Assembly)
- Remove 2 line pressure tubes. Remove 2 bolts, wave washers and tube clamp. Using large screwdriver, remove oil tube. See Fig 1.
- Remove manual valve. Remove 2 bolts, wave washers and clamp. Turn control valve assembly over. Remove bolt, wave washer, spring cover, manual detent spring and spacer.
- Remove wave washers, lock-up relay valve body plate and gasket. Using magnet, remove lock-up relay valve sleeve pin.
- Remove 15 bolts, wave washers, lower valve body cover, 2 gaskets and body plate. Remove 2 check balls from lower valve body.
- Turn control valve assembly over. Remove 7 bolts and wave washers. Turn control valve assembly over. Remove 3 bolts and wave washers. Remove front upper valve body by lifting up lower valve body.
- Remove 6 bolts and wave washers. Hold valve body plate to lower valve plate. Remove rear upper valve body by lifting up lower valve body. Ensure that check balls and springs DO NOT
fall out. Turn control valve assembly over. Remove 2 gaskets and body plate.
 Courtesy of © TOYOTA, LICENSE AGREEMENT TMS1002