Fuel Pump: Reassembly
- INSTALL NO. 1 FUEL SUCTION SUPPORT
- Install the No. 1 fuel suction support to the fuel filter.
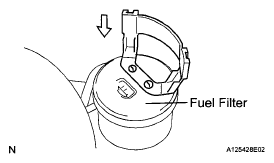 Courtesy of © TOYOTA, LICENSE AGREEMENT TMS1002
- INSTALL FUEL PUMP
- Apply gasoline to a new O-ring. Then install the O-ring and spacer to the fuel pump.
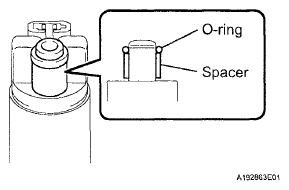 Courtesy of © TOYOTA, LICENSE AGREEMENT TMS1002
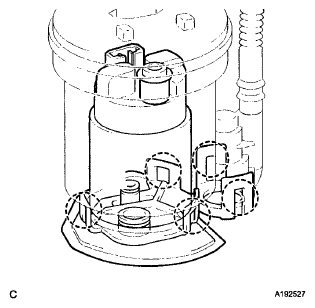
- Engage the 5 claws to install the fuel pump.
NOTE:
- Make sure that the O-ring is not cut or pinched during the installation.
- Engage the claws securely.
 Courtesy of © TOYOTA, LICENSE AGREEMENT TMS1002
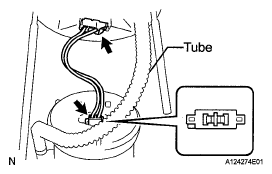
- CONNECT FUEL PUMP HARNESS
- Connect the fuel pump harness connector.
NOTE:
Do not separate the tube indicated in the illustration (See
FUEL SYSTEM ).
 Courtesy of © TOYOTA, LICENSE AGREEMENT TMS1002
- INSTALL FUEL SUCTION PLATE SUB-ASSEMBLY
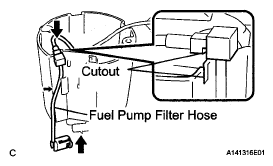
- Install the fuel pump filter tube while aligning it to the installation position of the No. 1 fuel sub-tank.
- Connect the jet pump nozzle.
 Courtesy of © TOYOTA, LICENSE AGREEMENT TMS1002
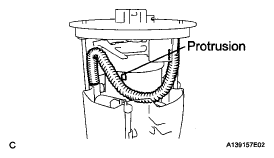
- Make sure that the fuel tube passes under the protrusion of the fuel filter, and engage the claw of the No. 1 fuel suction support.
- Install the spring to the fuel suction plate shaft and install it to the No. 1 fuel sub-tank.
 Courtesy of © TOYOTA, LICENSE AGREEMENT TMS1002
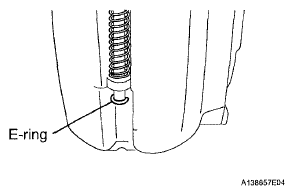
- Install a new E-ring.
- INSTALL FUEL SENDER GAUGE ASSEMBLY
(See
REMOVAL )
 Courtesy of © TOYOTA, LICENSE AGREEMENT TMS1002