Transaxle Reassembly
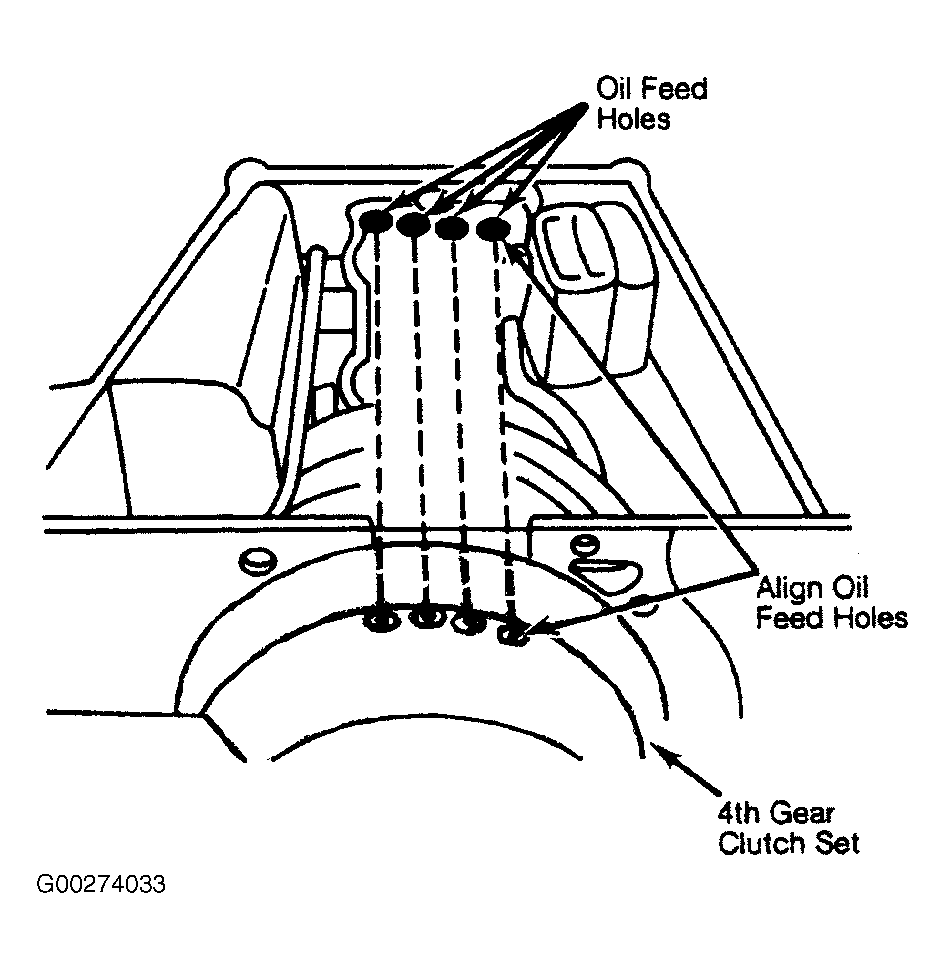
- Install 4th gear clutch set. Guide clutch set into transmission case so that 4 oil feed bores are aligned with bores in case. Bolt down clutch set with tools. Tighten to specifications.
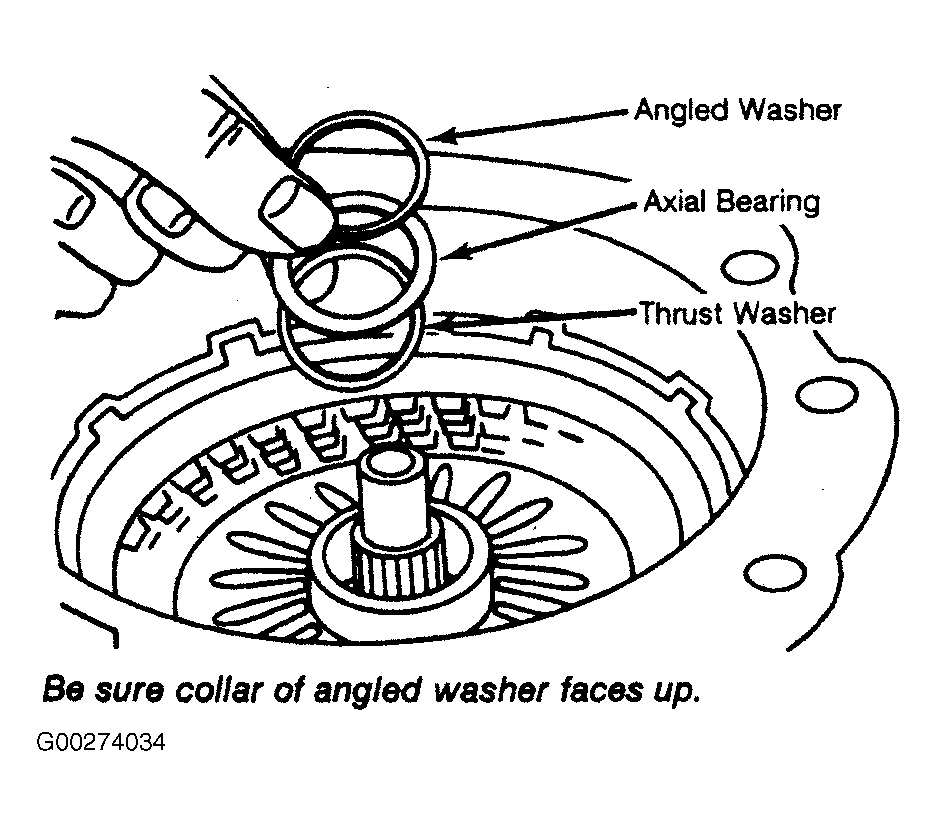
- Set transmission upright. Insert thrust washer, axial bearing and angled washer with collar facing up.
- Place entire gear set into case. Align 4 oil feed bores with bores in case. Springs must be in center of cylinder groove. See Fig 1
.
 Courtesy of BMW OF NORTH AMERICA, INC.
- Insert clutch B snap ring into case. Insert and push clutch B against stop. Install seal, support and snap ring. Insert plate carrier and thrust washer and axial bearing. See Fig 2
.
 Courtesy of BMW OF NORTH AMERICA, INC.
- Using white grease, paste angled washer on cylinder A. Insert clutch A and move it back and forth until splines of plate carrier and plates mesh.
- Install angled washer with collar facing up and install axial bearing. Using white grease, paste on gasket and thrust washer. Install converter bell housing and tighten all bolts to specification.
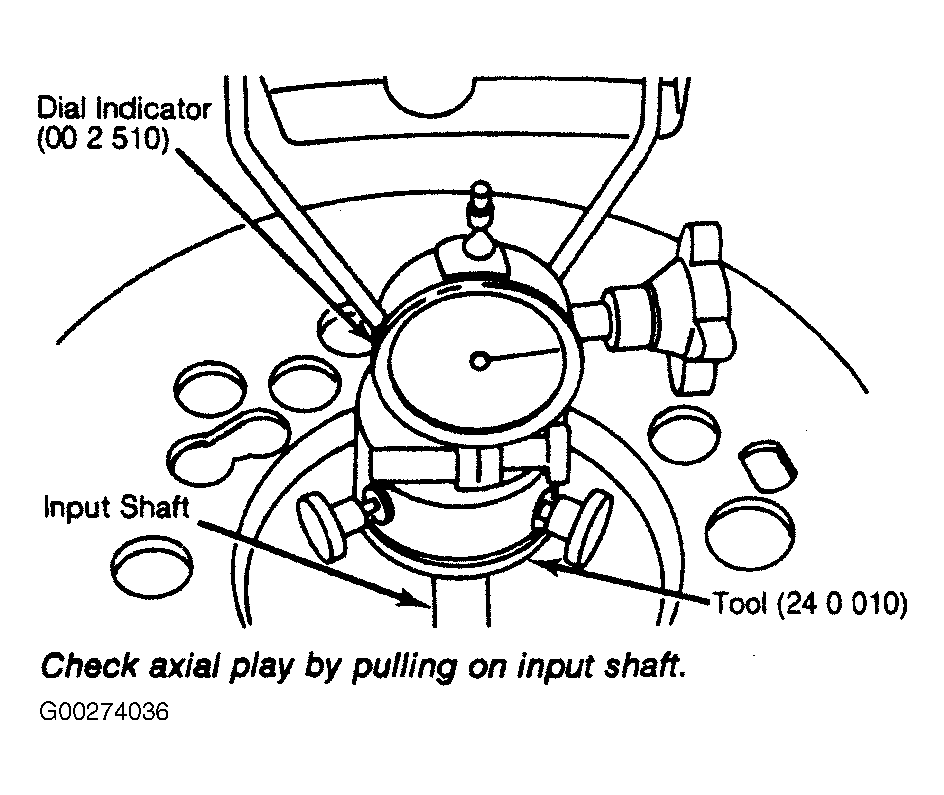
- Check axial play of input shaft. Mount tool to hold input shaft. Attach dial indicator gauge. Check axial play by pulling on input shaft. Clearance should be .008"-.016" (.2-.4 mm). See Fig 3
.
 Courtesy of BMW OF NORTH AMERICA, INC.
- If play deviates, take off converter bell housing again and replace thrust washer with a thicker or thinner one. Recheck axial play. Tighten down converter bell housing to specification. Remove tool.
- Install parking lock pawl. Attach return spring in bore of pawl. Lubricate "O" ring with ATF. Push on parking lock gear and governor.
- Using white grease, place gasket on transmission extension housing. Install housing to transmission and tighten to specification.
- Install output flange. Install collar nut and using tool hold output flange. Using tool, tighten collar nut to specification. Install lock plate and lock in groove.
- Install 8 sealing sleeves into valve body. Being careful not to damage sealing sleeves, press in sealing sleeves against stop. Install 8 springs and 8 circlips. Use longer springs to face cylinder F. See Fig 4
.
 Courtesy of BMW OF NORTH AMERICA, INC.
- Mount valve body so that selector valve can be connected in operating finger of pawl. This requires pulling throttle cable slightly, so that accelerator cam does not clamp on throttle pressure valve.
- Tighten valve body bolts only finger tight. Align valve body with tool. Distance between valve body case and throttle pressure piston must be .453" (11.5 mm).
- Using tools tighten bolts to specification. Install "O" ring between valve body and oil filter screen. Install and bolt down oil filter screen.
- Place magnets in oil pan and install gasket. Install oil sump and tighten bolts with brackets attached. Make sure both brackets with straight short legs are mounted on straight side of oil sump.