Center Support Assembly: Reassembly
- Lubricate moving parts with ATF. Install new oil seals and "O" rings on center support hub, sun gear shaft and brake piston. Lubricate "O" rings. Install No. 2 brake piston into center support. Do not damage "O" rings.
- Install return springs on piston. Place retainer onto return springs. Compress return springs and install snap ring. Repeat procedure for No. 1 brake piston.
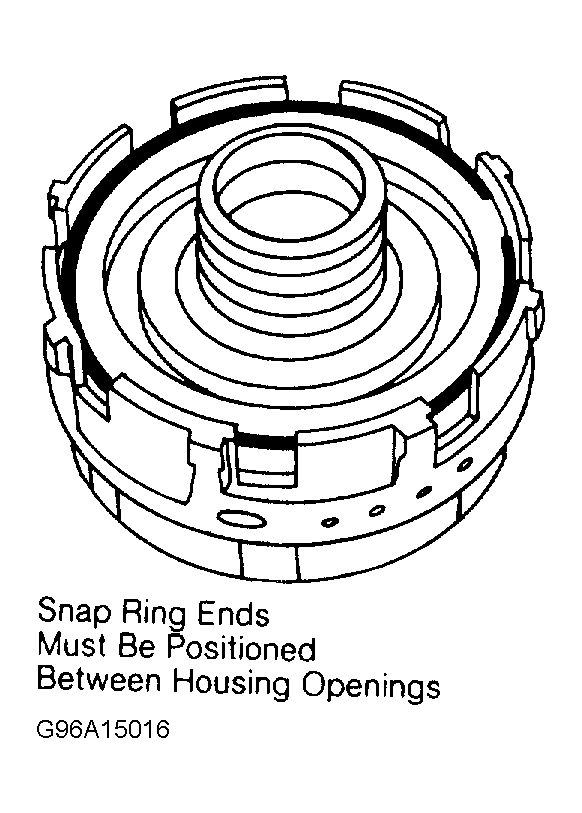
- Install No. 1 brake plate, disc. Install chamfered backing plate with chamfer facing disc. Install No. 1 brake snap ring into center support with ring end gap between openings on center support. See Fig 1. On brake No. 2, install thrust disc. Alternate friction discs and plates to match positions as disassembled. Install chamfered backing plate with chamfer facing disc.
 Courtesy of ISUZU MOTOR CO.
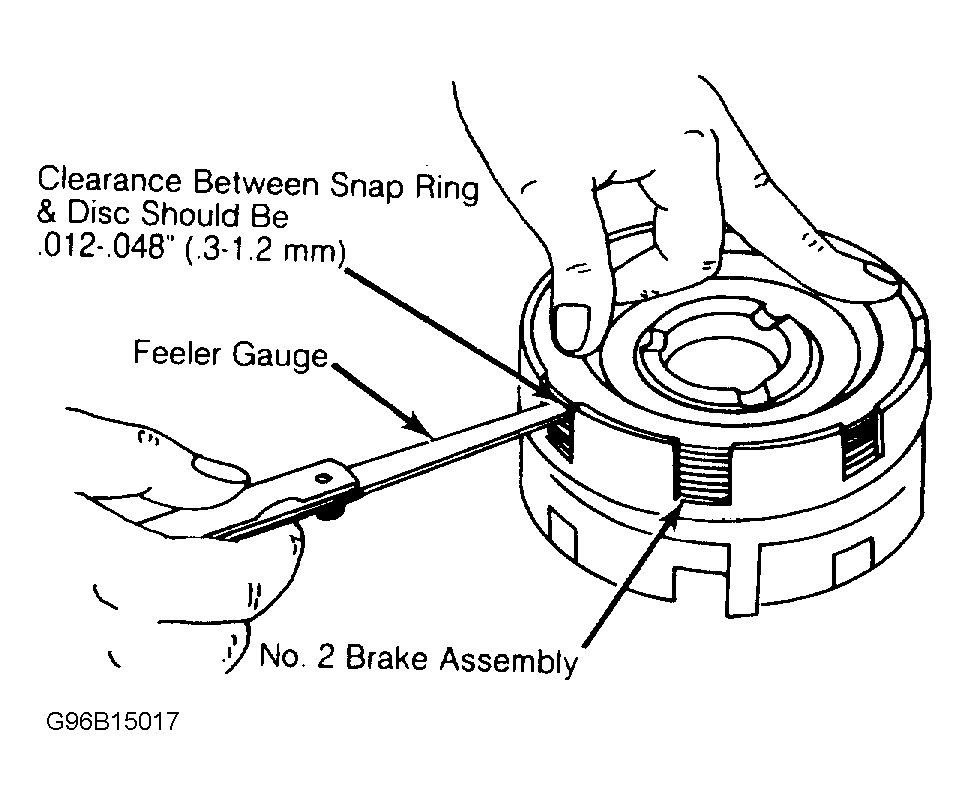
- Install No. 2 brake snap ring. On AW 55 models use .047" (1.2 mm) snap ring which has Blue marking to identify it. End clearance between snap rings and discs on both brakes should be between .012-.048" (.30-1.20 mm). See Fig 2.
 Courtesy of VOLVO CARS OF NORTH AMERICA.
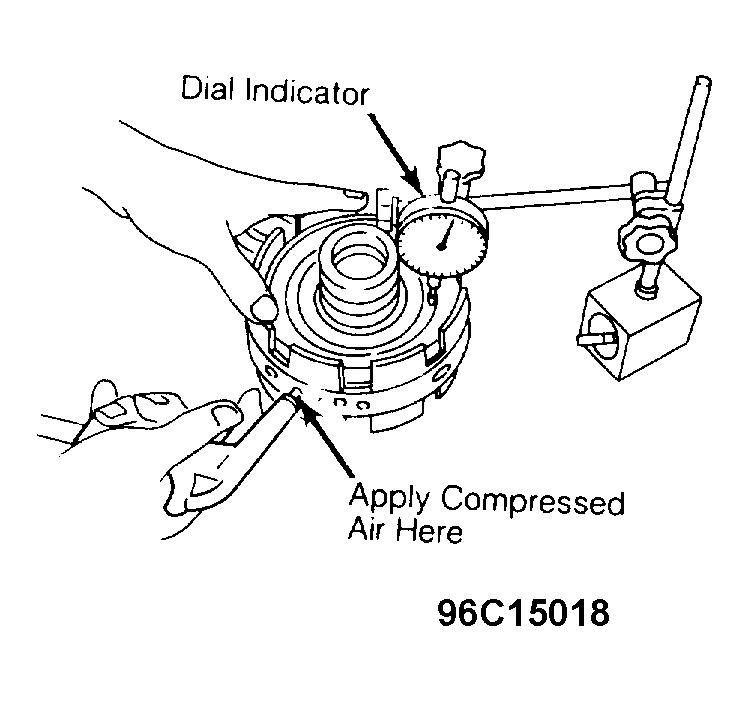
- By applying compressed air to oil holes, check operation of No. 1 and No. 2 brake pistons. Distinct clicking should be heard as piston is activated. See Fig 3.
 Courtesy of ISUZU MOTOR CO.
- Install brake hub assembly on sun gear with cupped side facing splines of sun gear. Install one-way clutch on sun gear shaft. Check that one-way clutch is not loose or stiff when installed on shaft.
- By holding No. 2 brake hub and rotating sun gear, check one-way clutch. Sun gear should rotate counterclockwise but lock up if turned clockwise.
- Install one-way clutch and sun gear shaft into center support. Align grooves of brake hub with lugs on discs. Install snap ring on sun gear shaft in groove on splined portion of shaft.