Blower Unit Removal/Installation
- Remove the passenger's dashboard undercover (see
PASSENGER'S DASHBOARD UNDERCOVER REMOVAL/INSTALLATION
) and the glove box (see
GLOVE BOX REMOVAL/INSTALLATION
).
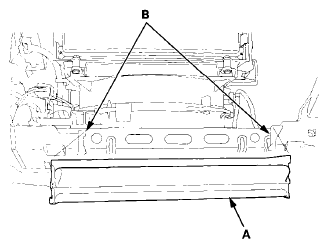
- Cut the plastic cross brace (A) in the glove box opening with diagonal cutters in the area (B), and discard it.
 Courtesy of AMERICAN HONDA MOTOR CO., INC.
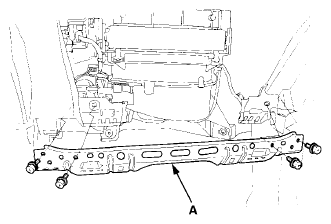
- Remove the bolts and the glove box frame (A).
 Courtesy of AMERICAN HONDA MOTOR CO., INC.
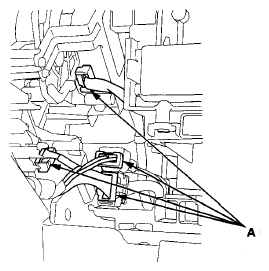
- Disconnect the connectors (A) from the A/C wire harness and the mode control motor and air mix control motor.
 Courtesy of AMERICAN HONDA MOTOR CO., INC.
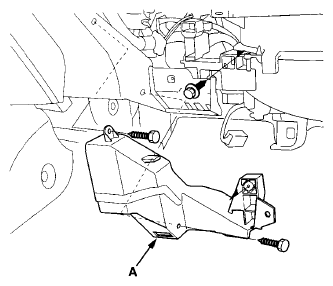
- Remove the self-tapping screws and the passenger's heater duct (A).
 Courtesy of AMERICAN HONDA MOTOR CO., INC.
- Remove the self-tapping screws, the mounting nuts, and the blower unit (A).
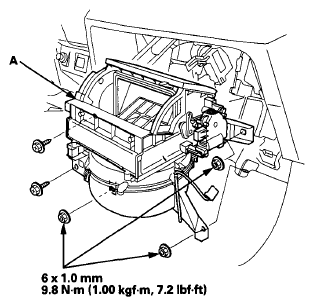 Courtesy of AMERICAN HONDA MOTOR CO., INC.
- Install the unit in the reverse order of removal. Make sure that there is no air leakage.